Share your photos by tagging us and using the hashtag #BigGreenEgg.
Want to see how the EGG is made? Click to Watch
Tri Tip Tutorial

I started off just posting another tri tip cook but then I kept adding more info and ultimately I've come up with something that is kind of a cooking and slicing tutorial.
Now there are many ways to cook tri-tip (sear then roast, roast only, sous-vide then sear, roast then sear) all of which can produce a tasty end result. My preferred method is the reverse sear (indirect roast then sear) and this cook reflects that method.
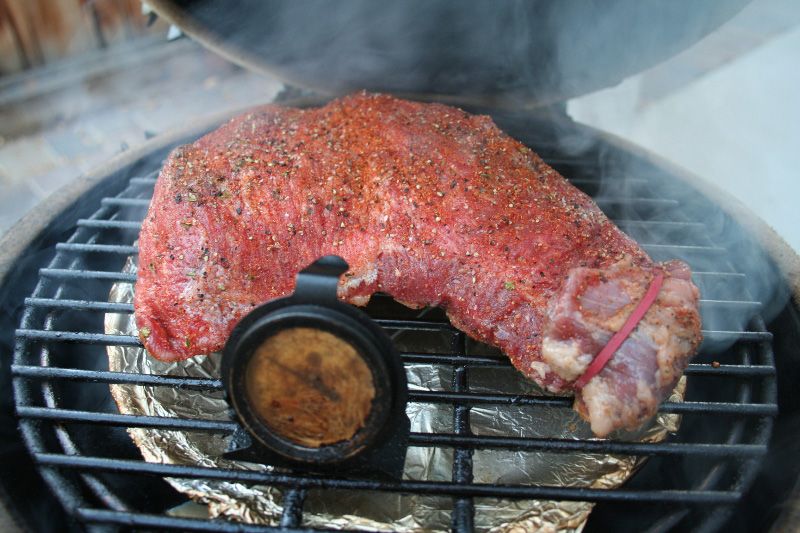
Some areas/stores offer both trimmed and untrimmed tri tip. Some favor the additional fat & flavor of an untrimmed tri tip but then you can't really see the meat under the layer of fat (but it should cost less/lb). I prefer a trimmed tri tip so I can get a look at the marbling and I like to look for a tri tip that has a nice marbling. This trimmed natural choice tri tip met the criteria:

You can see in the pic above the change in the grain of the tri tip with the longer "tail" on the right going off more to the right. I will adjust my slicing to account for this after the cook but it is really easy to see the different directions the grain runs before the cook.
I got it all seasoned up and onto the Small indirect with red oak smoke wood at dome temps in the 275-300 range. The roast temp is really up to you and I've done this step at temps from 250-425 but the thing to keep in mind is the higher the temp the greater the carryover in IT as the meat rests and you heat up your Egg. Now I like my tri-tip med-rare but have no problem eating it at medium. I'm fine with a target temp of about 127-130 with a rise of a few degrees during resting so I roasted it to an IT of about 115. You can adjust your IT up/down depending on how you like your meat cooked. The silicone band on the end is to hold the thinnest part of the tip up so it doesn't hang past the drip pan and get really overcooked.
I removed the plate setter and opened up the top & bottom vents and quickly got the Egg up to searing temps. The cast iron grid was under the plate setter during the indirect portion so it was already really hot. It was probably only 5 minutes between the roast and sear portion of this cook. I did a quick sear (about 1 minute on each side - don't over do this or you will fly past your target temp):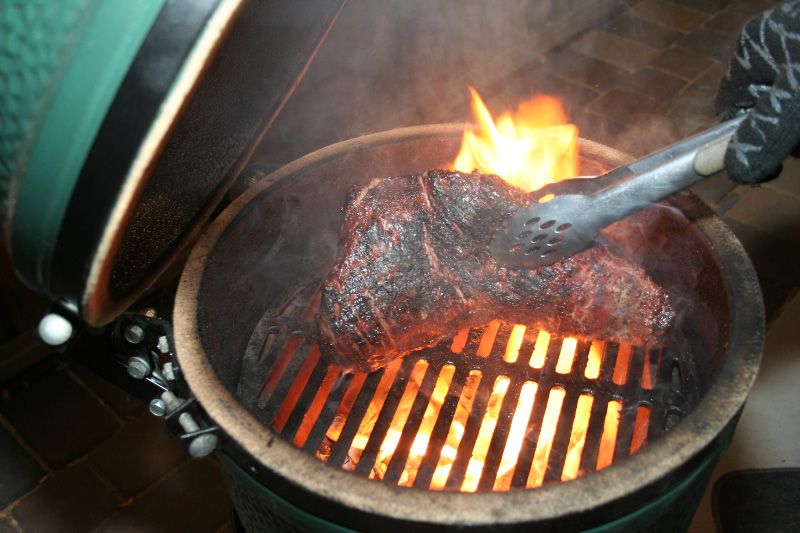

Pulled this one at about 125 and let it rest for about 20 minutes before slicing:
Tri tip must be sliced across the grain to get tender slices. I like to get some longer slices at the tip and then account for the different directions in grain by slicing the remainder in two separate portions. Ultimately I end up with slices in varying sizes and a little variation in degrees of doneness (med in thin end on the left to med-rare on the right as shown below):


Hope some find this info useful. Thanks for looking!
Bay Area, CA
Comments
-
That is a great job R2.I love Tri-Tip and try to do it very similar to your technique.
-
-
Looks good, I'll have to try the sear sometime, I usually just hold the temp at about 300 and cook until internals about 129, great tutorial.
-
Thanks for the compliments!XL, Large, Small, Mini Eggs, M&M BBQ Texas Smoke King, Shirley Fabrication 24x36 Patio, Humphrey's Weekender, Karubecue C-60, MAK 1-Star General, Hasty Bake Gourmet, Santa Maria Grill, Webers: 14" WSM, 22.5" OTG, 22.5" Kettle Premium, WGA Charcoal
Bay Area, CA -
Very well stated. May do one this weekend.Born and raised in NOLA. Now live in East TN.
-
Did a "roast style" tri tip today and it came out great but I think next time I'll do "stead style" and sear it on the coals. Thanks for the thread.My actuary says I'm dead.
-
oh i love me some tri-tip. Never done reverse sear method but i'll try it next time.Great job...thanks for posting!Just a hack that makes some $hitty BBQ....


Categories
- All Categories
- 184.1K EggHead Forum
- 15.8K Forum List
- 460 EGGtoberfest
- 1.9K Forum Feedback
- 10.4K Off Topic
- 2.2K EGG Table Forum
- 1 Rules & Disclaimer
- 9K Cookbook
- 13 Valentines Day
- 93 Holiday Recipes
- 224 Appetizers
- 520 Baking
- 2.5K Beef
- 88 Desserts
- 167 Lamb
- 2.4K Pork
- 1.5K Poultry
- 33 Salads and Dressings
- 324 Sauces, Rubs, Marinades
- 548 Seafood
- 175 Sides
- 122 Soups, Stews, Chilis
- 44 Vegetarian
- 102 Vegetables
- 313 Health
- 292 Weight Loss Forum