Welcome to the EGGhead Forum - a great place to visit and packed with tips and EGGspert advice! You can also join the conversation and get more information and amazing kamado recipes by following Big Green Egg to Experience our World of Flavor™ at:
Want to see how the EGG is made? Click to Watch
Facebook | Twitter | Instagram | Pinterest | Youtube | Vimeo
Share your photos by tagging us and using the hashtag #BigGreenEgg.
Share your photos by tagging us and using the hashtag #BigGreenEgg.
Want to see how the EGG is made? Click to Watch
New outdoor kitchen (lots of pics)

troutman
Posts: 498
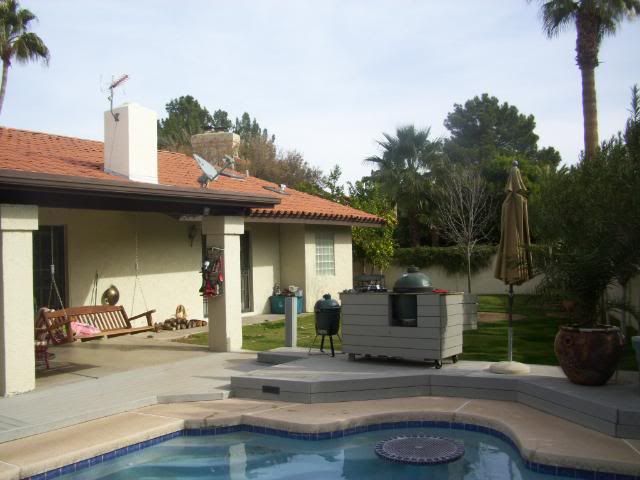
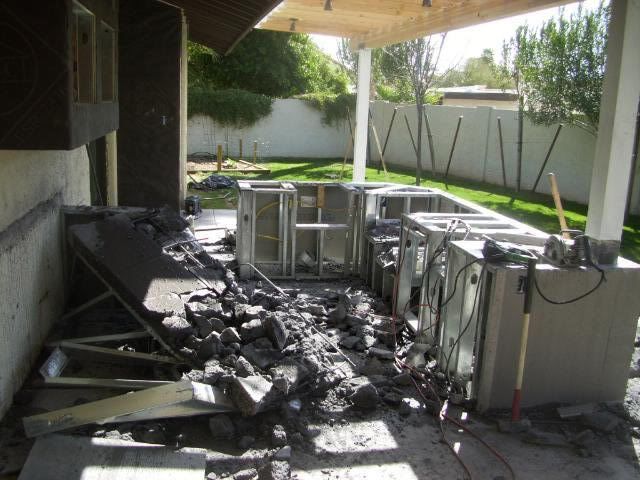
I started with this in February:
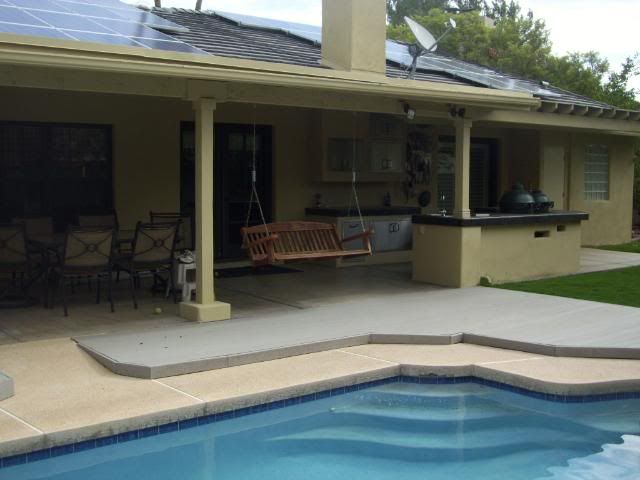
Now I have this in August (finally):
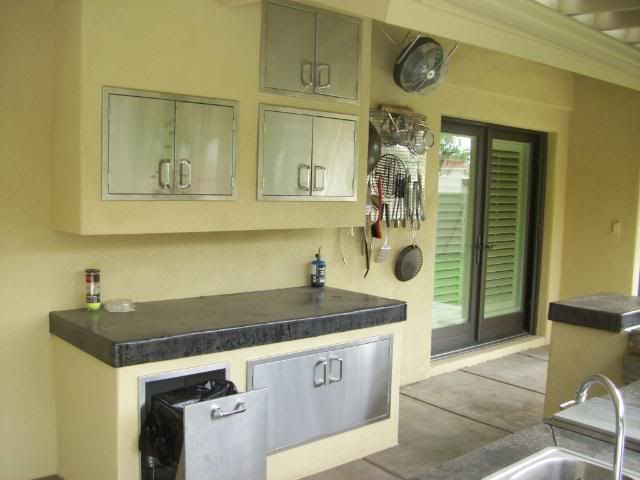
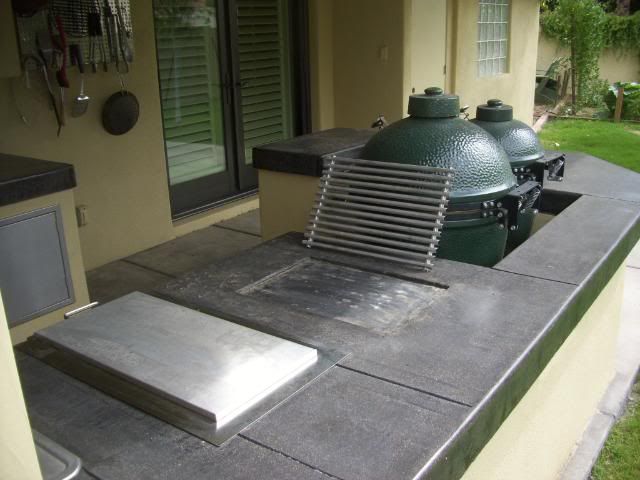
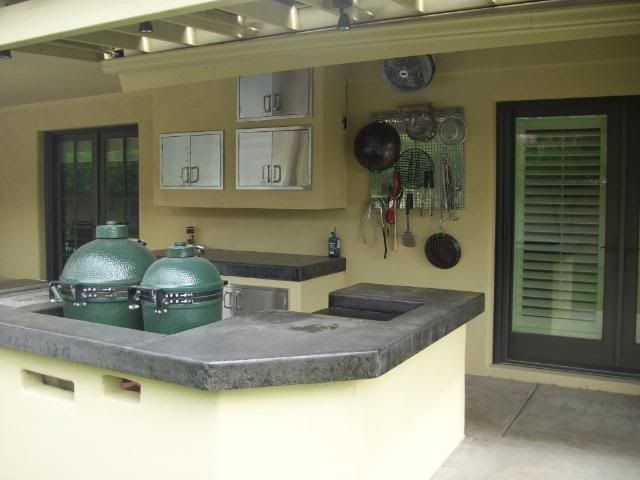
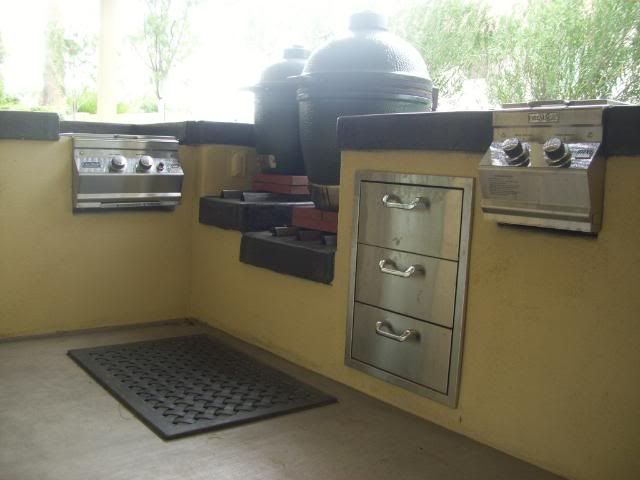
Four-inch poured concrete countertops (black, but they are a bit dirty since it stormed last night). Power burner for wok to the left of the Eggs, double burner on right, cold water sink:

Trash bin and lots of storage:
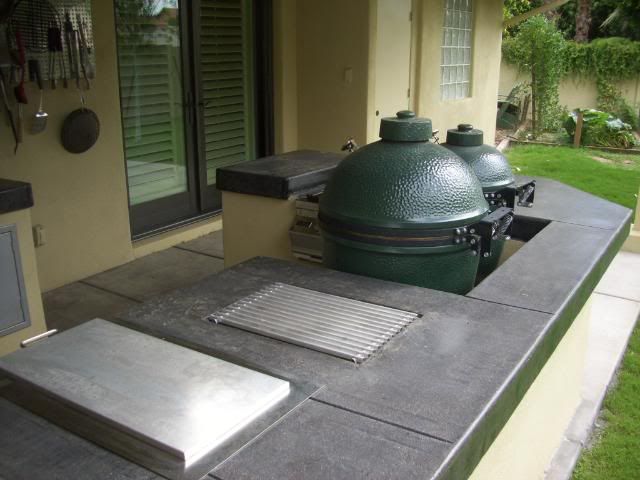
Made a depression in the counter for a removable trivet:
Some more views:
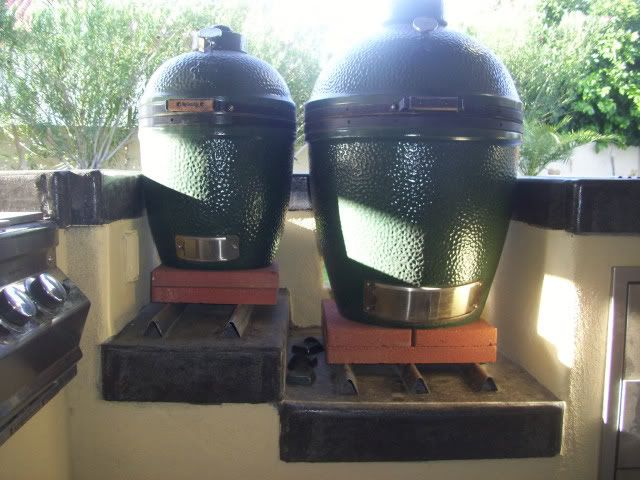
Close up of the Egg support. I didn't measure very well because the design was intended to have the Eggs sitting on the stainless steel angle iron that was embedded into the concrete. The grates were too low so I raised them 4 inches by adding the pavers. Nice air gap under the pavers, but it would have been nicer if the air gap was under the Eggs.
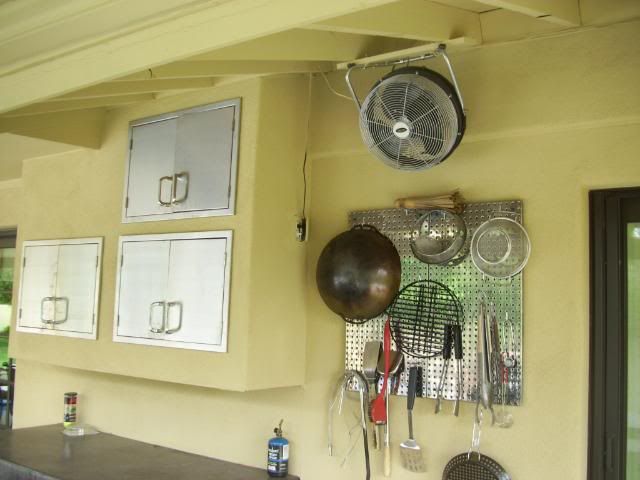
The stainless steel pegboard is proving to be a wonderful addition. The fan blows smoke away from the house:
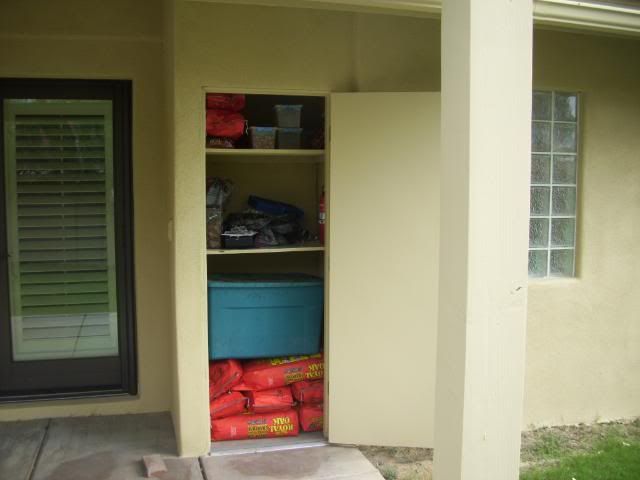
Added an outdoor pantry for charcoal, wood chips, and other stuff:
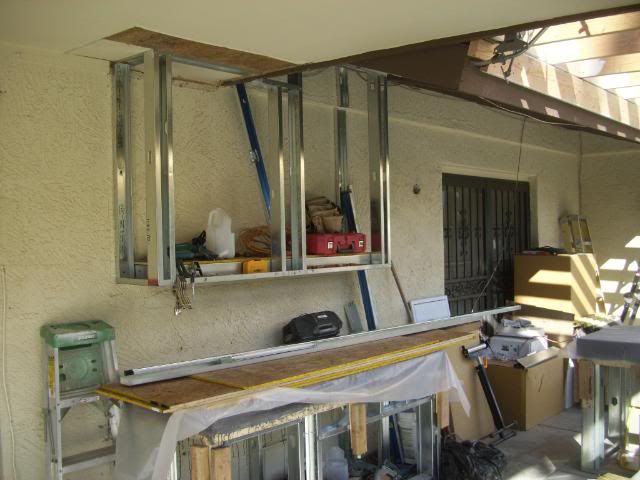
If you are still interested, here is some of the details about the process. Steel frame, ready for the forms for the countertop:

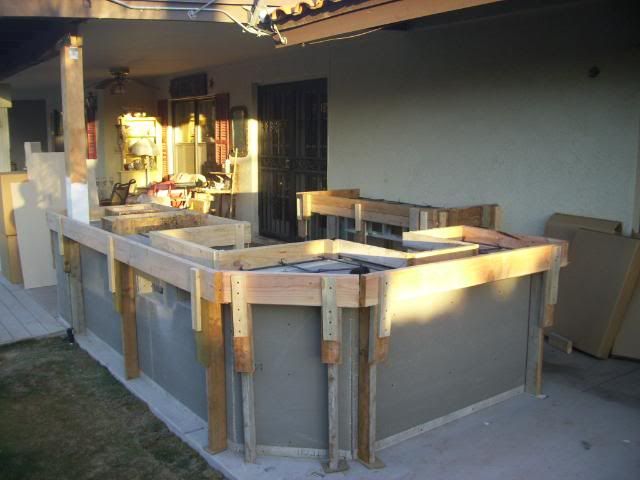
Forms are almost ready for the poured concrete, just need a bit more re-bar and rounded corners on the interior. If you are going to pour a concrete top like this, don't forget to round all the corners.
If you mess up the first countertop you pour, this is what you have to do. Very disheartening, and causes a lot more work and long delays. Ugh.
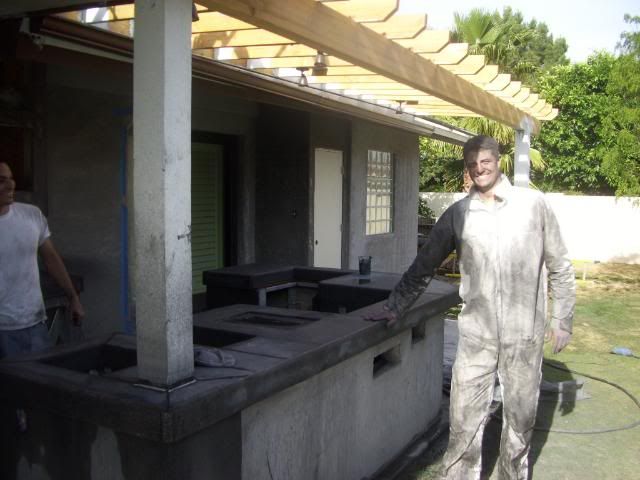
I found someone that knows what they are doing to pour the countertop for me. There is a lot of manual work to cure the concrete properly, polish it, and seal it. Here is what happens when you polish the concrete top:
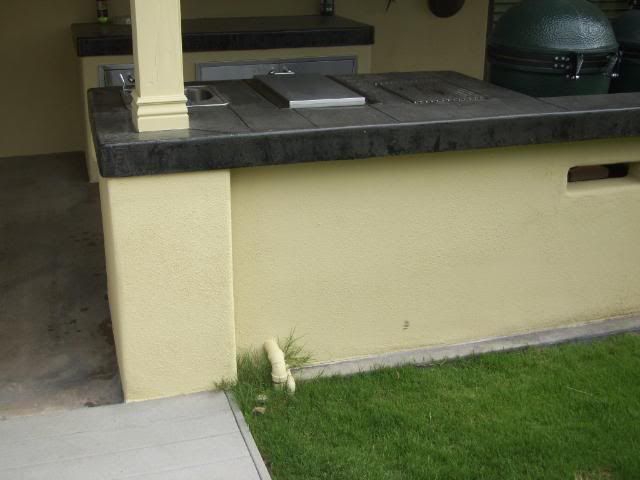
If you want a sink in your outdoor kitchen, don't forget to run your drain pipe and water supply lines before you pour the initial slab. I did, so it ends up looking like this:
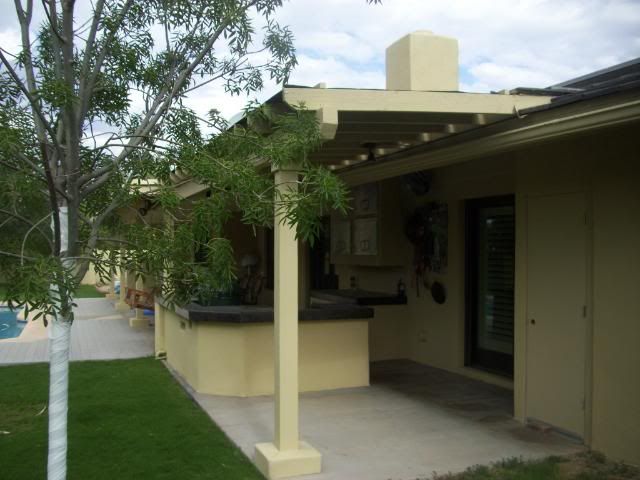
Finally, I added some thick sunscreen over the top of the arbor to keeps the suns rays off the countertop. Concrete retains heat exceptionally well, and this is Arizona, so I didn't need a big black heater all around me while cooking.
But, after all this labor and angst, you end up with something like this:
Thanks for looking.
Now I have this in August (finally):
Four-inch poured concrete countertops (black, but they are a bit dirty since it stormed last night). Power burner for wok to the left of the Eggs, double burner on right, cold water sink:
Trash bin and lots of storage:
Made a depression in the counter for a removable trivet:
Some more views:
Close up of the Egg support. I didn't measure very well because the design was intended to have the Eggs sitting on the stainless steel angle iron that was embedded into the concrete. The grates were too low so I raised them 4 inches by adding the pavers. Nice air gap under the pavers, but it would have been nicer if the air gap was under the Eggs.
The stainless steel pegboard is proving to be a wonderful addition. The fan blows smoke away from the house:
Added an outdoor pantry for charcoal, wood chips, and other stuff:
If you are still interested, here is some of the details about the process. Steel frame, ready for the forms for the countertop:
Forms are almost ready for the poured concrete, just need a bit more re-bar and rounded corners on the interior. If you are going to pour a concrete top like this, don't forget to round all the corners.
If you mess up the first countertop you pour, this is what you have to do. Very disheartening, and causes a lot more work and long delays. Ugh.
I found someone that knows what they are doing to pour the countertop for me. There is a lot of manual work to cure the concrete properly, polish it, and seal it. Here is what happens when you polish the concrete top:
If you want a sink in your outdoor kitchen, don't forget to run your drain pipe and water supply lines before you pour the initial slab. I did, so it ends up looking like this:
Finally, I added some thick sunscreen over the top of the arbor to keeps the suns rays off the countertop. Concrete retains heat exceptionally well, and this is Arizona, so I didn't need a big black heater all around me while cooking.
But, after all this labor and angst, you end up with something like this:
Thanks for looking.
Comments
-
SWEET!!! :woohoo:
Great looking kitchen. Thanks for the pics!
ENJOY ! -
wheres the beer opener :laugh: :laugh: :laugh: looks nicefukahwee maineyou can lead a fish to water but you can not make him drink it
-
Wow! (my lower jaw's resting on my desk) Beautiful job. Northeast winters make something like that all but moot here, but it's nice to dream.....
-
Scott,
Beauty! Where are you going to put your next eggs?")
SteveSteve
Caledon, ON
-
Thanks Clark. BTW, I'm an original Mississippi boy myself. I'm a bit west of there now.
-
She is inside.
(Please don't tell her I said that!) -
Quite a bit West!
Don't stay away too much..... -
Thanks WW. It is hard to enjoy it right now (110+ degrees, with lows in the 90's) but soon it will be great. If I don't melt, that is.
-
Thanks Steven. Funny you should ask, as I think a mini sitting on the counter to the left of the Small would round it out nicely.
Might take a while to convince the boss, but she'll eventually come around to my way of thinking. -
Amazing!Dave
Cambridge, Ontario - CanadaLarge (2010), Mini Max (2015), Large garden pot (2018) -
Awesome job! May I ask what kind of setup you have UNDER the eggs? Can't quite make it out from the photos.
Thanks in advance. -
wow - all I can say is... WOW.
That is the "holy grail" of Egg tables!! Heck, that doesn't even do it justice to call it a table, that's an Egg "mansion"
:PDon't get set into one form, adapt it and build your own, and let it grow, be like water. Empty your mind, be formless, shapeless — like water. Now you put water in a cup, it becomes the cup... Now water can flow or it can crash. Be water, my friend. - Bruce Lee -
Nice pics. You gave me new ideas
-
What a great job... I'd cook just to stay out there!!!Kent Madison MS
-
Thanks EggNorth. With our weather I get to enjoy this 9 months a year, and endure it the other 3.
-
Thanks ChefAl. I added a closer photo of the Egg supports in the original post so check it out.
-
Thanks HighTech. Love your handle.
-
Thanks Rainman. That is why I posted this, as I've been looking at other outdoor kitchens and borrowing ideas for years. Hope this helps.
-
Thanks Kent. My dogs sure love it, as I stay out there a lot and play with them while I cook (or sit).
-
Looks AMAZING!!!! Great job and looks like you'll have YEARS of enjoyment outta this.....I guess ya'll don't have a bunch of bugs in Arizona??? Screened in would be the next step if so.....
") Hunting-Fishing-Cookin' on my EGG! Nothing else compares!
Hunting-Fishing-Cookin' on my EGG! Nothing else compares! -
Great job, that is what I need someday, looking wonderful. Very nice.
Patti
Wichita, KS -
That is just beautiful! Great Job :woohoo:
Capt Frank
Homosassa, FL -
Great job!! I am jealous!!
-
That is super nice.
-
Thanks Jai. Few bugs here, so I guess the 115 degree days must be a bit hard on them. You can turn on the lights at night and never see a flying critter. It is great.
Rattlesnakes, scorpions, coyotes and lots of hawks though. Have to keep an eye on the little dogs. -
Thanks Patti. I've been planning it for many years.
-
Thanks Cap.
-
Thanks tmb. Jealous??? I'm a Miss. State and Ga. Tech graduate, and we never had four years of a Tebow. Superman wears Tebow pajamas under his costume.
You haven't suffered like me! -
Thanks Chris (and Jenn).
-
duuuude!! that is awesome!! great job you have a beautiful kitchen. now put it to work!


Categories
- All Categories
- 184.1K EggHead Forum
- 15.8K Forum List
- 460 EGGtoberfest
- 1.9K Forum Feedback
- 10.4K Off Topic
- 2.2K EGG Table Forum
- 1 Rules & Disclaimer
- 9K Cookbook
- 13 Valentines Day
- 93 Holiday Recipes
- 224 Appetizers
- 520 Baking
- 2.5K Beef
- 88 Desserts
- 167 Lamb
- 2.4K Pork
- 1.5K Poultry
- 33 Salads and Dressings
- 324 Sauces, Rubs, Marinades
- 548 Seafood
- 175 Sides
- 122 Soups, Stews, Chilis
- 44 Vegetarian
- 102 Vegetables
- 313 Health
- 292 Weight Loss Forum