Welcome to the EGGhead Forum - a great place to visit and packed with tips and EGGspert advice! You can also join the conversation and get more information and amazing kamado recipes by following Big Green Egg to Experience our World of Flavor™ at:
Want to see how the EGG is made? Click to Watch
Facebook | Twitter | Instagram | Pinterest | Youtube | Vimeo
Share your photos by tagging us and using the hashtag #BigGreenEgg.
Share your photos by tagging us and using the hashtag #BigGreenEgg.
Want to see how the EGG is made? Click to Watch
My almost finished table

jtriplett38
Posts: 29
I just put my egg into the new table. Still need to add some hooks, bottle opener, etc. I used pressure treated lumber from Lowe's and sanded the hell out of it. The Kreg pocket hole jig came in handy for assembly so there are no exposed fasteners.
It's much nicer having the egg higher up. I had it sitting on the concrete patio for almost a year before I built this table.
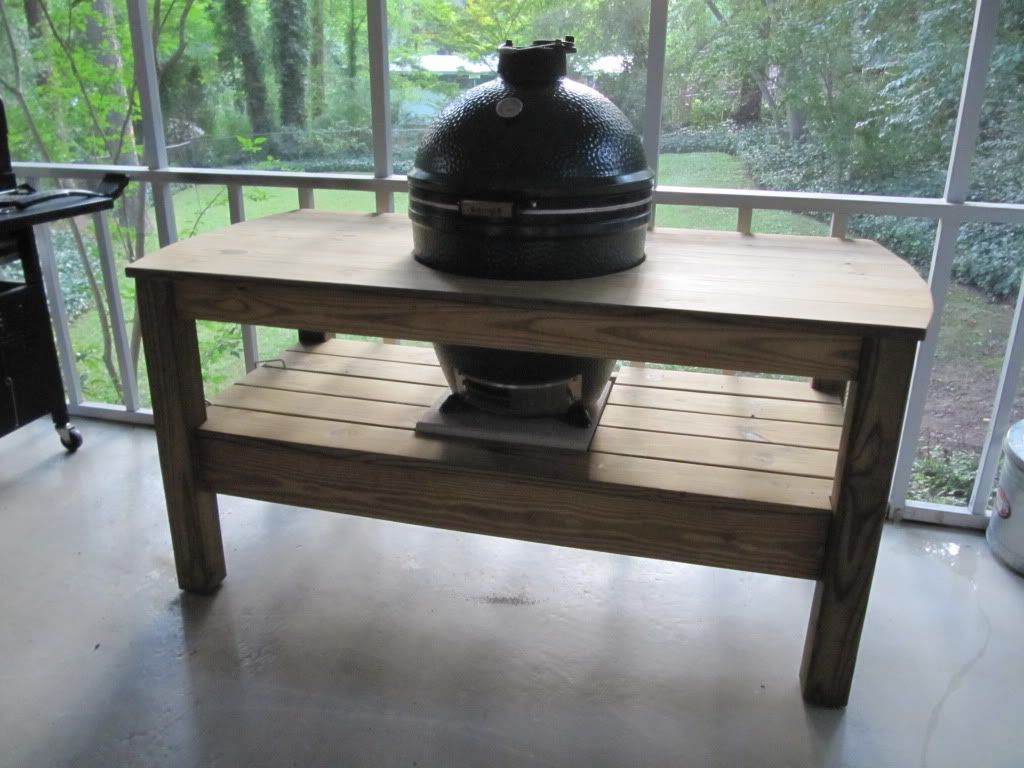
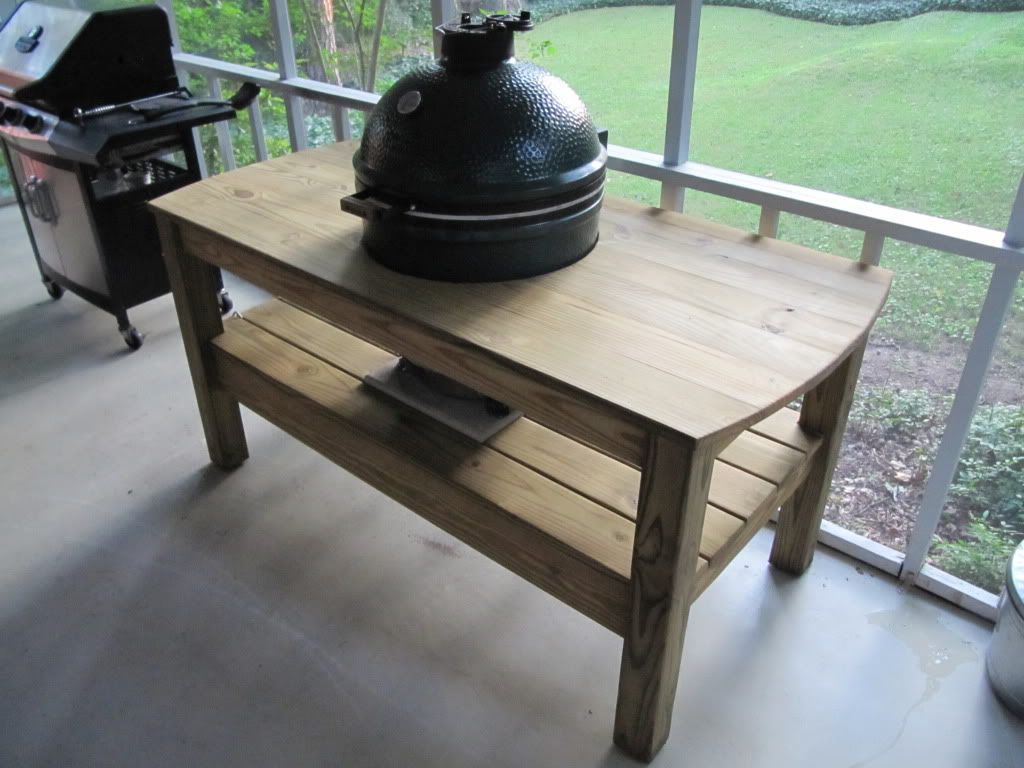
It's much nicer having the egg higher up. I had it sitting on the concrete patio for almost a year before I built this table.
Comments
-
Very Nice... I love the grain in the wood you used.
Jon -
Nice table! It really looks great. But what is that strange metal grill brush holder next to it??
-
How did you make the perfectly rounded edges?
-
I assume you're talking about the edges on the top of the table.
You can use a piece of string (about 4' long, the radius of the curve) with a screw tied to one end and a pencil or sharpie tied to the other. Find the center of the table (front to back) and press the screw tip into the wood 4' away from the end you want to mark. Now just sweep the arc on the end of the table with the sharpie (maybe practice with a pencil first to make sure it's what you want).
I used a jig saw (and a steady hand) to cut along the mark then a used a random orbit sander to smooth things out. I think it makes the table look a lot better than a squared off edge (and there's a little more workspace this way)
I used the same technique to mark and cut the hole for the egg. Obviously it's a much shorter string (10.5" I believe).
Let me know if this doesn't make sense. -
Wow, your table has a really clean look without all of the visible fasteners on the top. Me likely! I will have to look into that Kreg pocket jig."Bacon tastes gooood, pork chops taste gooood." - Vincent Vega, Pulp Fiction
Small and Large BGE in Oklahoma City. -
I have NEVER seen PT wood look so good!
what did you finish it with?
it really looks great!
what's that Kreg pocket hole jig you speak of? -
I tried to find the best boards at Lowe's then I let them dry out in the basement for a month or so before I tried working with it. That pressure treated practically drips when you get it at the store.
I sanded all of the lumber before I put everything together and then sanded the top surface again once it was assembled so it was really smooth board to board.
The other trick I did was to rip the edges off the boards I used for the top so they fit together tightly (the 5/4x6" decking lumber has rounded edges).
Once it was together, I finished it with Thompson's water seal honey gold tinted sealant.
Here's the link to the Kreg jig kit that I bought. It's pretty slick and was well worth the extra effort. I think Lowe's carries this as well. I know they have the screws in stock in most of the GA stores.
http://www.kregtool.com/products/pht/product.php?PRODUCT_ID=32


![[Deleted User]](https://secure.gravatar.com/avatar/72d0f3cf94935edd82517c944261e7bc/?default=https%3A%2F%2Fvanillicon.com%2Fec59a68092abc911e04ea514ec094e05_200.png&rating=g&size=200)
Categories
- All Categories
- 184.1K EggHead Forum
- 15.8K Forum List
- 460 EGGtoberfest
- 1.9K Forum Feedback
- 10.4K Off Topic
- 2.2K EGG Table Forum
- 1 Rules & Disclaimer
- 9K Cookbook
- 13 Valentines Day
- 93 Holiday Recipes
- 224 Appetizers
- 520 Baking
- 2.5K Beef
- 88 Desserts
- 167 Lamb
- 2.4K Pork
- 1.5K Poultry
- 33 Salads and Dressings
- 324 Sauces, Rubs, Marinades
- 548 Seafood
- 175 Sides
- 122 Soups, Stews, Chilis
- 44 Vegetarian
- 102 Vegetables
- 313 Health
- 292 Weight Loss Forum