Welcome to the EGGhead Forum - a great place to visit and packed with tips and EGGspert advice! You can also join the conversation and get more information and amazing kamado recipes by following Big Green Egg to Experience our World of Flavor™ at:
Want to see how the EGG is made? Click to Watch
Facebook | Twitter | Instagram | Pinterest | Youtube | Vimeo
Share your photos by tagging us and using the hashtag #BigGreenEgg.
Share your photos by tagging us and using the hashtag #BigGreenEgg.
Want to see how the EGG is made? Click to Watch
Stage-two pizza dough with o-verbose commentary

Zippylip
Posts: 4,768
Following the completion of the preparation of this post, I read over it & realized that it is an almost insultingly long & repetitively redundant :ermm: monologue devoted to make one simple statement, I have a new pizza dough slideshow. Why I spent days writing, analyzing, rewording & modifying it is beyond me. Why I’m telling you this, I don’t know either. Anyway, here is the post:
Most folks have seen my pizza dough slide show & some have used it with success. It’s a simple warm-rise beginner dough that is easy, fun, inexpensive & fast (ready to use in as little as 45 minutes & up to 8 hours).
The original slideshow:
Edit: sorry, for some reason photobucket will not allow 2 slideshows in the same window to play, this link is therefore disabled so the stage two link can work. I re-posted the original show further down on the thread.

The new one:
I wanted a new cold-rise method that yielded a better final product, however it still had to meet the same criteria as the original:
1) Simple to make: While it takes longer to prepare and to rise, it is very simple and straight forward;
2) Simple ingredients: water, flour, salt, and yeast. No sugar, oil, specialty flour, gluten, or starters are necessary;
3) Simple equipment: a mixer with a dough hook. No scale is necessary because you will sneak up to the right consistency similar to sneaking up to temp on the egg; &
4) Low cost: the finished dough is under 25 cents per pizza*. All testing was done with a 25lb sack of Sam’s Club bread flour I bought for $11.00.
To develop, I read Verasano’s method but couldn’t really follow it. I gleaned what I could & messed around with it a bit ending up with an abbreviated version with which I’ve been able to get consistent results comparable to some of the more difficult & complex methods.
The Stage-Two slideshow:

Condensed written instructions:
1) Combine 1.5 cups of cold water, 3 cups of flour, 1 teaspoon of yeast and 1 teaspoon of salt;
2) Mix with a spoon for a few seconds to eliminate any large pools of water;
3) Let stand for 20 minutes;
4) Mix on medium for 20 minutes (it will be very soupy, don’t worry);
5) Turn off, cover, let stand for another 20 minutes;
6) Turn mixer back on & add up to 1 additional cup of flour (about 1 tablespoon at a time) allowing it to incorporate. Repeat this until you get the consistency you are looking for (it should be pulling away from the bowl, yet still be sticky enough so that it is a pain in the ass to get out of the bowl);
7) Remove from bowl, cut into individual pieces (2 for 2-16 inch pies, 3 for 3-12 inch pies, or 4 for 4-12 inch thin-crust pies);
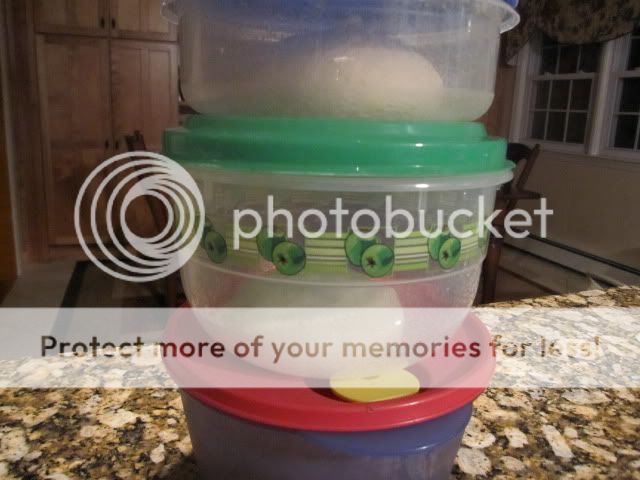
8) Place in separate oiled plastic containers & cover;
9) Refrigerate for a minimum of 24 hours and up to 4 days;
10) Remove about 2 hours before you are ready to use;
11) When removing from the bowl, be patient, it will want to stay in the bowl, this is normal;
12) On a floured surface, gently shape the dough (due to the higher moisture content, this dough will be harder to work with than more typical dough, so be careful not to tear it – tossing will not likely be possible);
13) Bake on egg at a minimum of 650 degrees. This dough benefits from higher temps, I’ve tried it at lower temps and the results were not as good. It will take about 6 minutes at this temp.
Tips:
* Removal: As always, I recommend removing the finished pie with a pizza screen & keeping elevated on a cooling rack or other raised surface, this prevents the bottom from steaming & losing its shizzle
* Toppings: Keep in mind that because this is relatively thin crust pie that will cook very fast, it is not a good idea to stack a lot of heavy toppings & sauce on.
* Temperature of ingredients: When you remove the dough from the refrigerator 2 hours before the cook, also remove any toppings, cheese and sauce you will put on the pie. This will help with nice browning of the cheese & finishing of the toppings
* Lump amount: This depends in part on the number of pies you’re making. I’ve read where some folks fill the egg with lump to the fire ring regardless of the number of pies being made. If you’re making a small batch of pies, say 4 or less, there is no need for the lump to even go above the fire box. I routinely cook 3-4 pies with one chimney full of fresh lump & the equivalent of one chimney full of already used lump in the box (and I still have lump left over afterwards).
This is not a low & slow where you need a lot of fuel, and when you shut the egg down the small area that’s lit dies out quickly. When going nuclear for pizza, the entire load of lump is fully a involved vibrant red magma. That is a lot of energy & a lot will be wasted if you overfill. If you’re doing pizzas often, chances are your gasket is ½ shot in the ass like mine, which means when you go to shut the egg down filled with molten lump, you are losing a ton of energy by the time that thing finally snuffs out.
Here’s a picture of the above lump amounts after a roughly 30-40 minute preheat and at the end of the first of 3 pies:

Note the level of the lump responsible for holding the egg at 650 for about 45 minutes at that point (preheat plus first pie cook time), it’s right around the level of the air holes. Add another 6 minutes a pop, the next two pies were on & off within an hour in total. When I shut the egg down, I feel like I’ve maximized the efficiency of the egg and the lump by using the minimum necessary. It doesn’t take a lot of lump to turn the interior of the egg into a violent but controlled conflagration, there’s no need to over feed the beast.
Some downsides:
* As state above, it is just as easy to make this dough as the original. However, it will take more practice to perfect and is more difficult to work with, so it’s not quite as forgiving as the original version. Best analogy is that the original is sort of the pulled pork of pizza dough, really hard to f it up. Stage two is more like brisket, pretty easy to prepare yet many more opportunities along the way to screw the pooch.
* I’m not sure why, but if there are leftovers, they don’t reheat very well. Maybe it was just the one batch that I actually had a whole pizza left over from, but when I re-heated the next day, it was not good. The crust became very tough, almost hard.
Blow by blow with still photos:
The test bag:

The dry ingredients all together:

Water added and slightly mixed:

Following the 20 minute rest (autolyzation), wet knead the dough for 20 minutes. It will look soupy like this:

Remove the hook:

Cover tightly:

Following a second 20 minute rest, turn the mixer back on & begin adding flour a little bit at a time until the dough starts pulling away from the bowl. This is the part that will take practice. After you make a few batches, you will begin to get a good idea of the specific wetness you are looking for; when you find the sweet spot, you’ll know it – lock it in. Keep in mind that the air bubbles, spring & texture of the final product will depend on a wetter than usual dough. Based upon my experiments, the wetter the dough going into the egg, the better the pizza was coming out of the egg.
Here is the dough after additional flour added (you can see it’s wet & droopy, that’s what you want):

Remove from the bowl & cut into pieces. This quantity will yield the following:
- 2-16 inch pizzas;
- 3-12 inch pizzas;
- 4-12 inch thin crust pizzas.
Store the dough in plastic containers sprayed with Pam.

Refrigerate for a minimum of 24 hours and up to 4 days. Take it out of the fridge about 2 hours before you are ready to use. This is what it looks like after 2 days:

To remove the dough, sprinkle a little flour on top while it’s still in the bowl and then turn the bowl upside down & wait until it releases itself, then flip back over onto a floured surface. Be patient here, it will not want to leave the container quickly, this is normal.
On the counter:

Finger flatten the dough. There is no need to flip, toss, or even pick it up. This dough is so soft & workable it will spread very easily into the exact size you want:

Sprinkle some corn meal on the peel & place the dough on:

Some simple crushed tomatoes:

Sliced mozzarella, salt, pepper, dried basil & olive oil:

To the egg preheated to at least 650:

This pie was cooked for about 6 minutes at 650:

Cooling on an elevated grid:

The undercarriage:

A few minutes later, sliced up & ready to eat:

This is what I am looking for on the interior, nice air pockets. The texture of the final product is definitely a step up from the beginner dough. If you have the time, the stage-two dough will yield better results. This pie is from a different batch, with very similar results:


Cost analysis:
* I know a lot of people purchase dough at the supermarket or at their local pizza shop. These are great alternatives, but if you have the time & the inclination, it is really fun to make dough at home. I am not sure what people are paying for pre-made dough, but for fun and comparison purposes I calculated the cost of homemade dough as follows (ok I was home sick & bored sh!tless when I did this):
- 33 cents per 16 inch pizza;
- 22 cents per 12 inch pizza; &
- 16 cents per 12 inch thin crust pizza.
The specifics:
Flour: using a pounds-to cups conversion (1 pound = 4 cups), the Sam’s Club sack of flour contains 100 cups which yields the following quantity of pizzas for $11.00:
- 16 inch pizzas @ 2 cups per pizza = yield of 50 pizzas / $11.00 = 22 cents per pizza;
- 12 inch pizzas @ 1.33 cups per pizza yields 75 pizzas / $11.00 = 14.6 cents per pizza;
- 12 inch thin crust pizzas @ 1 cup per pizza yields 100 pizzas / $11.00 = 11 cents per pizza
Yeast: I am sure this can be done much cheaper with some kind of bulk yeast, but I still use the $8.00 jar of bread machine yeast out of habit. Using a teaspoon-to-batch ratio (4oz. jar = 35.5 teaspoons), the jar yields the following quantity of pizzas for $8.00:
- 16 inch pizzas @ ½ teaspoon per pizza = yield of 71 pizzas / $8.00 = 11.26 cents per pizza;
- 12 inch pizzas @ 1/3 teaspoon per pizza = yield of 106.5 pizzas / $8.00 = 7.5 cents per pizza;
- 12 inch thin crust @ ¼ teaspoon per pizza = yield of 142 pizzas / $8.00 = 5.63 cents per pizza.
Salt & water: too negligible to calculate so they were not added.
If you’ve suffered through this post & are still reading, you may be interested to know that it took nearly 20 years for me to advance to stage-two, so look for my all new Stage-Three slide show right around October, 2030.
Most folks have seen my pizza dough slide show & some have used it with success. It’s a simple warm-rise beginner dough that is easy, fun, inexpensive & fast (ready to use in as little as 45 minutes & up to 8 hours).
The original slideshow:
Edit: sorry, for some reason photobucket will not allow 2 slideshows in the same window to play, this link is therefore disabled so the stage two link can work. I re-posted the original show further down on the thread.
The new one:
I wanted a new cold-rise method that yielded a better final product, however it still had to meet the same criteria as the original:
1) Simple to make: While it takes longer to prepare and to rise, it is very simple and straight forward;
2) Simple ingredients: water, flour, salt, and yeast. No sugar, oil, specialty flour, gluten, or starters are necessary;
3) Simple equipment: a mixer with a dough hook. No scale is necessary because you will sneak up to the right consistency similar to sneaking up to temp on the egg; &
4) Low cost: the finished dough is under 25 cents per pizza*. All testing was done with a 25lb sack of Sam’s Club bread flour I bought for $11.00.
To develop, I read Verasano’s method but couldn’t really follow it. I gleaned what I could & messed around with it a bit ending up with an abbreviated version with which I’ve been able to get consistent results comparable to some of the more difficult & complex methods.
The Stage-Two slideshow:
Condensed written instructions:
1) Combine 1.5 cups of cold water, 3 cups of flour, 1 teaspoon of yeast and 1 teaspoon of salt;
2) Mix with a spoon for a few seconds to eliminate any large pools of water;
3) Let stand for 20 minutes;
4) Mix on medium for 20 minutes (it will be very soupy, don’t worry);
5) Turn off, cover, let stand for another 20 minutes;
6) Turn mixer back on & add up to 1 additional cup of flour (about 1 tablespoon at a time) allowing it to incorporate. Repeat this until you get the consistency you are looking for (it should be pulling away from the bowl, yet still be sticky enough so that it is a pain in the ass to get out of the bowl);
7) Remove from bowl, cut into individual pieces (2 for 2-16 inch pies, 3 for 3-12 inch pies, or 4 for 4-12 inch thin-crust pies);
8) Place in separate oiled plastic containers & cover;
9) Refrigerate for a minimum of 24 hours and up to 4 days;
10) Remove about 2 hours before you are ready to use;
11) When removing from the bowl, be patient, it will want to stay in the bowl, this is normal;
12) On a floured surface, gently shape the dough (due to the higher moisture content, this dough will be harder to work with than more typical dough, so be careful not to tear it – tossing will not likely be possible);
13) Bake on egg at a minimum of 650 degrees. This dough benefits from higher temps, I’ve tried it at lower temps and the results were not as good. It will take about 6 minutes at this temp.
Tips:
* Removal: As always, I recommend removing the finished pie with a pizza screen & keeping elevated on a cooling rack or other raised surface, this prevents the bottom from steaming & losing its shizzle
* Toppings: Keep in mind that because this is relatively thin crust pie that will cook very fast, it is not a good idea to stack a lot of heavy toppings & sauce on.
* Temperature of ingredients: When you remove the dough from the refrigerator 2 hours before the cook, also remove any toppings, cheese and sauce you will put on the pie. This will help with nice browning of the cheese & finishing of the toppings
* Lump amount: This depends in part on the number of pies you’re making. I’ve read where some folks fill the egg with lump to the fire ring regardless of the number of pies being made. If you’re making a small batch of pies, say 4 or less, there is no need for the lump to even go above the fire box. I routinely cook 3-4 pies with one chimney full of fresh lump & the equivalent of one chimney full of already used lump in the box (and I still have lump left over afterwards).
This is not a low & slow where you need a lot of fuel, and when you shut the egg down the small area that’s lit dies out quickly. When going nuclear for pizza, the entire load of lump is fully a involved vibrant red magma. That is a lot of energy & a lot will be wasted if you overfill. If you’re doing pizzas often, chances are your gasket is ½ shot in the ass like mine, which means when you go to shut the egg down filled with molten lump, you are losing a ton of energy by the time that thing finally snuffs out.
Here’s a picture of the above lump amounts after a roughly 30-40 minute preheat and at the end of the first of 3 pies:
Note the level of the lump responsible for holding the egg at 650 for about 45 minutes at that point (preheat plus first pie cook time), it’s right around the level of the air holes. Add another 6 minutes a pop, the next two pies were on & off within an hour in total. When I shut the egg down, I feel like I’ve maximized the efficiency of the egg and the lump by using the minimum necessary. It doesn’t take a lot of lump to turn the interior of the egg into a violent but controlled conflagration, there’s no need to over feed the beast.
Some downsides:
* As state above, it is just as easy to make this dough as the original. However, it will take more practice to perfect and is more difficult to work with, so it’s not quite as forgiving as the original version. Best analogy is that the original is sort of the pulled pork of pizza dough, really hard to f it up. Stage two is more like brisket, pretty easy to prepare yet many more opportunities along the way to screw the pooch.
* I’m not sure why, but if there are leftovers, they don’t reheat very well. Maybe it was just the one batch that I actually had a whole pizza left over from, but when I re-heated the next day, it was not good. The crust became very tough, almost hard.
Blow by blow with still photos:
The test bag:
The dry ingredients all together:
Water added and slightly mixed:
Following the 20 minute rest (autolyzation), wet knead the dough for 20 minutes. It will look soupy like this:
Remove the hook:
Cover tightly:
Following a second 20 minute rest, turn the mixer back on & begin adding flour a little bit at a time until the dough starts pulling away from the bowl. This is the part that will take practice. After you make a few batches, you will begin to get a good idea of the specific wetness you are looking for; when you find the sweet spot, you’ll know it – lock it in. Keep in mind that the air bubbles, spring & texture of the final product will depend on a wetter than usual dough. Based upon my experiments, the wetter the dough going into the egg, the better the pizza was coming out of the egg.
Here is the dough after additional flour added (you can see it’s wet & droopy, that’s what you want):
Remove from the bowl & cut into pieces. This quantity will yield the following:
- 2-16 inch pizzas;
- 3-12 inch pizzas;
- 4-12 inch thin crust pizzas.
Store the dough in plastic containers sprayed with Pam.
Refrigerate for a minimum of 24 hours and up to 4 days. Take it out of the fridge about 2 hours before you are ready to use. This is what it looks like after 2 days:
To remove the dough, sprinkle a little flour on top while it’s still in the bowl and then turn the bowl upside down & wait until it releases itself, then flip back over onto a floured surface. Be patient here, it will not want to leave the container quickly, this is normal.
On the counter:
Finger flatten the dough. There is no need to flip, toss, or even pick it up. This dough is so soft & workable it will spread very easily into the exact size you want:
Sprinkle some corn meal on the peel & place the dough on:
Some simple crushed tomatoes:
Sliced mozzarella, salt, pepper, dried basil & olive oil:
To the egg preheated to at least 650:
This pie was cooked for about 6 minutes at 650:
Cooling on an elevated grid:
The undercarriage:
A few minutes later, sliced up & ready to eat:
This is what I am looking for on the interior, nice air pockets. The texture of the final product is definitely a step up from the beginner dough. If you have the time, the stage-two dough will yield better results. This pie is from a different batch, with very similar results:
Cost analysis:
* I know a lot of people purchase dough at the supermarket or at their local pizza shop. These are great alternatives, but if you have the time & the inclination, it is really fun to make dough at home. I am not sure what people are paying for pre-made dough, but for fun and comparison purposes I calculated the cost of homemade dough as follows (ok I was home sick & bored sh!tless when I did this):
- 33 cents per 16 inch pizza;
- 22 cents per 12 inch pizza; &
- 16 cents per 12 inch thin crust pizza.
The specifics:
Flour: using a pounds-to cups conversion (1 pound = 4 cups), the Sam’s Club sack of flour contains 100 cups which yields the following quantity of pizzas for $11.00:
- 16 inch pizzas @ 2 cups per pizza = yield of 50 pizzas / $11.00 = 22 cents per pizza;
- 12 inch pizzas @ 1.33 cups per pizza yields 75 pizzas / $11.00 = 14.6 cents per pizza;
- 12 inch thin crust pizzas @ 1 cup per pizza yields 100 pizzas / $11.00 = 11 cents per pizza
Yeast: I am sure this can be done much cheaper with some kind of bulk yeast, but I still use the $8.00 jar of bread machine yeast out of habit. Using a teaspoon-to-batch ratio (4oz. jar = 35.5 teaspoons), the jar yields the following quantity of pizzas for $8.00:
- 16 inch pizzas @ ½ teaspoon per pizza = yield of 71 pizzas / $8.00 = 11.26 cents per pizza;
- 12 inch pizzas @ 1/3 teaspoon per pizza = yield of 106.5 pizzas / $8.00 = 7.5 cents per pizza;
- 12 inch thin crust @ ¼ teaspoon per pizza = yield of 142 pizzas / $8.00 = 5.63 cents per pizza.
Salt & water: too negligible to calculate so they were not added.
If you’ve suffered through this post & are still reading, you may be interested to know that it took nearly 20 years for me to advance to stage-two, so look for my all new Stage-Three slide show right around October, 2030.
happy in the hut
West Chester Pennsylvania
West Chester Pennsylvania
Comments
-
This is great! Thank you for taking the time to do this!
-
couldn't get the shows to work initially, had to edit & re-paste the link 3 times, same one each time till it worked, not sure what was going on therehappy in the hut
West Chester Pennsylvania -
nicely done old boy. i had a lot of wise-ass comments that came to mind, but i didn't want to belittle the effort. :laugh:
my fear is that if i start doing this, the reward will be such that i get sucked into the vortex of "must be perfect" like i have become with bacon, sausage, ham, etc.
bad enough the BGE has taken over my food-life and spoiled me for most things cooked. i am afraid i won't be able to settle for store bought dough anymore.
the spring looks fantastic. happens quickly, right? i see a great spring once every eight pizzas maybe, with store bought dough. often frozen, thawed (sometimes, in a hurry iin the micro)...
looks beautiful.
and for some reason, i didn't think your post was too long at all, by the way.
hahahahahaed egli avea del cul fatto trombetta -Dante -
Your an attorney...you get paid by the word...that is why it is so long... :woohoo:
 :silly:
  :pinch: :laugh:
Great job Marc. The variations from Varasano's recipe amaze me at how good they are. You have hit another homerun. Thanks for taking the time to put this all together. You & Large Marge need to be in the Pizza Hall of Fame...with Fidel of course.. :P :woohoo: -
Good Post! Pizza Dough was the one thing I've given up on. It was always OK not great. I will be giving this a try. Wonderful job and thank you for posting it!
JayI'm ashamed of what I did for a Klondike Bar. -
I see that you use bread machine yeast. Varasano's uses the sourdough yeast culture. Have you tried the sourdough culture? If so did it make much of a difference?
Thanks! -
thanks, guessing the wise-assnes could easily exceed the length of the post itself
this is certainly an vortexable area, so do proceed with caution. But if anyone is making dough anyway, this doesn't take any more time in aggregate actually standing in the kitchen, just spreads it out in spurts
the spring does happen almost immediately, 70 degree water trapped inside of the dough vaporizes pretty quickly upon hitting the pitts of hell
I still can't get the original show to run though, is it coming up when you click on it. It looks like the second show is running fine however???happy in the hut
West Chester Pennsylvania -
How many billable hours did you p!sh away putting this together? Nice granite all the same.
Steve
Caledon, ON
-
i don't know if the slide show runs. i didn't bother clicking it. i just wanted to say something nice for all your hard work. i do my pizzas with ragu sauce on a split english muffined egli avea del cul fatto trombetta -Dante
-
:P :woohoo: :P :woohoo: :silly: :pinch: :cheer: :huh:
")
-
If you're after "must be perfect" with bacon and ham then you have a very long road to travel sir.
-
Zippy, you're a master of pizza Kaizen.
Although, I really don't see how you're going to improve upon the Zip.2 version. -
-
if you want some witty comebacks and jibes, i can send them to you via email first, and then you can post them here, if that works.ed egli avea del cul fatto trombetta -Dante
-
Oil isn’t something I consciously omitted, but it is not an ingredient I have used in pizza dough with any regularity as my prior use of it didn’t make any noteworthy difference. My goal was to make a dough with a minimum of ingredients that had a fantastic texture. I (sometime stubbornly/sometimes detrimentally) cling to minimalism & simplicity as keys to cooking success. In fact, this version has one less ingredient (sugar) that the beginner version. You may indeed have a point though related to the leftover situation. I believe the leftover pie (crust) turned into a rock as there was close to zero moisture in it, perhaps the oil would resolve that. Nevertheless, I am more interested in maximizing the first run of the pie, there aren't often leftovers to contend with anywayhappy in the hut
West Chester Pennsylvania -
Rebecca, thank you. Certainly it is possible to improve on this version. In fact I tried doing just that prior to posting it by consulting with fidel. I don't want to insult him by saying I may as well have had a conversation with a thumb tack, so I just won't say anything at all, I'm considerate like that :laugh:happy in the hut
West Chester Pennsylvania -
Zippy,
I've yet to make a pizza on the egg, but your dough is almost a carbon copy of the No Knead Artisan dough that I make almost weekly.
My dough recipe:
6 cups AP flour
3 cups water
1 tsp yeast
1 T coarse salt
Very similar to yours. You've added a raise, and incorporate more flour after the rise. So I guess that makes it somewhat different. I wonder how the results would be if using the Artisan dough after an 8 hour rest after the original mixing.
Roger -
enough to buy a beach house :evil:happy in the hut
West Chester Pennsylvania -
Roger, yep, this dough is very common from an ingredient list standpoint. I think the difference though comes from hydrating the dough prior to kneading it, wet kneading it, then the lengthy cold rise. This is what is so interesting about pizza dough. You can start with the same raw ingredients and yield many different final products.happy in the hut
West Chester Pennsylvania -
Zippy:
What's up with that freeform platesetter in this slideshow? Or is it photo problem because of the angle?
Can you freeze extra dough balls, and if not, would adding oil make that work?
Great presentations and beautiful pizzas!
Judy in San DiegoJudy in San Diego -
Quadzilla, I did not try it so I'm not sure what differences if any it would make - I imagine though that if you were to use it & age the dough for several days, it would yield a different flavor. Perhaps better but maybe worse, depending on taste.happy in the hut
West Chester Pennsylvania -
Jay, maybe try the original version first. Like I said in the post, pretty had to mess that one up. It can also be used the same day you make it. For quickest rise, you can put it in the warming drawer of your oven on low, takes about 30 minutes or so to rise. Sitting on the counter it doubles in size in about 2 hours, but can also sit there all day without ill effect. It is also comparably dry, so it is easier to work with that the new version, good luck, Marchappy in the hut
West Chester Pennsylvania -
Thank you Marc. I appreciate your dilligence and attention to detail in the production of this post. I lost the link to your other slideshow quite some time ago. The personal lesson that you gave helped me quite a bit. I will try this recipe in the near future and hopefully I will have some level of successs. Your pies look fantastic!
-
Thank you for putting this together.
My pizza is getting raves thanks to all your help.
Keeps getting better with every try.
Shane -
Kim, Large Marge certainly deserves that designation, I'm not so sure about the unmentionable one thoughhappy in the hut
West Chester Pennsylvania -
Marc What a great and helpful post. Thanks for donating so much time to increasing the enjoyment of those of us who love BGE pizza!!
-
That is pretty much what I been preaching over the years on this forum.
I do the same thing but run a higher hydration and this allows me a higher temp in the egg. I will do Neapolitan style using a 65% hydration and 1000 deg egg and it cooks in about 3 mins.
When I am doing several pizzas ..for a pizza party I will lower the hydration and cook at 650 deg.
Now this is for a more NY style crust.
This weekend I will be doing NY style and a Chicago style... -
Wow Marc great pics and cost analysis. I usually buy my dough at Pinocchio's they charge $2.00 a ball. We have kitchen aid mixer but never thought about making our own. After viewing you slide show i'm now inspired to try it on my own. Thanks for a great post!
-
Jack, that stuff is like silly putty :laugh: – do they still give the kids a small piece of it to play with while waiting for dinner? ahh, the good old days. Jimmy Johns is coming along nicely, the walls & roof are done, I see work trucks out there every day so they must be busy inside. I cannot wait to grab a fresh box of those, haven’t had one since the fire.
By the way, since you have the kitchen aid & an egg, you have all the hardware, just need to go pick up a pallet of flour & you're off to the raceshappy in the hut
West Chester Pennsylvania -
Marc...not sure about the Pinnochio tradition. If we order out it's always Appollo for us. I have a question concerning the hot vs cold method. Do you feel the cold method gives a considerable thinner pie. We recently ate at Osteria in the city and had a couple of their pies, they were incredibly thin. I would really like to be able to make a thin crust pizza. Good news about Jimmy Johns!


Categories
- All Categories
- 184.1K EggHead Forum
- 15.8K Forum List
- 460 EGGtoberfest
- 1.9K Forum Feedback
- 10.4K Off Topic
- 2.2K EGG Table Forum
- 1 Rules & Disclaimer
- 9K Cookbook
- 13 Valentines Day
- 93 Holiday Recipes
- 224 Appetizers
- 520 Baking
- 2.5K Beef
- 88 Desserts
- 167 Lamb
- 2.4K Pork
- 1.5K Poultry
- 33 Salads and Dressings
- 324 Sauces, Rubs, Marinades
- 548 Seafood
- 175 Sides
- 122 Soups, Stews, Chilis
- 44 Vegetarian
- 102 Vegetables
- 313 Health
- 292 Weight Loss Forum