Welcome to the EGGhead Forum - a great place to visit and packed with tips and EGGspert advice! You can also join the conversation and get more information and amazing kamado recipes by following Big Green Egg to Experience our World of Flavor™ at:
Want to see how the EGG is made? Click to Watch
Facebook | Twitter | Instagram | Pinterest | Youtube | Vimeo
Share your photos by tagging us and using the hashtag #BigGreenEgg.
Share your photos by tagging us and using the hashtag #BigGreenEgg.
Want to see how the EGG is made? Click to Watch
Large Egg-Mates for XL nest?

Canugghead
Posts: 14,002
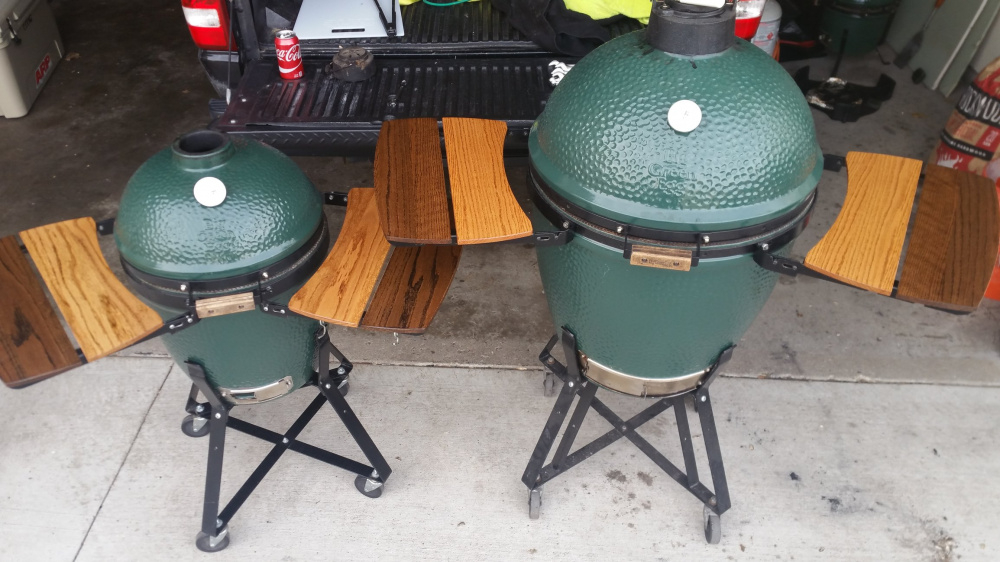
Have a spare set of new Large egg mates and hoping I can make it fit my XL nest.
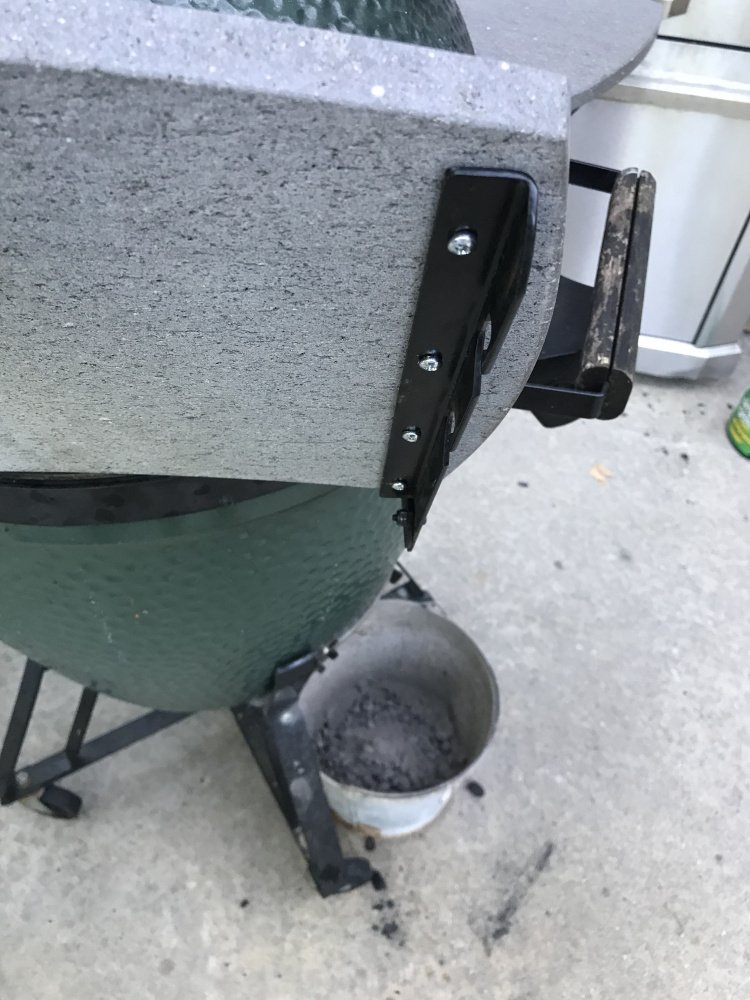
Two pictures below, thinking of flattening the curve to match XL band, it should also spread the holes to match the bolts? What say you?
P.s. ignore the studs on the second photo, I placed the egg mate against front of XL band to illustrate the gap that needs flattening.
Calling egg dealers on the forum, @pgprescott , @stlcharcoal ?
canuckland
Comments
-
Not an egg dealer, bit I think it will work. You may need to make the holes (where the shelf attaches to the curved bracket, by your left hand) into slots, to accommodate flattening the curve of the bracket?#1 LBGE December 2012 • #2 SBGE February 2013 • #3 Mini May 2013A happy BGE family in Houston, TX.
-
-
-
If I recall right that's what I did on my XL."The pig is an amazing animal. You feed a pig an apple and it makes bacon. Let's see Michael Phelps do that" - Jim Gaffigan
Minnesota -
Great! Any chance you remember or can you check if any drilling was involved? Also, a good way to flatten the curve? ThanksWeberWho said:If I recall right that's what I did on my XL.canuckland -
I tracked down my old post on my XL and it turns out the mates I bought were for an XL. The ones I ended up bending and fitting were my large mates to my small egg. Sorry about that.Canugghead said:
Great! Any chance you remember or can you check if any drilling was involved? Also, a good way to flatten the curve? ThanksWeberWho said:If I recall right that's what I did on my XL.
I locked down one end of the mates with the stud and nut and formed the shape of the egg pressing against it until I reached the other end. It didn't take much to form it. What gave me issues was brackets that stick out that hold the arms of the table mates. Once you change the original shape of the mates the brackets don't line up and lock into place right. So I had play around and bend the brackets so the arms could lock into position. I had to extend the bolt further out for it to catch. Hopefully your bands on the mates doesn't change all that much.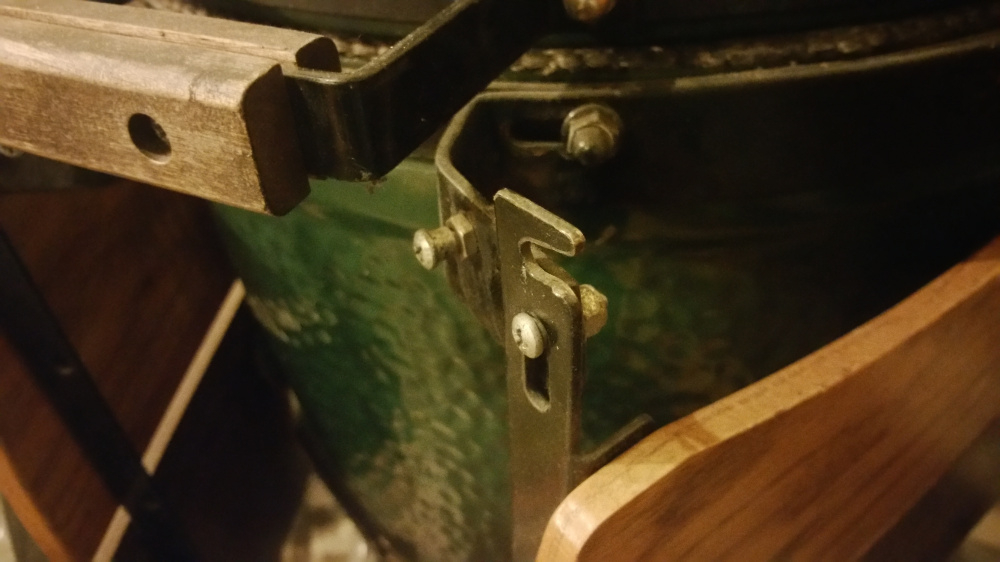
If you have any issue bending the band on the mates a couple of longer wood clamps would probably help you with forming it if you have any available. I don't recall the band on the mates giving me any issues though.
"The pig is an amazing animal. You feed a pig an apple and it makes bacon. Let's see Michael Phelps do that" - Jim Gaffigan
Minnesota -
@WeberWho really appreciate your digging into this and the detailed information, will report back.canuckland
-
Everything went well more or less exactly as @WeberWho described. Should have checked the studs without the nuts yesterday
") turned out the nest studs fit the eggmate bracket slots without drilling or flattening the curve.
turned out the nest studs fit the eggmate bracket slots without drilling or flattening the curve.
I figured as long as it's secured I don't need to flatten bracket for exact fit. However, upon tightening the nuts the bracket flattens a bit, causing the side arms to point in; this slight misalignment made the shelf hard to slide and engage.
Protected with towel and sandwiched the arm with scrap oak as shown, pushed the wood out gently and done!
Next: Stain and seal wood slats, apply small piece of scrap gasket under outer slat edge where it bangs on the ceramic bottom.
Thanks again guys for your help and encouragement. This is still a friendly place canuckland -
Good deal! I'm glad it worked out for you.Canugghead said:Everything went well more or less exactly as @WeberWho described. Should have checked the studs without the nuts yesterday turned out the nest studs fit the eggmate bracket slots without drilling or flattening the curve.
I figured as long as it's secured I don't need to flatten bracket for exact fit. However, upon tightening the nuts the bracket flattens a bit, causing the side arms to point in; this slight misalignment made the shelf hard to slide and engage.
Protected with towel and sandwiched the arm with scrap oak as shown, pushed the wood out gently and done!
Next: Stain and seal wood slats, apply small piece of scrap gasket under outer slat edge where it bangs on the ceramic bottom.
Thanks again guys for your help and encouragement. This is still a friendly place"The pig is an amazing animal. You feed a pig an apple and it makes bacon. Let's see Michael Phelps do that" - Jim Gaffigan
Minnesota -
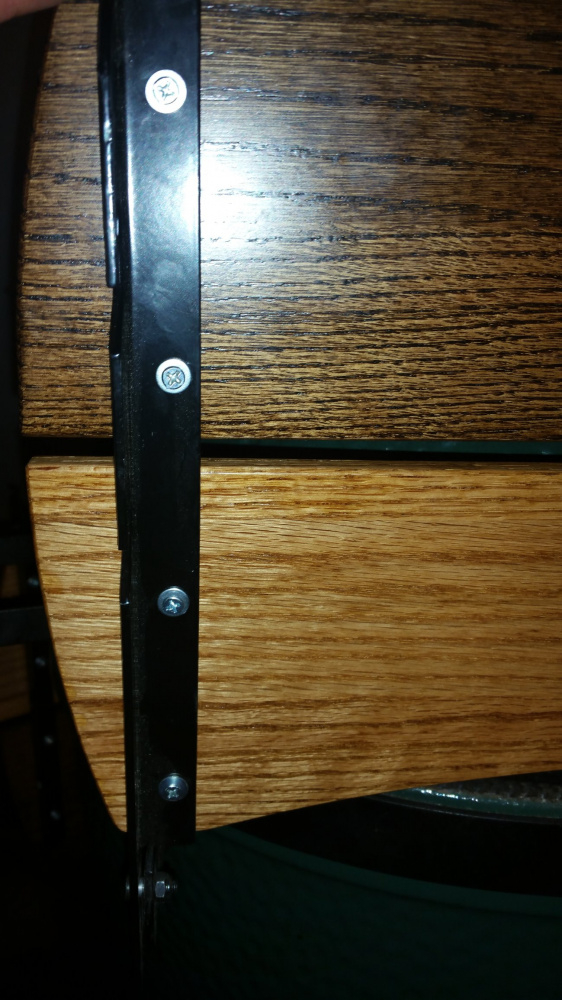
Big mistake removing the wood slats to refinish because the self tapping machine screws were countersunk, many at an angle ☹️Even with careful handling, no power tool, I ended up taking out a chunk of wood on three of the screws. All but 1 or 2 self tapping screws could not be retightened fully.
Down the road, I’ll probably make custom shelves with scrap wood, and secure with invisible screws from below, that’s how I built the custom front folding shelf for my Traeger Pro 34.canuckland -
I also replaced my mates tops and used screws from below to give it a cleaner look from the topside.
"The pig is an amazing animal. You feed a pig an apple and it makes bacon. Let's see Michael Phelps do that" - Jim Gaffigan
Minnesota -
@WeberWho Nice, love your stain contrast. You need to make new handles to match though
") canuckland
canuckland -
I traded my wood shelves out for granite and used hidden fasteners too. After 10yrs I had to cut the self rapper screws loose with a sawzall
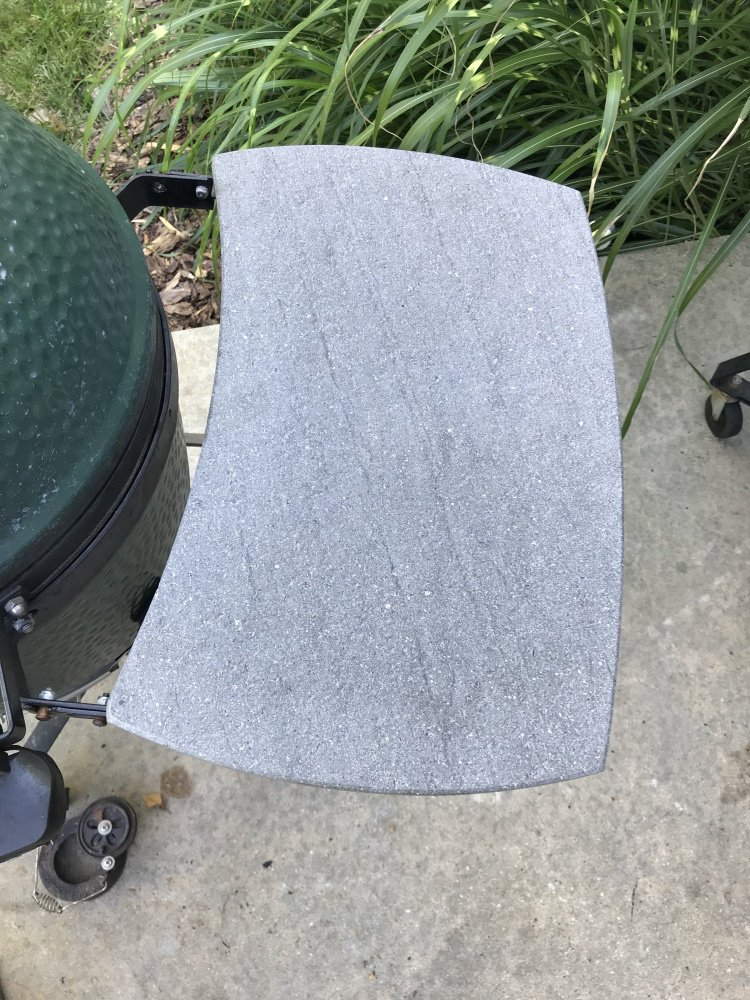
 -----------------------------------------analyze adapt overcome2008 -Large BGE. 2013- Small BGE and 2015 - Mini. Henderson, Ky.
 -
@Mattman3969 , love it. Thanks for the warning re those damn screws, have to keep an eye on them, I suppose with these shelves screw up is not a bad thing 😅
Btw, do you take any precaution to prevent granite banging the ceramic?canuckland -
I keep meaning to epoxy a rubber bumper on the back of the shelf but never have. I think they have only been lowered once or twice since I put them on so I keep forgetting about it.-----------------------------------------analyze adapt overcome2008 -Large BGE. 2013- Small BGE and 2015 - Mini. Henderson, Ky.


Categories
- All Categories
- 184.1K EggHead Forum
- 15.8K Forum List
- 460 EGGtoberfest
- 1.9K Forum Feedback
- 10.4K Off Topic
- 2.2K EGG Table Forum
- 1 Rules & Disclaimer
- 9K Cookbook
- 13 Valentines Day
- 93 Holiday Recipes
- 224 Appetizers
- 520 Baking
- 2.5K Beef
- 88 Desserts
- 167 Lamb
- 2.4K Pork
- 1.5K Poultry
- 33 Salads and Dressings
- 324 Sauces, Rubs, Marinades
- 548 Seafood
- 175 Sides
- 122 Soups, Stews, Chilis
- 44 Vegetarian
- 102 Vegetables
- 313 Health
- 292 Weight Loss Forum