Welcome to the EGGhead Forum - a great place to visit and packed with tips and EGGspert advice! You can also join the conversation and get more information and amazing kamado recipes by following Big Green Egg to Experience our World of Flavor™ at:
Want to see how the EGG is made? Click to Watch
Facebook | Twitter | Instagram | Pinterest | Youtube | Vimeo
Share your photos by tagging us and using the hashtag #BigGreenEgg.
Share your photos by tagging us and using the hashtag #BigGreenEgg.
Want to see how the EGG is made? Click to Watch
Installing Rutland Gasket on XLBGE - THANK YOU @RRP

Black_Badger
Posts: 1,182
Hello All,
Thought I'd share my experiences with installing a Rutland gasket on the XLBGE, maybe pass along some quick lessons learned. I'm far from the handiest guy in the world, but all in all this was pretty easy even on my own (admittedly with tons of guidance on here and other sites). So far I'm very pleased and I'm happy I decided to make this change. Let me dive in:
First off, HUGE thanks to Ron Pratt ( @RRP ) who sold me the pre-trimmed gasket and gave me tons of advice on how to do this. I deviated from his instructions in only a few places and probably would have been better off had I not. I really appreciate all the help dude.
Since it was just me and I don't have much space to work on my patio I decided to try this install without removing the top. I think that was a mistake. Granted, it all worked, but it made the job more difficult in the end. I probably would have been better off parking the top in the living room while I worked on the base, but I think that may have had adverse ramifications with the Mrs. Using the 3M paint stripping wheel and the pumice stone I was able to clean the entire circumference of the top and bottom, but there were quite a few tricky pieces around the hinges.
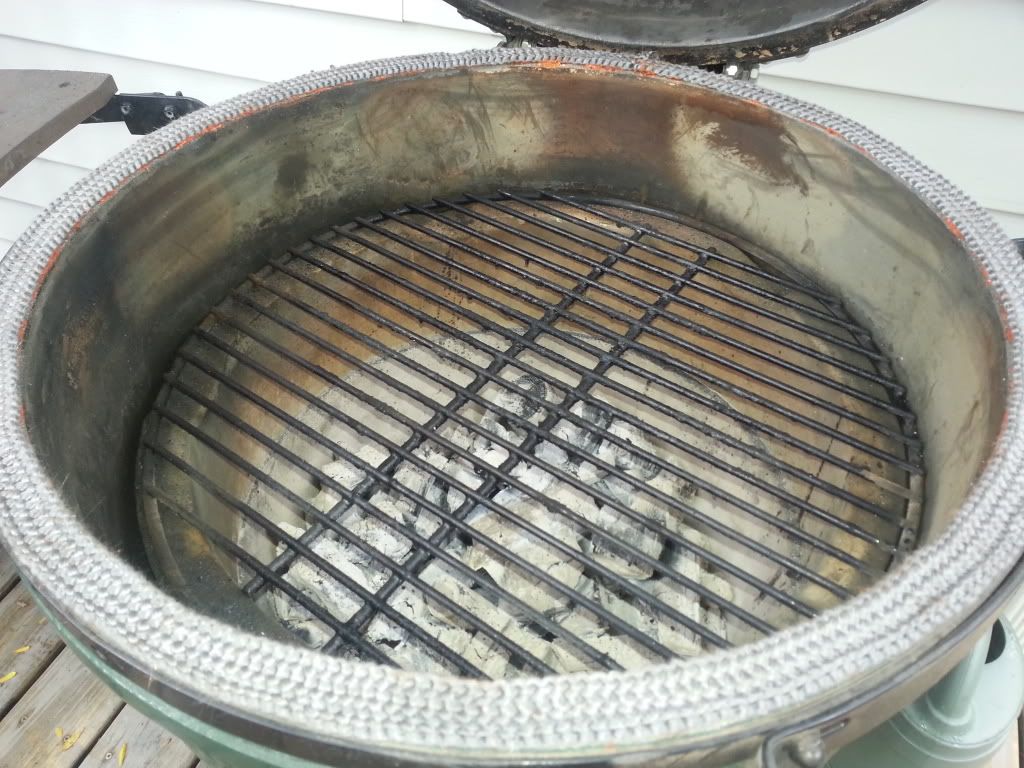
I started by removing as much of the torched felt gasket as I could with my hands and a safety blade. Big strips came away quite easily; it was really burned up. What I couldn't get this way I went after with the paint stripper. THIS WAS FAR AND AWAY THE BEST TOOL FOR THE JOB! It was able to clear off the felt gasket quickly and easily without damaging my precious egg. Made short work of all the areas I could reach easily (which wasn't everything due to the top being on...). For the hard to reach corners I went to the pumice stone. I ended up grnding down about 75% of the stone, but it did work nicely in areas where my drill wouldn't fit.
Once the base was clean and most of the top was clean (battery ran dead on drill, D'oh!) I started installing the Rutland. I marked it in quarters as suggested and marked quadrants on the rim of the egg. One thing I noticed here: I wrapped the Rutland completely in my masking tape marking, and it was really hard to remove before adhering the Rutland in those spots. This is one thing I'd do differently next time, I'd try to do the marking some other way because this caused some trouble.
Bunching the gasket back on itself and pressing it into the permatex was pretty intuitive. I bought a full sided trowel to spread the adhesive and this tool worked okay at best. I really needed something much smaller (like the sabre saw blade, that was recommended). I'm concerned that I may not have used enough adhesive, but I was getting it seeping through and around the gasket, so I had a hard time justifying more. One other deviation; since i left the top on it was way easier to start in the front than the back. This worked fine, but now the ugly seem is right in the front of the egg, instead of tucked in the back.
Word of caution: I did not end up trimming ANYTHING off the gasket, I used it ALL. Please consider this if you're thinking of pre-trmming the gasket or doing a diagonal seem or something. I did trim up the very end where it had partially unraveled a very little bit and found kitchen shears were the best tool for that task. The stuff is difficult to cut.
So, installed the Rutland, putting about 4-6inches of adhesive around the perimeter in each go and bunching the Rutland back onto itself as I went. First quater was fine, just learning as I went. Second quarter I was in the back, reaching over the grill surface and around hinges, but getting more confident all the time. By the third quarter I'd stopped checking the length of the gasket and this almost burned me. Towards the end I noticed I was low on gasket for the rest of the loop. With about eight inches to go I only had about six inches of gasket the way i'd been bunching. I ended up bunching the last part quite a bit less, but it did make it all the way back to the origin. Close one...
I put some wax paper down all around the edge, dropped the lid and let the adhesive dry for one hour. After drying I popped the lid and pulled the wax paper. Everything looked fine so I lowered the lid and let the permatex cure for 24 hours.
Today I fired the XL up for the first time and kept it below 400. Everything seemed to hold fine and I saw a HUGE reduction in smoke escaping from the seem; from quite a bit before to none now. Cooked up some chicken sausage, pollo asada, corn, and a purple onion to test it all out and it was a delicious as always. Very pleased with that result.
Take home message, if your gasket is shot contact @RRP and he can help you out. Buy the 3M paint scraper wheel, it's awesome. Take the top off. Be patient, let it dry, get back to cooking.
Cheers all -
B_B
Thought I'd share my experiences with installing a Rutland gasket on the XLBGE, maybe pass along some quick lessons learned. I'm far from the handiest guy in the world, but all in all this was pretty easy even on my own (admittedly with tons of guidance on here and other sites). So far I'm very pleased and I'm happy I decided to make this change. Let me dive in:
First off, HUGE thanks to Ron Pratt ( @RRP ) who sold me the pre-trimmed gasket and gave me tons of advice on how to do this. I deviated from his instructions in only a few places and probably would have been better off had I not. I really appreciate all the help dude.
Since it was just me and I don't have much space to work on my patio I decided to try this install without removing the top. I think that was a mistake. Granted, it all worked, but it made the job more difficult in the end. I probably would have been better off parking the top in the living room while I worked on the base, but I think that may have had adverse ramifications with the Mrs. Using the 3M paint stripping wheel and the pumice stone I was able to clean the entire circumference of the top and bottom, but there were quite a few tricky pieces around the hinges.
I started by removing as much of the torched felt gasket as I could with my hands and a safety blade. Big strips came away quite easily; it was really burned up. What I couldn't get this way I went after with the paint stripper. THIS WAS FAR AND AWAY THE BEST TOOL FOR THE JOB! It was able to clear off the felt gasket quickly and easily without damaging my precious egg. Made short work of all the areas I could reach easily (which wasn't everything due to the top being on...). For the hard to reach corners I went to the pumice stone. I ended up grnding down about 75% of the stone, but it did work nicely in areas where my drill wouldn't fit.
Once the base was clean and most of the top was clean (battery ran dead on drill, D'oh!) I started installing the Rutland. I marked it in quarters as suggested and marked quadrants on the rim of the egg. One thing I noticed here: I wrapped the Rutland completely in my masking tape marking, and it was really hard to remove before adhering the Rutland in those spots. This is one thing I'd do differently next time, I'd try to do the marking some other way because this caused some trouble.
Bunching the gasket back on itself and pressing it into the permatex was pretty intuitive. I bought a full sided trowel to spread the adhesive and this tool worked okay at best. I really needed something much smaller (like the sabre saw blade, that was recommended). I'm concerned that I may not have used enough adhesive, but I was getting it seeping through and around the gasket, so I had a hard time justifying more. One other deviation; since i left the top on it was way easier to start in the front than the back. This worked fine, but now the ugly seem is right in the front of the egg, instead of tucked in the back.
Word of caution: I did not end up trimming ANYTHING off the gasket, I used it ALL. Please consider this if you're thinking of pre-trmming the gasket or doing a diagonal seem or something. I did trim up the very end where it had partially unraveled a very little bit and found kitchen shears were the best tool for that task. The stuff is difficult to cut.
So, installed the Rutland, putting about 4-6inches of adhesive around the perimeter in each go and bunching the Rutland back onto itself as I went. First quater was fine, just learning as I went. Second quarter I was in the back, reaching over the grill surface and around hinges, but getting more confident all the time. By the third quarter I'd stopped checking the length of the gasket and this almost burned me. Towards the end I noticed I was low on gasket for the rest of the loop. With about eight inches to go I only had about six inches of gasket the way i'd been bunching. I ended up bunching the last part quite a bit less, but it did make it all the way back to the origin. Close one...
I put some wax paper down all around the edge, dropped the lid and let the adhesive dry for one hour. After drying I popped the lid and pulled the wax paper. Everything looked fine so I lowered the lid and let the permatex cure for 24 hours.
Today I fired the XL up for the first time and kept it below 400. Everything seemed to hold fine and I saw a HUGE reduction in smoke escaping from the seem; from quite a bit before to none now. Cooked up some chicken sausage, pollo asada, corn, and a purple onion to test it all out and it was a delicious as always. Very pleased with that result.
Take home message, if your gasket is shot contact @RRP and he can help you out. Buy the 3M paint scraper wheel, it's awesome. Take the top off. Be patient, let it dry, get back to cooking.
Cheers all -
B_B
Finally back in the Badger State!
Middleton, WI
Middleton, WI
Comments
-
Outstanding @Black_Badger ! I'm in the same process, but have gotten rained out this weekend. Thanks for posting so others can learn from your experience! I'm taking photos along the way for posting, but since you already did, I'll add them here when completed in the next couple of days.Flint, Michigan
-
Craig, you are certainly welcome and I thank you for the critique of my detailed instructions. I have honed them over the 11 years I've been providing this service. While removing the dome and even the bands all together would make the clean off and application much easier there are folks who might not want to do that for fear of possible alignment issues. RonRe-gasketing the USA one yard at a time
-
This is on my to-do list for my large.. Thanks for sharing the details!
LBGE
MS Gulf Coast - Proud member of the Who Dat Nation!
My Not Frequently Updated Basically Dead Blog: http://datcue.wordpress.com -
At the time I replaced the gasket on my large (also, thanks to @RRP for the wonderful instructions), I did not remove the dome. I just didn't feel like taking that on, particularly since there was no gasket going on to the dome.
It completely changed (improved) the performance of my egg,
If it ever needs replacing, I'm right back to Rutland (and Ron).
John in the Willamette Valley of Oregon -
It took me over 4 years to get around to replacing mine at the end of the last year. I'm glad that I did now. I used the Permatex and Rutland as you did, using a zigzag pattern. I had no bleeding through but did have a little orange from the Permatex on the sides of the gasket in a few places. It has worked great.
Knoxville, TN
Nibble Me This -
The only thing I would do differently next time, is to put the gasket on top instead of the bottom. It does not get as messy as on the bottom. Make sure you readjust the bite!FelipeMen, easier fed than understood!!
-
Sorry, but I disagree with putting it on the top even though you are correct that it would stay cleaner. My opinion is if the gasket were to start to fail you would be more apt to notice the deterioration every time you opened your egg, whereas if it were on the dome side you may not notice it until it has gotten much worst. Besides that I like the idea that my gasket stays stationary and not collecting dust and junk to be waved over my food with every opening and closing.FlyingTivo said:The only thing I would do differently next time, is to put the gasket on top instead of the bottom. It does not get as messy as on the bottom. Make sure you readjust the bite!FelipeRe-gasketing the USA one yard at a time -
-
I did my Rutland 2.5 years ago with the help of RRP (Thanks again!). My opinion, if you have an XL, taking the lid off is a must, only because it is so simple to take on and off ( It literally takes less than a minute.) - different hinge system than other size eggs.Felt gasket removal: The only thing I used was a paint scrapper for the big stuff and then a paint stripper wheel on my drill for the rest. Didn't need anything else for really clean rims.Notes I made for next time (if there ever is a next time):1.) Apply all the Permatex Ultra Copper all the way around in one shot, didn't see any reason to do it in steps. Applying the Rutland goes fast so no worries of it drying before you're done.2.) I didn't measure out 1/4's and didn't see a need for it. As long as you're "bunching" and getting even thickness all the way around, you're good. Turned out perfect and just chopped whatever I had left off and put it around the inside of my ceramic top.Ron, I always said if I did it again I'd put the Rutland on the top, but good point about collecting crap and dropping all over the food every time you open the lid. I think you swayed me.Packerland, Wisconsin
-
@Black Badger Thanks for the post I have ordered the material from Ron and I will be doing gasket replacement o the small. I think I will remove the top to do mine. Wonder what almost of 4 years cooking have done to the bolts?.....guess I will find out.Large, small and mini now Egging in Rowlett Tx
-
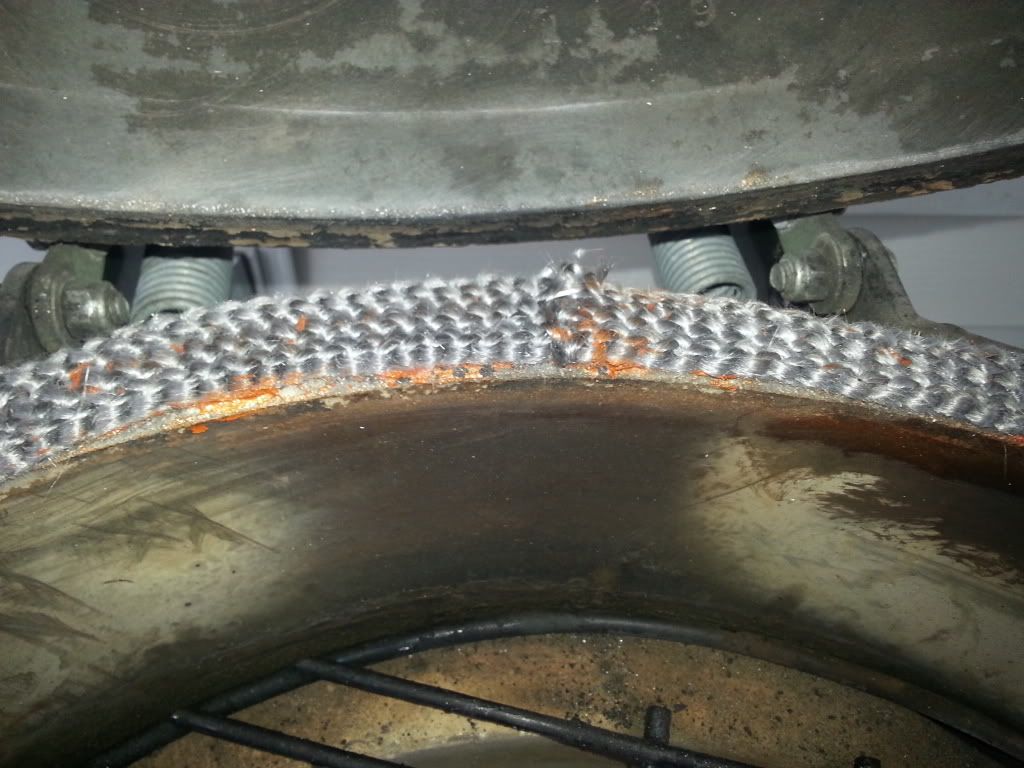
I did my large install yesterday. Just opened it up and found that gasket in the rear (near back hinges) had shifted off the ring and toward the inside of my egg. I assume this is because my lid is not centered/balanced correctly? I was still able to rip up the gasket in that area, realign it, and its back drying again now. I left the lid open this time to dry, hoping it has some time to set first before I shut the lid (potentially pushing it off again).Here is a pic after my gasket realignment . . Have you heard of this happening before? Also, will the look of the orange adhesive fade? Thanks @RRP for all your help.
 Columbus, OH
“There are only two ways to live your life. One is as though nothing is a miracle. The other is as if everything is” -
Yes the oozed through Permatex will fade and turn gray from soot & charcoal dust in time. If you want to just take a sharp blade utility knife and trim off that Permatex which has run down inside. Also for the fibers at those butt ends that "fuzz" will burn off using a butane type lighter that you use to start your fire. As for the Permatex itself it dries to the touch in one hour, but it takes 24 hours to cure hard since it is a chemical cure not a heat nor air curing process. HTHRonRe-gasketing the USA one yard at a time


Categories
- All Categories
- 184.1K EggHead Forum
- 15.8K Forum List
- 460 EGGtoberfest
- 1.9K Forum Feedback
- 10.4K Off Topic
- 2.2K EGG Table Forum
- 1 Rules & Disclaimer
- 9K Cookbook
- 13 Valentines Day
- 93 Holiday Recipes
- 224 Appetizers
- 520 Baking
- 2.5K Beef
- 88 Desserts
- 167 Lamb
- 2.4K Pork
- 1.5K Poultry
- 33 Salads and Dressings
- 324 Sauces, Rubs, Marinades
- 548 Seafood
- 175 Sides
- 122 Soups, Stews, Chilis
- 44 Vegetarian
- 102 Vegetables
- 313 Health
- 292 Weight Loss Forum