Welcome to the EGGhead Forum - a great place to visit and packed with tips and EGGspert advice! You can also join the conversation and get more information and amazing kamado recipes by following Big Green Egg to Experience our World of Flavor™ at:
Want to see how the EGG is made? Click to Watch
Facebook | Twitter | Instagram | Pinterest | Youtube | Vimeo
Share your photos by tagging us and using the hashtag #BigGreenEgg.
Share your photos by tagging us and using the hashtag #BigGreenEgg.
Want to see how the EGG is made? Click to Watch
Making a whole pastured chicken

GuinnessGuy
Posts: 45
I hope everyone is in the midst of a relaxing holiday weekend!
I just picked up some whole pasture-raised chickens at the farmer's market. They are between 3 and 4 pounds each. I have read some places that suggest the pastured chicken needs to be cooked at lower temps and for less time since it is leaner, and I have also read other places that call for the same basic chicken guidelines (just go till 165 on the breast, 180 on the leg). Since I'll be making them on the egg (only one at a time though) and there always seems to be some kind of egg-specific twist, I figured I'd ask the eggsperts! Note, I have never made any type of chicken on the egg but I have read about the spatchcock method on the NW site.
Thanks,
Jeff
Comments
-
Spatchcock is definetly the way to go. I don't have a clue as to whether a free range bird should be cooked differently than any other. Chicken is forgiving and cooks up very well on the egg. One hint, avoid the temptation to open the dome for a "peek". Food stays very moist in the egg, but opening it up a lot will lead to dryness as well as extending your cooking time.
")
Capt Frank
Homosassa, FL -
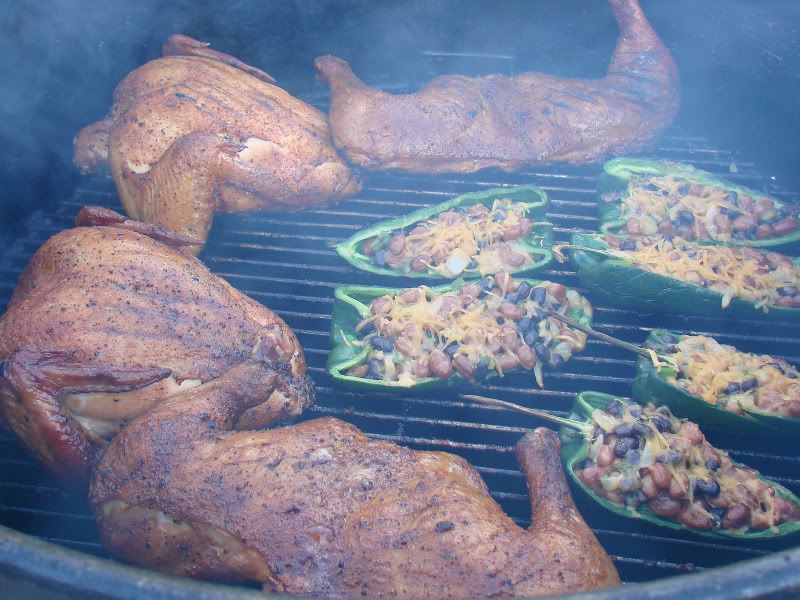
My preferred method of cooking chickens is in halves.... But I split them at the pelvis instead of down the backbone. The advantage here is that the breast remains whole and can be cooked to 165°. The dark half, can be cooked to 175°+. I find it's easier for me to control the cook this way, plus I never have overdone white meat.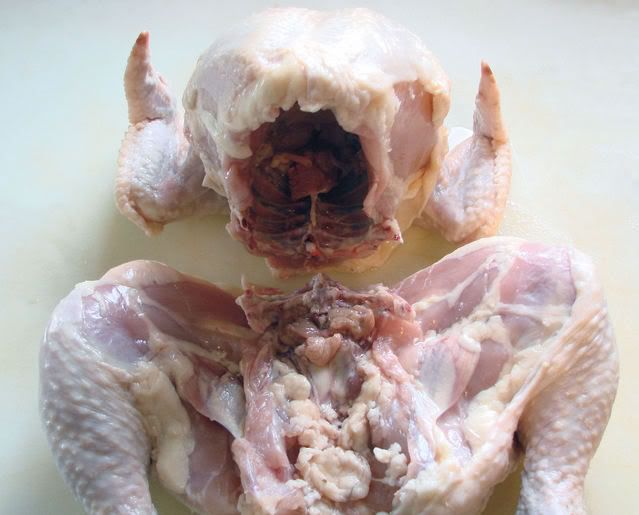 Happy Trails~thirdeye~Barbecue is not rocket surgery
 -
Very interesting... those peppers look tasty as well!
I noticed on the official BGE website, they describe how to cook chicken and they talk about putting it skin side down first for a short time to make the skin crispy, then flipping it for the remaining time. Are you getting that nice golden brown color just leaving it skin-up the whole time? And I can't tell from the pics, are you doing direct heat? And about what temp? 350? -
Thirdeye, Can you tell me a little about the peppers you have going there? They look tasty.
-
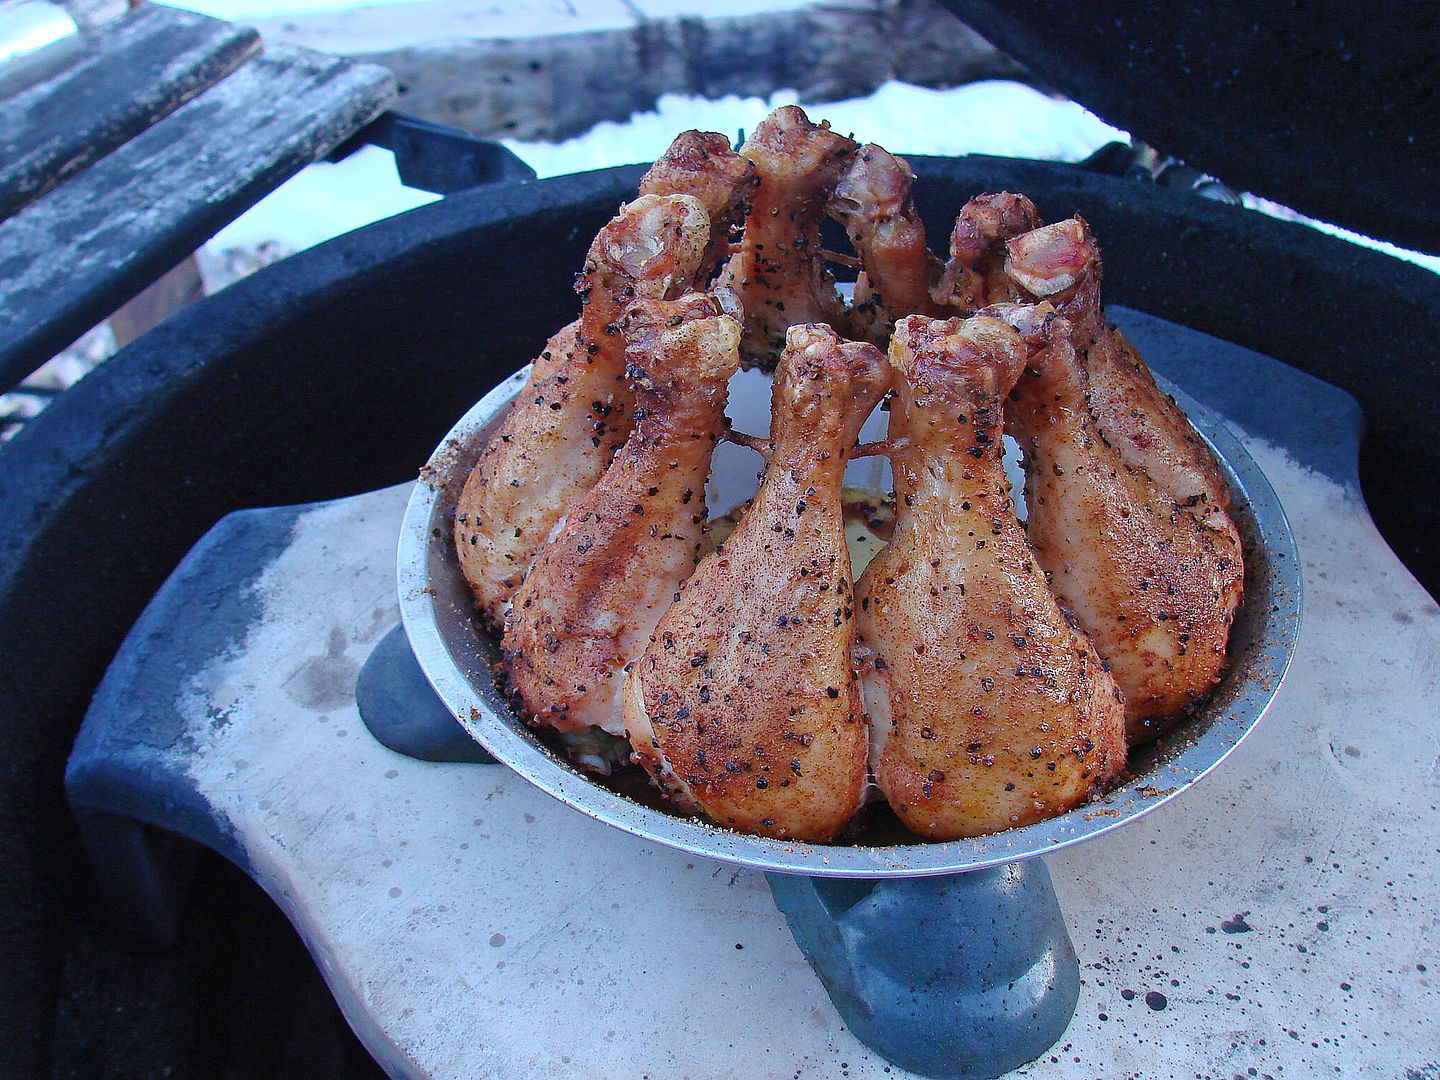
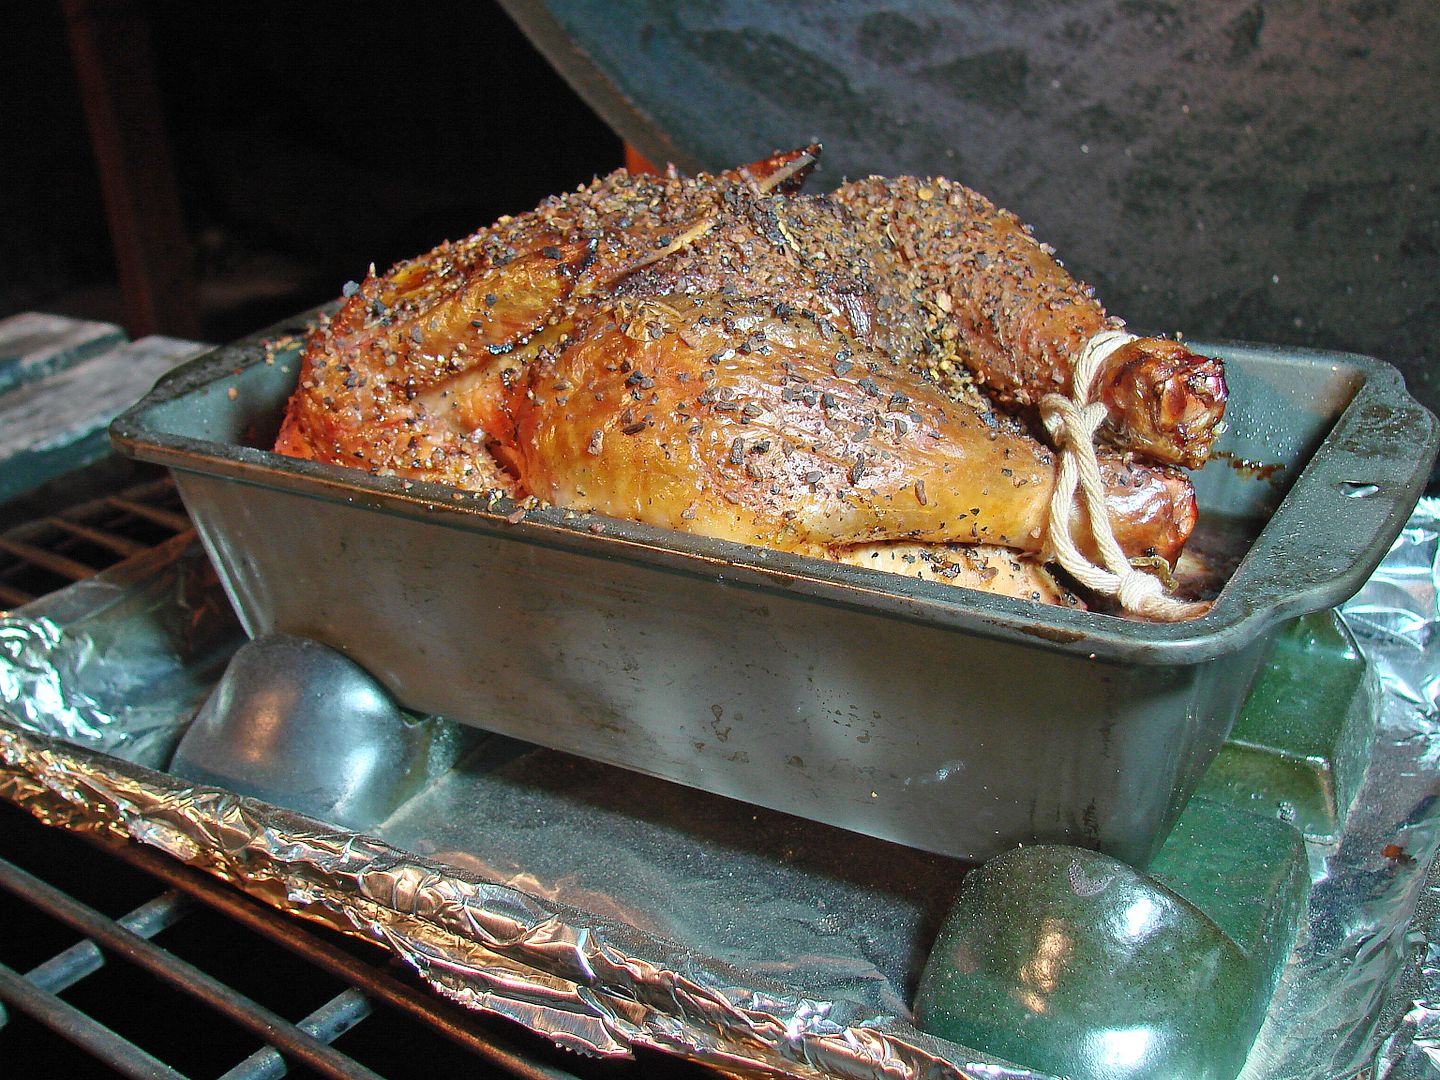
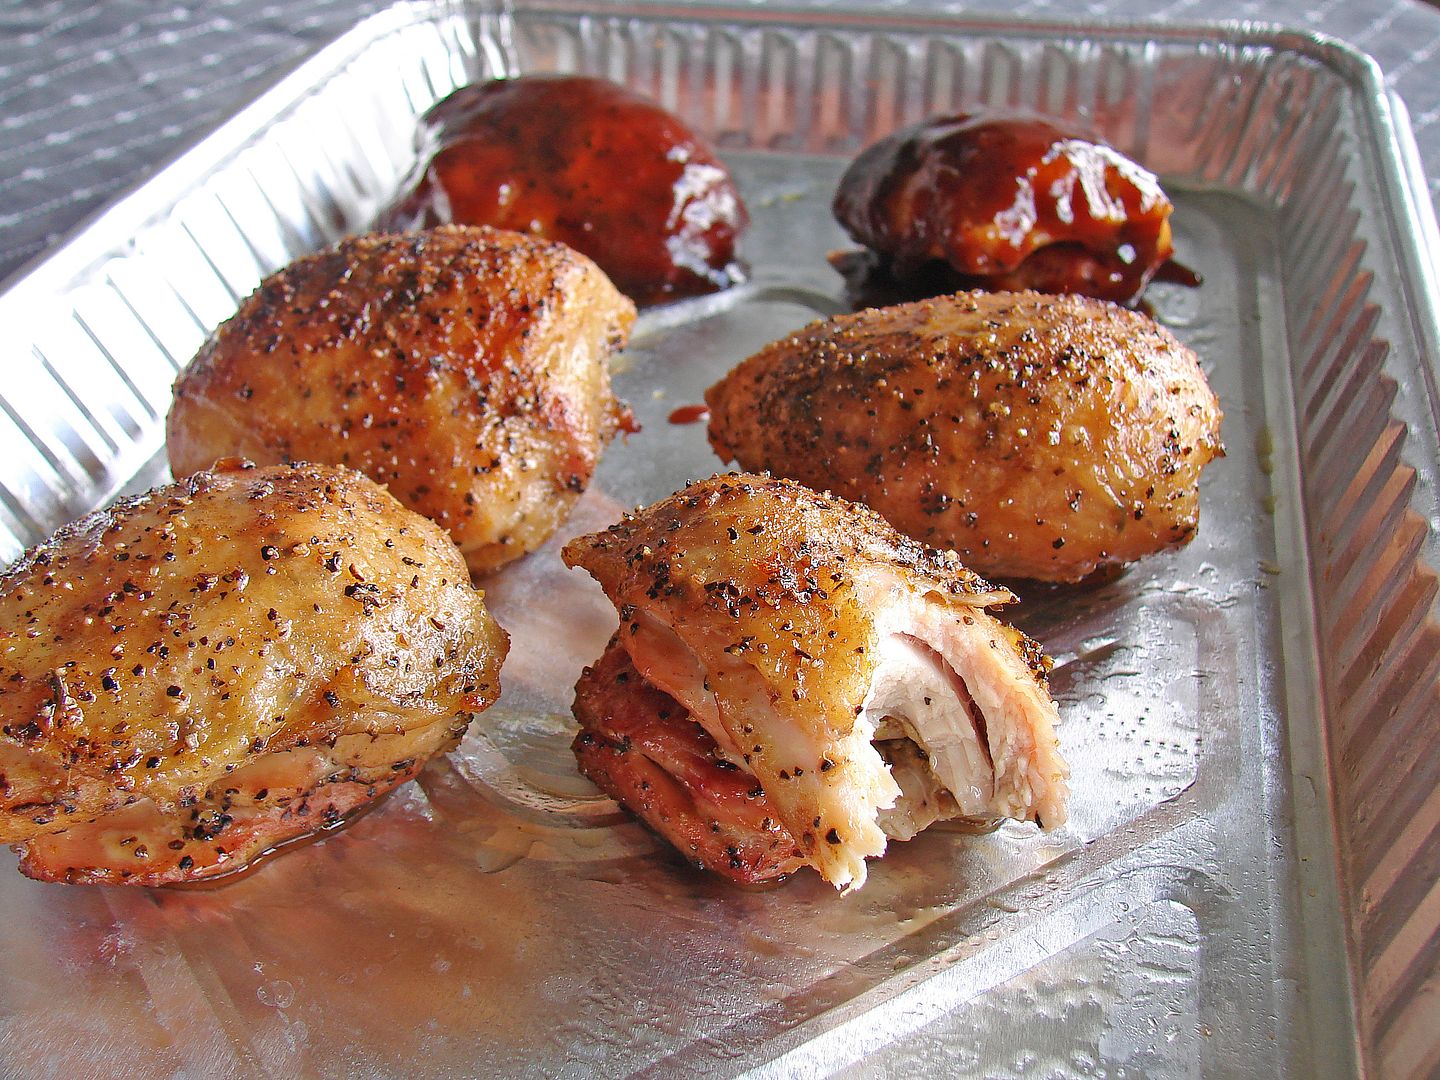
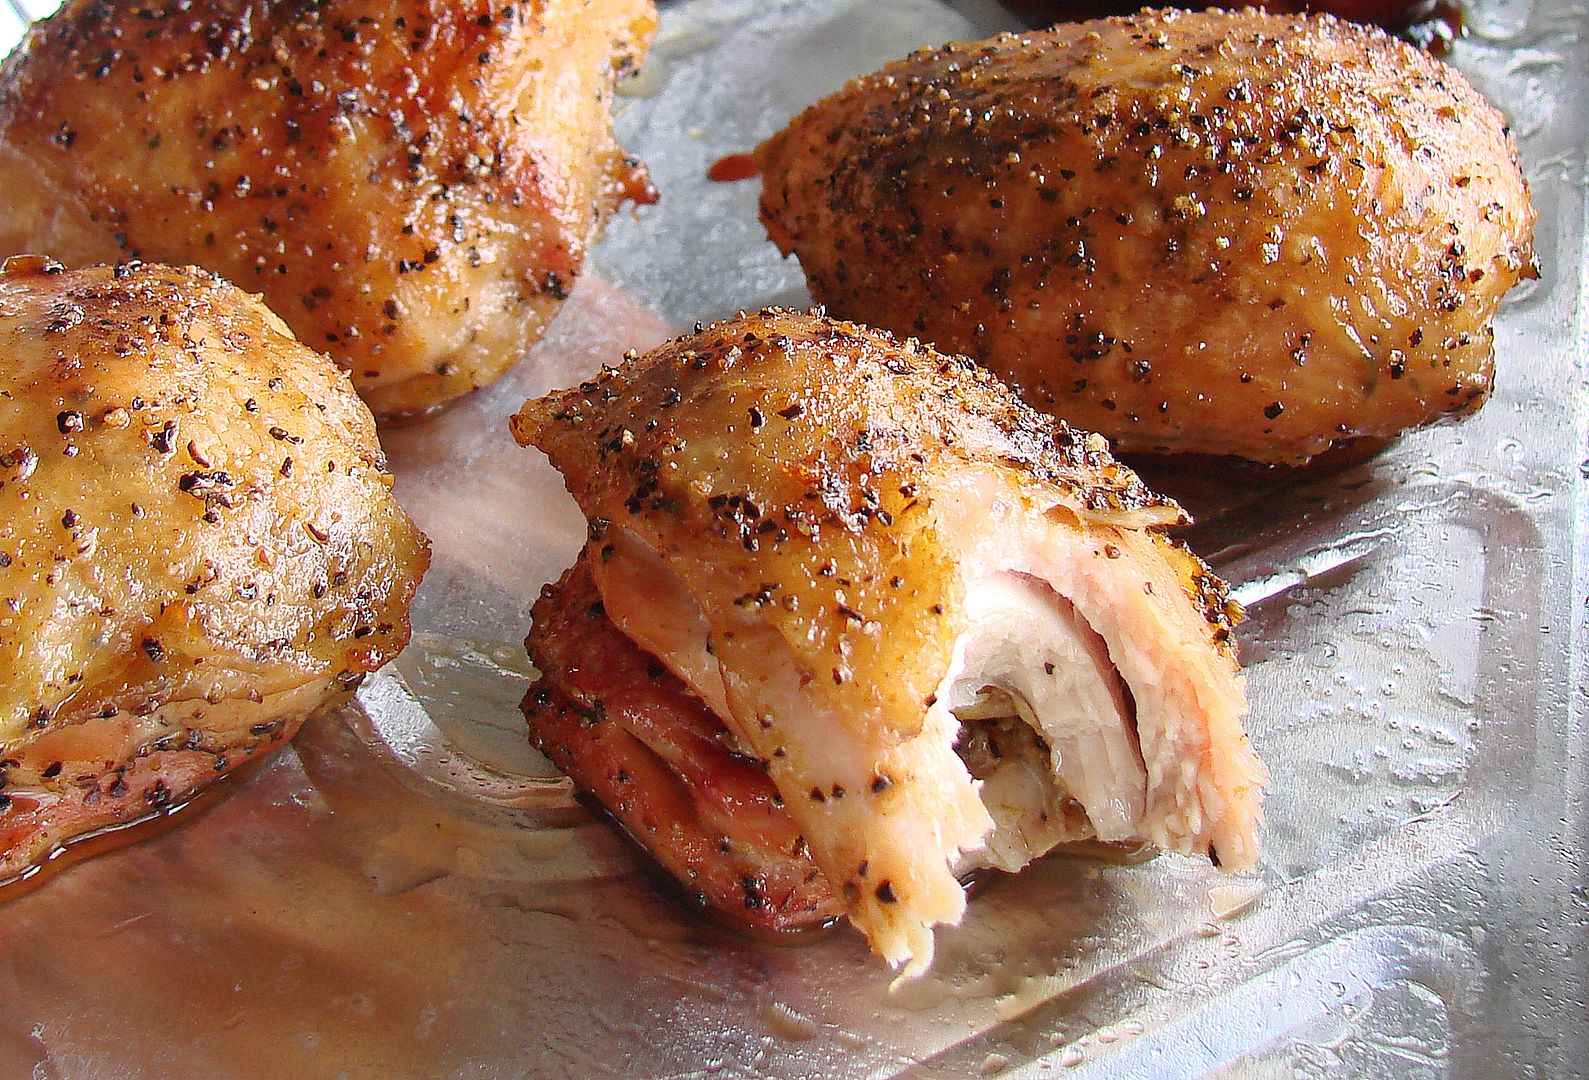
I leave the skin up most of the time, but do turn it if needed to get some color or to crisp up. it's kind of a case-by-case thing. Some skin performs better than others do. It's not always necessary to turn chicken. Look at these photos or the crown leg cook and the bird in the roasting pan, they picked up nice color on their own.
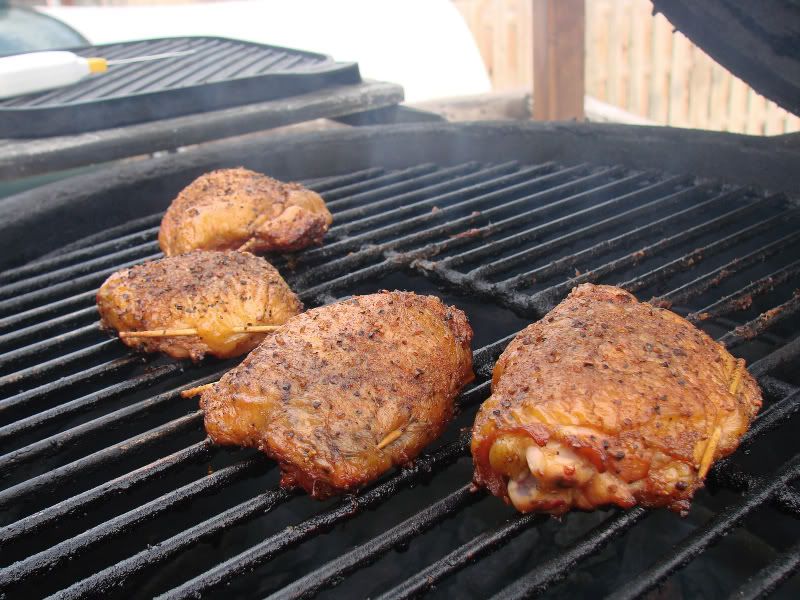
These quarters were probably turned once. Same with the halves cooking with the sausages and the thighs. Notice the toothpicks in the skin on the quarters and thighs? I forgot them in the breast in the second picture (I had lifted up the skin and stuffed it with basil leaves) and the skin shrunk up a hair. they help in your presentation.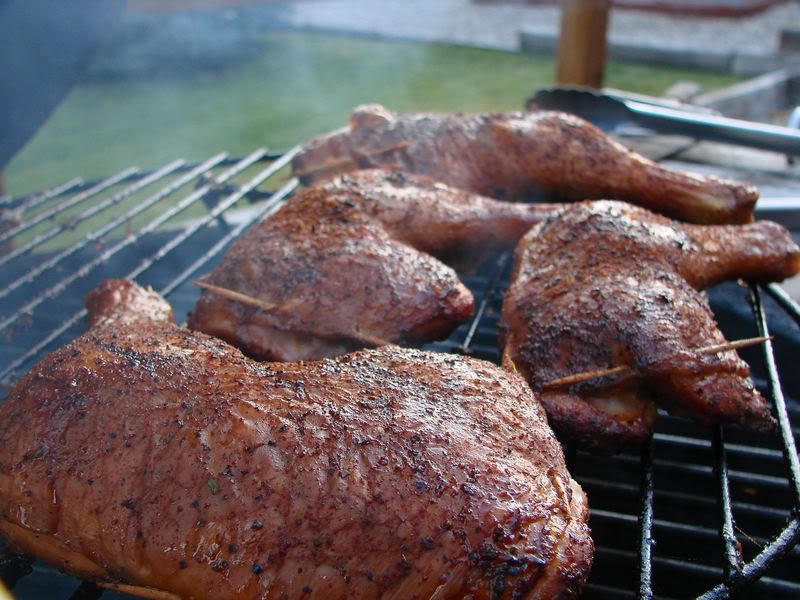

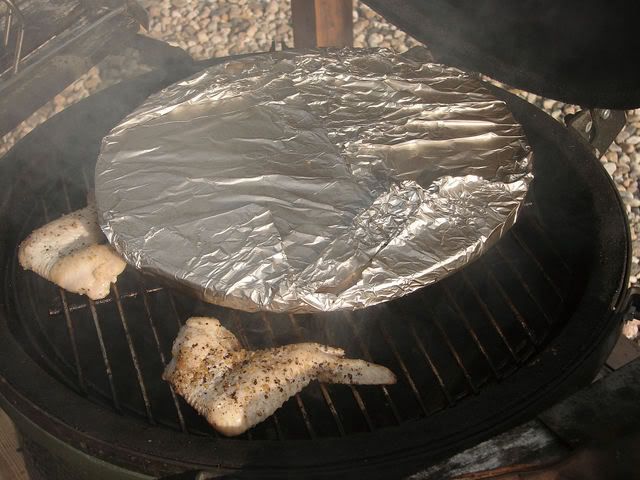
In this cook I was using a pizza stone as a weight to make pressed chicken. I put the dark half on first, then the breast a few minutes later.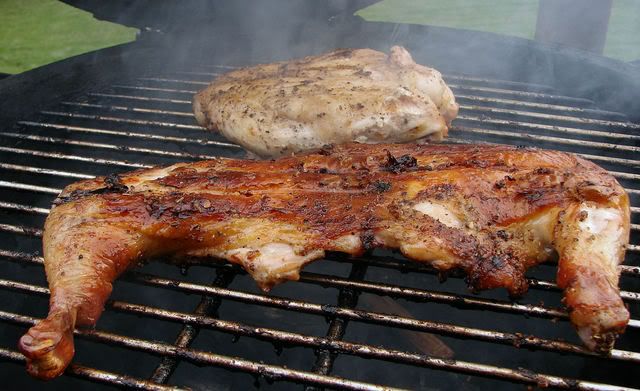
I cook a lot of chicken with a raised direct set-up and a medium hot fire, around 250° or 300°. These thighs were de-boned and I scrapped the fat off the skin. This method is becoming one of my favorite chicken cooks.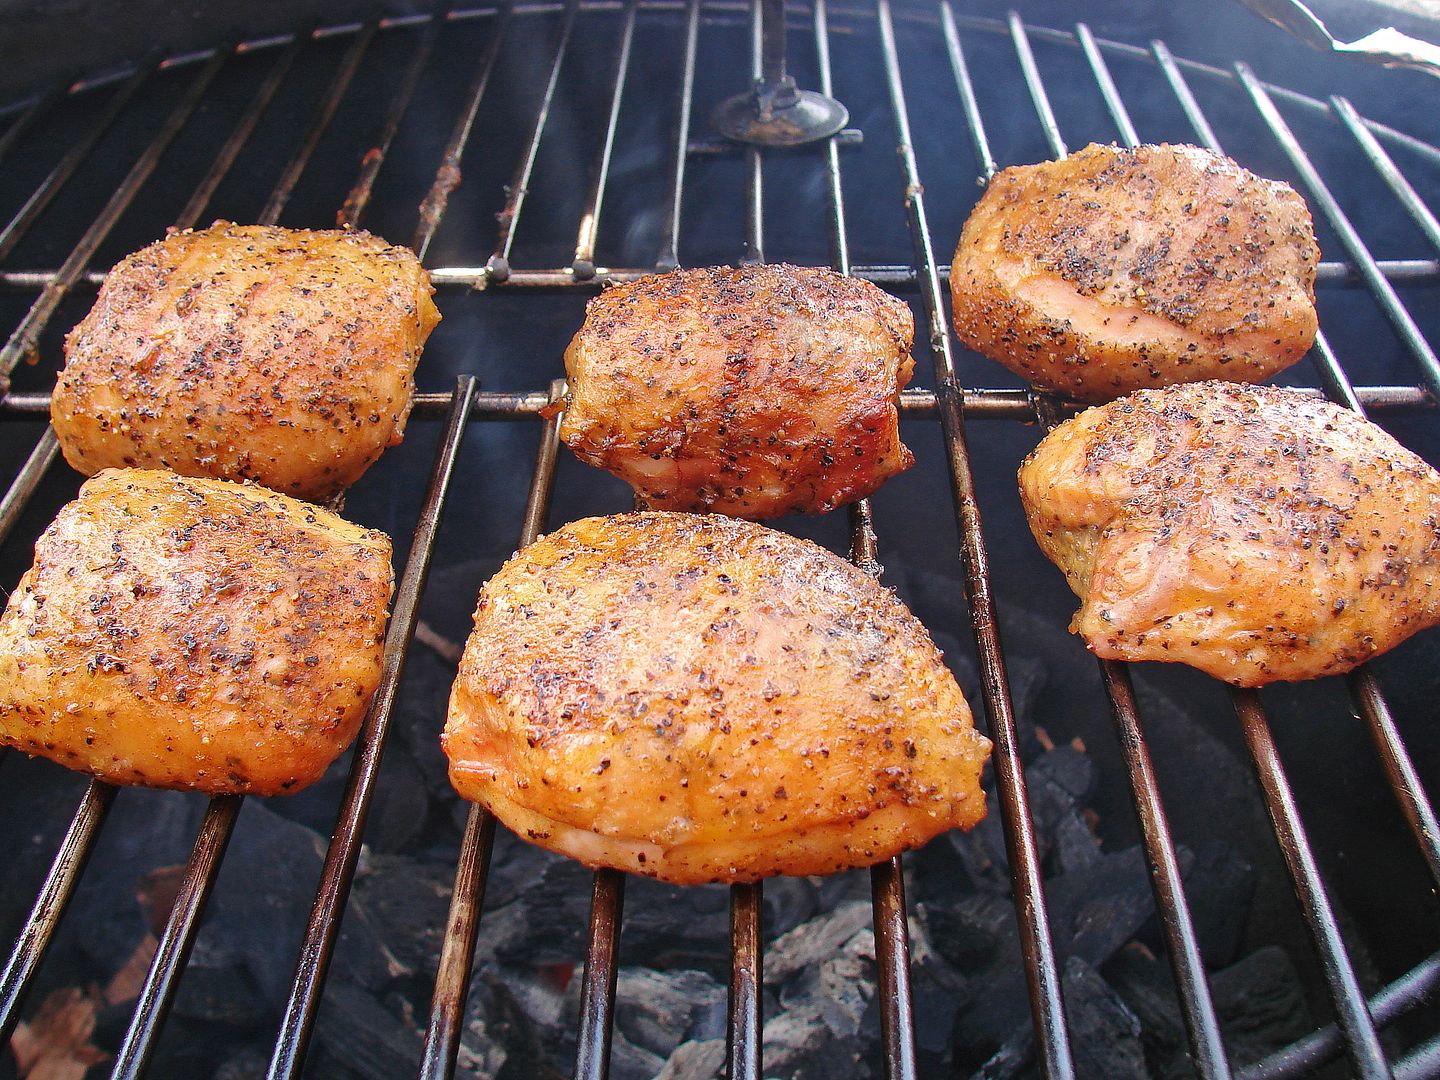
 Happy Trails~thirdeye~Barbecue is not rocket surgery
 -

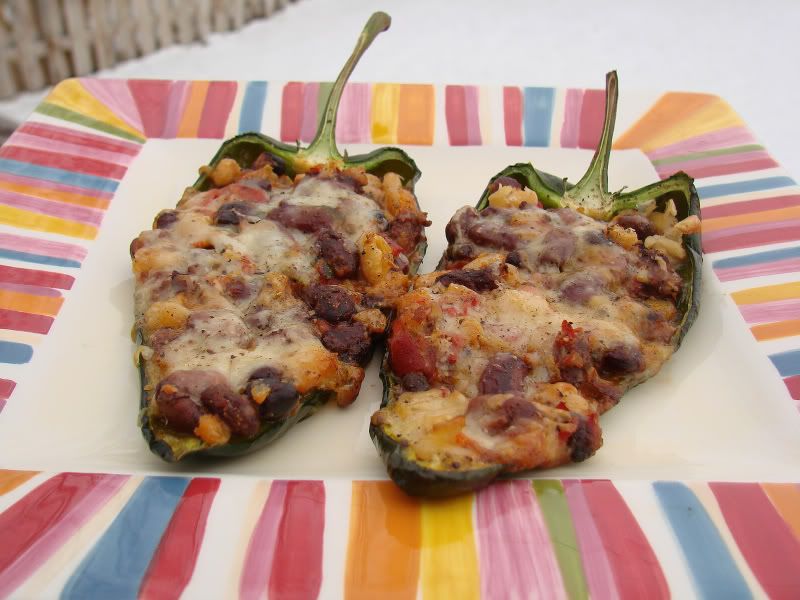
Those are Poblano Rellenos, a recipe from S. Rachlain which can be tweaked slightly depending on what you have on hand. It came to the forum by way of JM3 and fishlessman. It's available on Raichlen's Barbecue University site so I see no problem in posting it here for you. Here are some of my thoughts...
Use caution when making the filling, you don't want it too thick.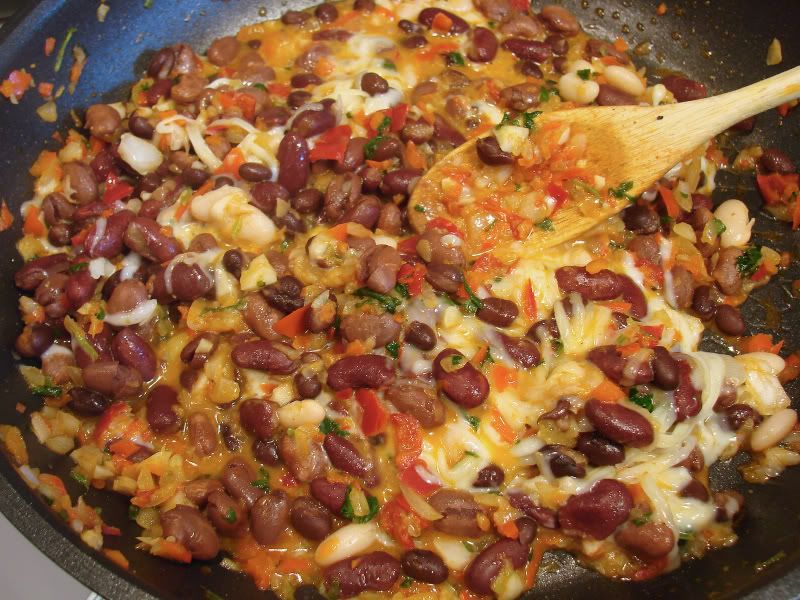
Don't fill the peppers too full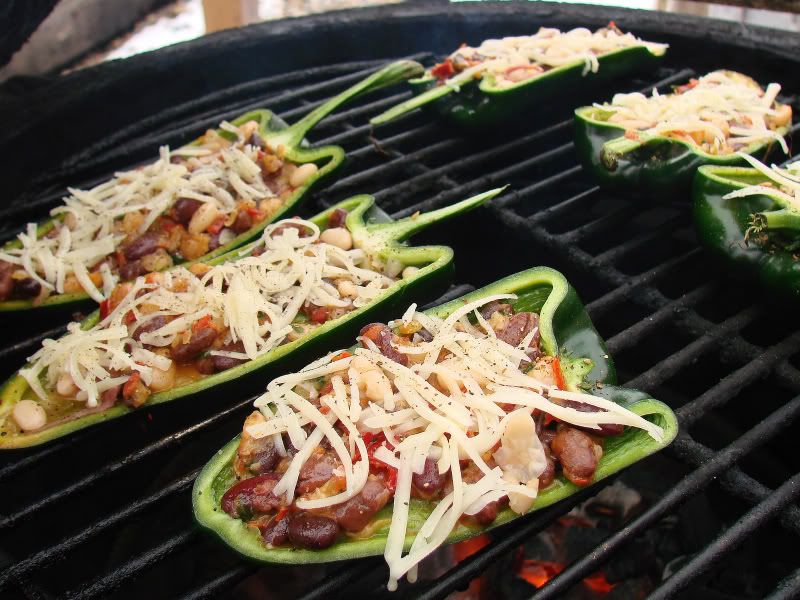
Poblano Relleno
Steve Raichlen
• 6 large poblano peppers or green bell peppers
• 2 cans (16 ounces each) low-sodium pinto beans or black beans
• 3 tablespoons extra-virgin olive oil, plus 1 tablespoon for drizzling
• 1 medium onion, finely chopped
• 2 cloves garlic, finely chopped
• 2 jalapeño peppers, seeded and finely chopped (for a hotter filling, leave the seeds in)
• 1/2 red bell pepper, finely chopped
• 1/4 fresh cilantro, chopped
• 1/4 cup hulled pumpkin seeds (optional; see Note)
• 1 teaspoon ground cumin
• 1 to 3 teaspoons of your favorite hot sauce, or more to taste
• 3 cups (about 12 ounces) pepper Jack, Monterey Jack, or white Cheddar cheese, coarsely grated
• Coarse salt (kosher or sea) and freshly ground black pepper
• 1 cup wood chips or chunks (preferably mesquite), soaked for 1 hour in water to cover, then drained
1 If using poblano peppers, cut them in half lengthwise, and scrape out the seeds. If using bell peppers, cut off the tops about 1/2 inch below the stems. Scrape out the veins and seeds, taking care not to puncture the bottoms.
2 Drain the beans, place them in a colander, rinse under cold running water, then drain again.
3 Heat 2 tablespoons of the olive oil in a nonstick skillet over medium heat. Add the onion, garlic, jalapeños, red bell pepper, cilantro, pumpkin seeds, if using, and cumin and cook until golden brown, about 4 minutes. Stir in the beans, hot sauce, and 2 cups of the cheese. Taste for seasoning, adding salt, pepper, and/or more hot sauce as necessary. Spoon the bean mixture into the hollowed-out peppers. Sprinkle the remaining cheese on top, dividing it evenly among the peppers. Drizzle the remaining 1 tablespoon of olive oil over the cheese.
4 Set up the grill for indirect grilling and preheat to medium. If using a gas grill, place all of the wood chips or chunks in the smoker box or in a smoker pouch and preheat on high until you see smoke, then reduce heat to medium. If using a charcoal grill, preheat it to medium, then toss all of the wood chips or chunks on the coals.
5 When ready to cook, place the peppers in the center of the hot grate, away from the heat. Cover the grill and cook the peppers until they are tender and the cheese is browned and bubbling, 30 to 40 minutes. Use a spatula to transfer the peppers to a platter or plates and serve at once.
Servings: 6
Recipe Source
Author: Steven RaichlenHappy Trails~thirdeye~Barbecue is not rocket surgery -
about how long did they take to cook to 165-180? Looks like your fire was about 325?
-
Thanks a ton!!! I've roasted and peeled a lot of poblanos. I'm assuming that the long roast pretty well takes care of the skin? Also, the recipe calls out indirect, yet in your pics it seems they are cooking direct? Probably just exceptional cooking skill of the chef!
-
Right, the cooking does lightly blister the skin, and it cooks tender. When I do cook them direct, it's a raised direct. When I have used an indirect set-up I will go a little higher on the pit temp.Happy Trails~thirdeye~Barbecue is not rocket surgery


Categories
- All Categories
- 184K EggHead Forum
- 15.8K Forum List
- 459 EGGtoberfest
- 1.9K Forum Feedback
- 10.4K Off Topic
- 2.2K EGG Table Forum
- 1 Rules & Disclaimer
- 9K Cookbook
- 13 Valentines Day
- 93 Holiday Recipes
- 224 Appetizers
- 520 Baking
- 2.5K Beef
- 88 Desserts
- 167 Lamb
- 2.4K Pork
- 1.5K Poultry
- 33 Salads and Dressings
- 324 Sauces, Rubs, Marinades
- 548 Seafood
- 175 Sides
- 122 Soups, Stews, Chilis
- 44 Vegetarian
- 102 Vegetables
- 313 Health
- 292 Weight Loss Forum