Welcome to the EGGhead Forum - a great place to visit and packed with tips and EGGspert advice! You can also join the conversation and get more information and amazing kamado recipes by following Big Green Egg to Experience our World of Flavor™ at:
Want to see how the EGG is made? Click to Watch
Facebook | Twitter | Instagram | Pinterest | Youtube | Vimeo
Share your photos by tagging us and using the hashtag #BigGreenEgg.
Share your photos by tagging us and using the hashtag #BigGreenEgg.
Want to see how the EGG is made? Click to Watch
Question on homemade LARGE tables need some help

Dave Shady
Posts: 247
I got my table 85% done, All that is left if the top
I used the measurements from the BGE site but intentionaly stretched the dimension between the bottom table and the top. Egg called for 15" I stretched it to 17". The plan calls for a 21" cut out.
17" is without the paver under the egg yet. But so was the BGE 15" dimension.
Question has anyone built one to egg specs and how much play is in that 21" cut out? DO i need to go a lil bit larger since my egg will sit a little lower to the band than it would of before. or is the 21" pleanty of ROOM for choking up on the egg 2" more than standard.
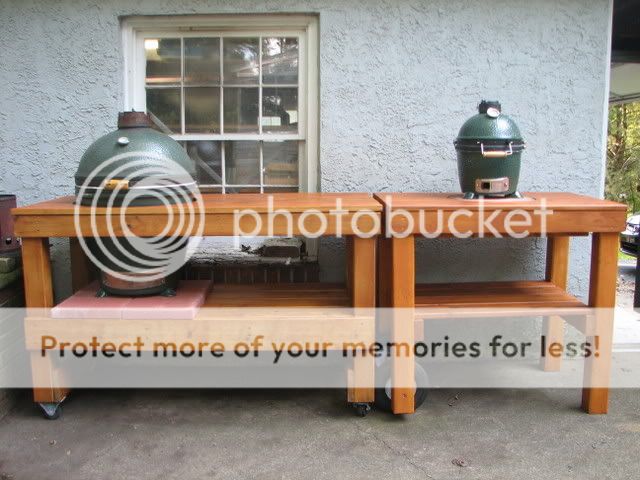
I wanted more space on the shelf. Used all cedar and 4x4 cedar for the posts. Its lookin great esp with the 10" air ride tires :woohoo:
Any help on this would be great, kind of hard to measure the egg but I also think that If i measure up from the bottom to the 16" height I could get an close guestimate on the diam of the egg at that point.
Any help appreciated, I dont have an egg in a table to look at and dont want to screw it up.
I used the measurements from the BGE site but intentionaly stretched the dimension between the bottom table and the top. Egg called for 15" I stretched it to 17". The plan calls for a 21" cut out.
17" is without the paver under the egg yet. But so was the BGE 15" dimension.
Question has anyone built one to egg specs and how much play is in that 21" cut out? DO i need to go a lil bit larger since my egg will sit a little lower to the band than it would of before. or is the 21" pleanty of ROOM for choking up on the egg 2" more than standard.
I wanted more space on the shelf. Used all cedar and 4x4 cedar for the posts. Its lookin great esp with the 10" air ride tires :woohoo:
Any help on this would be great, kind of hard to measure the egg but I also think that If i measure up from the bottom to the 16" height I could get an close guestimate on the diam of the egg at that point.
Any help appreciated, I dont have an egg in a table to look at and dont want to screw it up.
Comments
-
I did a similar build.Only thing is my hindge rubbed the table top.I remedied that with an extra paver under the base of the egg.I wanted more storage space under the tabletop.It turned out OK but if I were building another I would severely modify the plans.Too inebriated to go into details now
 Research tables on the search forum before you commit!!!
 ")

-
We used the exact specs of the Whiz table. Though i messed up the measurement of the hinge to the base, the hinge rubbed. I put in one more fire brick and it worked great, since it gave me room for my stoker cables.
You want some play, and the egg gets pretty hot when doing some cooks.
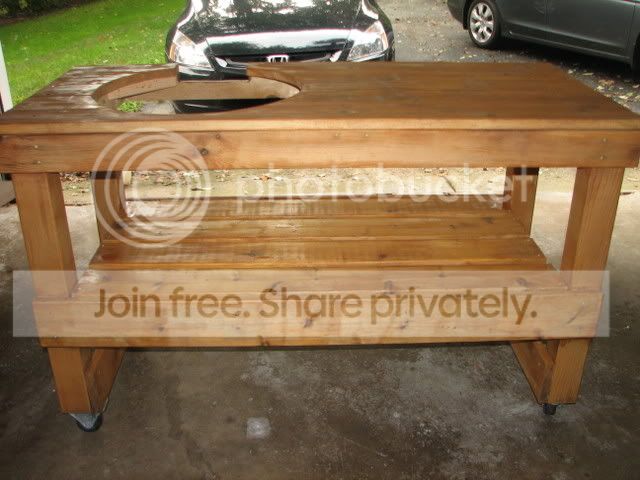
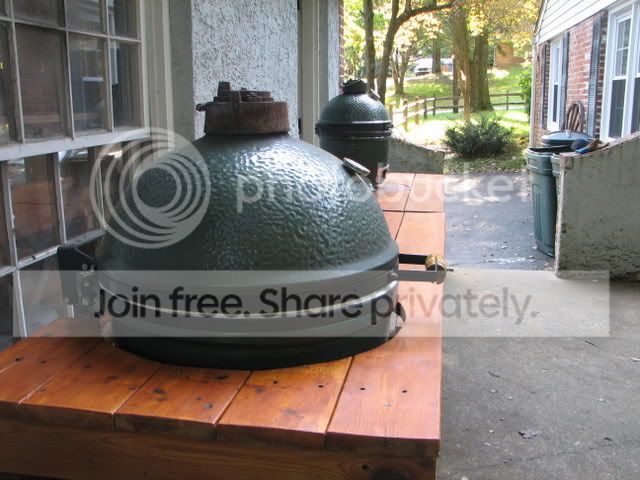
Here is my table...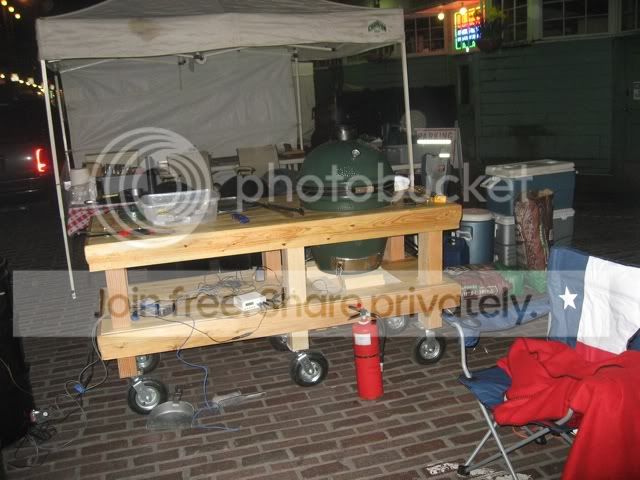
-
From what I can recall, I built mine pretty much to the same specs as the one I measured in the showroom, & as for the cut-out, I just put the dome on the table, traced it, then added an inch & cut it out. In the end, it worked out nice, with or without the paver, here are some pictures I took during the latest re-finishing project:


 happy in the hut
West Chester Pennsylvania -
Like your large wheels for the mini !! Need all the help you can to lug that small guy around!
-
You need to use the directions as a rough guide. Get the measurement from the bottom of the egg base up to the top of the base. Add to that the thickness of your paver stone. The base of the egg is widest at the top. If your egg will sit in the table so that the top of the base is a few inches above the table, 21 inches is fine. It sounds to me like the top of your egg base will sit about even with the table top. If so you will need a bigger hole than 21 inches. If the hinge on the egg is still made the same way, when you open the egg the hinge goes doen a bit. Make sure you take that into consideration, or you will have to add another paver stone, or chop a piece off the table.
-
We posting table porn?
-
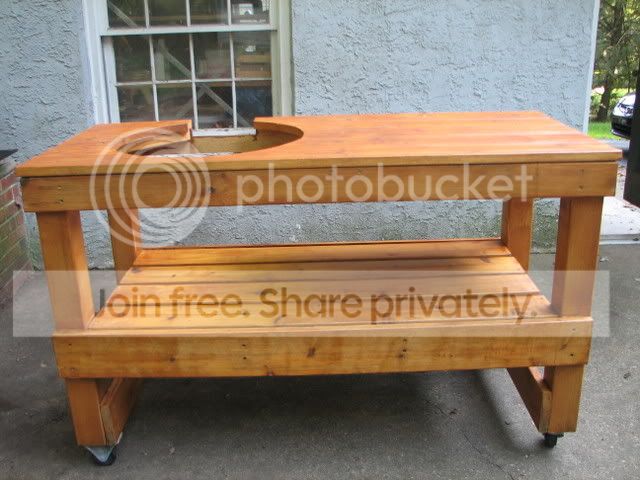
thanks everyone got it fitted today, with one paver and the 3 feet it clears the table top by about 3/8" - 1/2" MAX.... BUT it fit, I have about 7/16-3/4" of air around the egg between it and the table. I got the cut out well reinforced from underneath also. Love the BIG WHEELS for sure and its nice. Now once our DECK gets built in 2 weeks it will be movin on up. and have a nice metal roof over the entire deck to keep it out of the elements.


Got a ventilated cover on the way tomorrow for it. Now to get the DECK DONE!!!! -
Good looking rig.
") Good luck in the remodel.
Good luck in the remodel. -
Nice table.
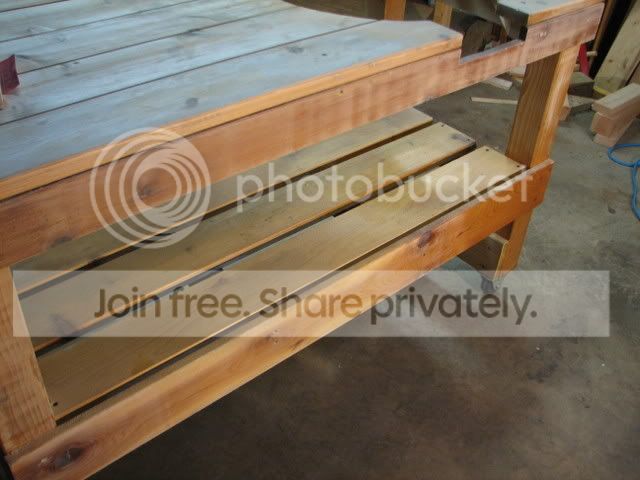
One curious observation: Looking at the end grains of the table top's five planks, the front and back pieces have bark side up whereas the three pieces between them are bark side down, I was wondering about the potential 'cupping' and water pooling on the middle pieces over time, can any wood experts chime in please?
Garycanuckland -
The reason it was that way was better side of the board. so some were reversed.
This table will not be left uncovered and the new deck will be covered with a full roof so it wont even get wet.
I also added (overdid) the bracing underneath and boards are all screwed down with 2 screws on every joist that they crossed. If they do I can always remove the board and replace. that was the reason that I did not use any glue on the Deck boards used for the surfaces. the rest of the cart was clued and screwed.


Categories
- All Categories
- 184.1K EggHead Forum
- 15.8K Forum List
- 460 EGGtoberfest
- 1.9K Forum Feedback
- 10.4K Off Topic
- 2.2K EGG Table Forum
- 1 Rules & Disclaimer
- 9K Cookbook
- 13 Valentines Day
- 93 Holiday Recipes
- 224 Appetizers
- 520 Baking
- 2.5K Beef
- 88 Desserts
- 167 Lamb
- 2.4K Pork
- 1.5K Poultry
- 33 Salads and Dressings
- 324 Sauces, Rubs, Marinades
- 548 Seafood
- 175 Sides
- 122 Soups, Stews, Chilis
- 44 Vegetarian
- 102 Vegetables
- 313 Health
- 292 Weight Loss Forum