Share your photos by tagging us and using the hashtag #BigGreenEgg.
Want to see how the EGG is made? Click to Watch
No Knead Bread

http://www.eggheadforum.com/index.php?option=com_simpleboard&func=view&id=584613&catid=1
Mixed in 1/4 tsp instant yeast, 5 cups of flour and 1.5 cups spring water. So now I have this lumpy ball. It was hard to get all the flour wet. All the pictures I have seen of no knead dough is really wet.
Is the recipe short on water, or am I short on bread brains?
I beg your help!
Happy weekend!
Chris
Comments
-
Anything here help?
Bread, NY Times No Knead Bread
This is an article and recipe that was at one time posted in the NY Times. I've been making it lately and it turns out perfect every time. The only thing I changed is to increase the salt to 2t instead of 1.5t.The recipe is kind of buried in the middle of two articles. I don't know why it says it takes 1.5 hours of prep time. It actually takes only minutes of prep time, the rest is all 'resting.'Gwen
No-Knead Bread
Adapted from Jim Lahey, Sullivan Street Bakery
Time: About 1 1/2 hours plus 14 to 20 hours' rising
3 cups all-purpose or bread flour, more for dusting
1/4 tsp instant yeast
1 1/4 tsp salt
Cornmeal or wheat bran as needed.
INNOVATIONS
1 in bread baking are rare. In fact, the 6,000-year-old process hasn't changed much since Pasteur made the commercial production of standardized yeast possible in 1859. The introduction of the gas stove, the electric mixer and the food processor made the process easier, faster and more reliable.
2 I'm not counting sliced bread as a positive step, but Jim Lahey's method may be the greatest thing since.
3 This story began in late September when Mr. Lahey sent an e-mail message inviting me to attend a session of a class he was giving at Sullivan Street Bakery, which he owns, at 533 West 47th Street in Manhattan. His wording was irresistible: ''I'll be teaching a truly minimalist breadmaking technique that allows people to make excellent bread at home with very little effort. The method is surprisingly simple -- I think a 4-year-old could master it -- and the results are fantastic.''
4 I set up a time to visit Mr. Lahey, and we baked together, and the only bad news is that you cannot put your 4-year-old to work producing bread for you. The method is complicated enough that you would need a very ambitious 8-year-old. But the results are indeed fantastic.
5 Mr. Lahey's method is striking on several levels. It requires no kneading. (Repeat: none.) It uses no special ingredients, equipment or techniques. It takes very little effort.
6 It accomplishes all of this by combining a number of unusual though not unheard of features. Most notable is that you'll need about 24 hours to create a loaf; time does almost all the work. Mr. Lahey's dough uses very little yeast, a quarter teaspoon (you almost never see a recipe with less than a teaspoon), and he compensates for this tiny amount by fermenting the dough very slowly. He mixes a very wet dough, about 42 percent water, which is at the extreme high end of the range that professional bakers use to create crisp crust and large, well-structured crumb, both of which are evident in this loaf.
7 The dough is so sticky that you couldn't knead it if you wanted to. It is mixed in less than a minute, then sits in a covered bowl, undisturbed, for about 18 hours. It is then turned out onto a board for 15 minutes, quickly shaped (I mean in 30 seconds), and allowed to rise again, for a couple of hours. Then it's baked. That's it.
8 I asked Harold McGee, who is an amateur breadmaker and best known as the author of ''On Food and Cooking'' (Scribner, 2004), what he thought of this method. His response: ''It makes sense. The long, slow rise does over hours what intensive kneading does in minutes: it brings the gluten molecules into side-by-side alignment to maximize their opportunity to bind to each other and produce a strong, elastic network. The wetness of the dough is an important piece of this because the gluten molecules are more mobile in a high proportion of water, and so can move into alignment easier and faster than if the dough were stiff.''
9 That's as technical an explanation as I care to have, enough to validate what I already knew: Mr. Lahey's method is creative and smart.
10 But until this point, it's not revolutionary. Mr. McGee said he had been kneading less and less as the years have gone by, relying on time to do the work for him. Charles Van Over, author of the authoritative book on food-processor dough making, ''The Best Bread Ever'' (Broadway, 1997), long ago taught me to make a very wet dough (the food processor is great at this) and let it rise slowly. And, as Mr. Lahey himself notes, ''The Egyptians mixed their batches of dough with a hoe.''
11 What makes Mr. Lahey's process revolutionary is the resulting combination of great crumb, lightness, incredible flavor -- long fermentation gives you that -- and an enviable, crackling crust, the feature of bread that most frequently separates the amateurs from the pros. My bread has often had thick, hard crusts, not at all bad, but not the kind that shatter when you bite into them. Producing those has been a bane of the amateur for years, because it requires getting moisture onto the bread as the crust develops.
12 To get that kind of a crust, professionals use steam-injected ovens. At home I have tried brushing the dough with water (a hassle and ineffective); spraying it (almost as ineffective and requiring frequent attention); throwing ice cubes on the floor of the oven (not good for the oven, and not far from ineffective); and filling a pot with stones and preheating it, then pouring boiling water over the stones to create a wet sauna (quite effective but dangerous, physically challenging and space-consuming). I was discouraged from using La Cloche, a covered stoneware dish, by my long-standing disinclination to crowd my kitchen with inessential items that accomplish only one chore. I was discouraged from buying a $5,000 steam-injected oven by its price.
13 It turns out there's no need for any of this. Mr. Lahey solves the problem by putting the dough in a preheated covered pot -- a common one, a heavy one, but nothing fancy. For one loaf he used an old Le Creuset enameled cast iron pot; for another, a heavy ceramic pot. (I have used cast iron with great success.) By starting this very wet dough in a hot, covered pot, Mr. Lahey lets the crust develop in a moist, enclosed environment. The pot is in effect the oven, and that oven has plenty of steam in it. Once uncovered, a half-hour later, the crust has time to harden and brown, still in the pot, and the bread is done. (Fear not. The dough does not stick to the pot any more than it would to a preheated bread stone.)
14 The entire process is incredibly simple, and, in the three weeks I've been using it, absolutely reliable. Though professional bakers work with consistent flour, water, yeast and temperatures, and measure by weight, we amateurs have mostly inconsistent ingredients and measure by volume, which can make things unpredictable. Mr. Lahey thinks imprecision isn't much of a handicap and, indeed, his method seems to iron out the wrinkles: ''I encourage a somewhat careless approach,'' he says, ''and figure this may even be a disappointment to those who expect something more difficult. The proof is in the loaf.''
15 The loaf is incredible, a fine-bakery quality, European-style boule that is produced more easily than by any other technique I've used, and will blow your mind. (It may yet change the industry. Mr. Lahey is experimenting with using it on a large scale, but although it requires far less electricity than conventional baking, it takes a lot of space and time.) It is best made with bread flour, but all-purpose flour works fine. (I've played with whole-wheat and rye flours, too; the results are fantastic.)
16 You or your 8-year-old may hit this perfectly on the first try, or you may not. Judgment is involved; with practice you'll get it right every time.
17 The baking itself is virtually foolproof, so the most important aspect is patience. Long, slow fermentation is critical. Mr. Lahey puts the time at 12 to 18 hours, but I have had much greater success at the longer time. If you are in a hurry, more yeast (three-eighths of a teaspoon) or a warmer room temperature may move things along, but really, once you're waiting 12 hours why not wait 18? Similarly, Mr. Lahey's second rising can take as little as an hour, but two hours, or even a little longer, works better.
18 Although even my ''failed'' loaves were as good as those from most bakeries, to make the loaf really sensational requires a bit of a commitment. But with just a little patience, you will be rewarded with the best no-work bread you have ever made. And that's no small thing.
Bread Preparation:
1 In a large bowl combine flour, yeast and salt. Add 1 5/8 cups water, and stir until blended; dough will be shaggy and sticky. Cover bowl with plastic wrap. Let dough rest at least 12 hours, preferably about 18, at warm room temperature, about 70 degrees.
2 Dough is ready when its surface is dotted with bubbles. Lightly flour a work surface and place dough on it; sprinkle it with a little more flour and fold it over on itself once or twice. Cover loosely with plastic wrap and let rest about 15 minutes.
3 Using just enough flour to keep dough from sticking to work surface or to your fingers, gently and quickly shape dough into a ball. Generously coat a cotton towel (not terry cloth) with flour, wheat bran or cornmeal; put dough seam side down on towel and dust with more flour, bran or cornmeal. Cover with another cotton towel and let rise for about 2 hours. When it is ready, dough will be more than double in size and will not readily spring back when poked with a finger.
4 At least a half-hour before dough is ready, heat oven to 450 degrees. Put a 6- to 8-quart heavy covered pot (cast iron, enamel, Pyrex or ceramic) in oven as it heats. When dough is ready, carefully remove pot from oven. Slide your hand under towel and turn dough over into pot, seam side up; it may look like a mess, but that is O.K. Shake pan once or twice if dough is unevenly distributed; it will straighten out as it bakes. Cover with lid and bake 30 minutes, then remove lid and bake another 15 to 30 minutes, until loaf is beautifully browned. Cool on a rack.
5 Yield: One 1 1/2-pound loaf.
THE MINIMALIST; No Kneading, but Some Fine-Tuning, By Mark Bittman, 12/06/06
1 LAST month I wrote about Jim Lahey, the owner of Sullivan Street Bakery on West 47th Street in Manhattan, and his clever way to produce a European-style boule at home. Mr. Lahey's recipe calls for very little yeast, a wet dough, long rising times and baking in a closed, preheated pot. My results with Mr. Lahey's method have been beyond satisfying.
2 Happily, so have those of most readers. In the last few weeks Jim Lahey's recipe has been translated into German, baked in Togo, discussed on more than 200 blogs and written about in other newspapers. It has changed the lives (their words, not mine) of veteran and novice bakers. It has also generated enough questions to warrant further discussion here. The topics are more or less in the order of the quantity of inquiries.
3 WEIGHT VS. VOLUME -- The original recipe contained volume measures, but for those who prefer to use weight, here are the measurements: 430 grams of flour, 345 grams of water, 1 gram of yeast and 8 grams of salt. With experience, many people will stop measuring altogether and add just enough water to make the dough almost too wet to handle.
4 SALT -- Many people, me included, felt Mr. Lahey's bread was not salty enough. Yes, you can use more salt and it won't significantly affect the rising time. I've settled at just under a tablespoon.
5 YEAST -- Instant yeast, called for in the recipe, is also called rapid-rise yeast. But you can use whatever yeast you like. Active dry yeast can be used without proofing (soaking it to make sure it's active).
6 TIMING -- About 18 hours is the preferred initial rising time. Some readers have cut this to as little as eight hours and reported little difference. I have not had much luck with shorter times, but I have gone nearly 24 hours without a problem. Room temperature will affect the rising time, and so will the temperature of the water you add (I start with tepid). Like many other people, I'm eager to see what effect warmer weather will have. But to those who have moved the rising dough around the room trying to find the 70-degree sweet spot: please stop. Any normal room temperature is fine. Just wait until you see bubbles and well-developed gluten -- the long strands that cling to the sides of the bowl when you tilt it -- before proceeding.
7 THE SECOND RISE -- Mr. Lahey originally suggested one to two hours, but two to three is more like it, in my experience. (Ambient temperatures in the summer will probably knock this time down some.) Some readers almost entirely skipped this rise, shaping the dough after the first rise and letting it rest while the pot and oven preheat; this is worth trying, of course.
8 OTHER FLOURS -- Up to 30 percent whole-grain flour works consistently and well, and 50 percent whole-wheat is also excellent. At least one reader used 100 percent whole-wheat and reported ''great crust but somewhat inferior crumb,'' which sounds promising. I've kept rye, which is delicious but notoriously impossible to get to rise, to about 20 percent. There is room to experiment.
9 FLAVORINGS -- The best time to add caraway seeds, chopped olives, onions, cheese, walnuts, raisins or whatever other traditional bread flavorings you like is after you've mixed the dough. But it's not the only time; you can fold in ingredients before the second rising.
10 OTHER SHAPES -- Baguettes in fish steamers, rolls in muffin tins or classic loaves in loaf pans: if you can imagine it, and stay roughly within the pattern, it will work.
11 COVERING BETWEEN RISES -- A Silpat mat under the dough is a clever idea (not mine). Plastic wrap can be used as a top layer in place of a second towel.
12 THE POT -- The size matters, but not much. I have settled on a smaller pot than Mr. Lahey has, about three or four quarts. This produces a higher loaf, which many people prefer -- again, me included. I'm using cast iron. Readers have reported success with just about every available material. Note that the lid handles on Le Creuset pots can only withstand temperatures up to 400 degrees. So avoid using them, or remove the handle first.
13 BAKING -- You can increase the initial temperature to 500 degrees for more rapid browning, but be careful; I scorched a loaf containing whole-wheat flour by doing this. Yes, you can reduce the length of time the pot is covered to 20 minutes from 30, and then increase the time the loaf bakes uncovered. Most people have had a good experience baking for an additional 30 minutes once the pot is uncovered.
14 As these answers demonstrate, almost everything about Mr. Lahey's bread is flexible, within limits. As we experiment, we will have failures. (Like the time I stopped adding flour because the phone rang, and didn't realize it until 18 hours later. Even this, however, was reparable). This method is going to have people experimenting, and largely succeeding, until something better comes along. It may be quite a while.
Recipe Type
Bread
Recipe Source
Source: BGE Forum, Dimplesmom, 2007/06/10
THE MINIMALIST; The Secret of Great Bread: Let Time Do the Work
By MARK BITTMAN -
I think you need more water. You seem to be heavy on flour. Maybe yours was a bit packed when you measured it out?
My recipe calls for 6 cups flour and 2.5 cups of water. -
hey chris i am not sure about your recepie??
i have never tried it... the one i use has always worked and brock posted it originally (at least in my mind)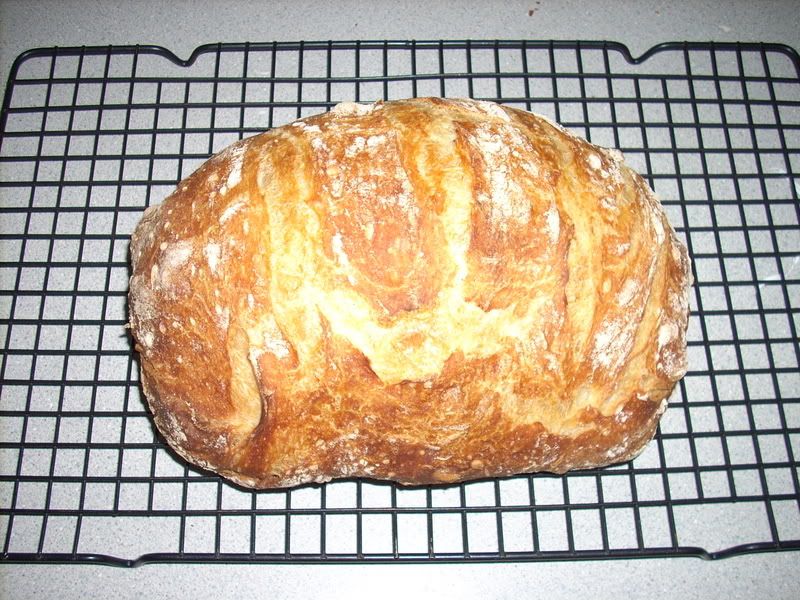
here is the recepie and i am with fidel you need more water and yeast
Bread, No Knead Brock from just across.........
OK -- Here goes! This is a no-knead recipe. Very little "hands-on" time... maybe a total of ten minutes handling ingredients.
1 Simply dump into a bowl and quickly mix together
2 > 3 Cups all purpose flour
3 > 1/2 tsp yeast
4 > 1-1/2 tsp salt [I use sea salt]
5 Then just dump in 1-1/2 cups of good tasting water
6 > In about 20 - 30 seconds, just squish the water into the flour... don't worry about "under mixing." It will hydrate on its own.
7 Cover with plastic, and let sit on the counter 12+ hours.
8 < The longer it sits, the more taste it will develop
9 The next day ---
10 Flop the gooey mess onto a well floured countertop.
11 >It will be really sticky, and will seem like it is too wet. It isn't!
12 >Use flour liberally on your hands, and "powder" the dough as needed so you don't end up wearing it!
13 Tri-fold the mess as best you can just twice!
14 < Work the dough a bit with your fingers to de-gas the biggest bubbles. Unlike traditional bread making, don't overwork this section. You can do this in maybe 15 seconds at the most.
15 < Leave some gas bubbles in the dough.
16 As best you can with the gooey mess, keep your hands well floured, roll into a ball and place the dough into a lightly oiled [EVOO] bowl.
17 Cover with a towel, and walk away!
18 < To this point, your total contact time with ingredients is maybe a minute, include measuring the flour, yada-yada.
19 < Just walk away, Jose! -- For two hours.
20 Preheat your oven [Egg] to 450F, with the dutch oven in it
21 Turn the dough out on the counter again, gently de-gassing.
22 < Tri-fold twice!
23 < Then shape the dough into an appropriately long "log."
24 < Again, this is a fast-'n-furious step, taking less than a minute.
25 < When the "log" is formed, let it rest for about 10 minutes.
26 Quickly, toss the "log" into the dutch oven, that has been in your Egg/oven for 30 min @ 450F
27 < The extremely wet dough [superhydrated] will steam -- but the steam can't escape the dutch oven easily... this is what makes that crispy, yummy crust on the bread!
28 < BTW -- The bread will not stick to the baking pot. < Don't grease the oven or anything. Just use it.
29 After 30 minutes, take the lid off the cooker, and continue to bake for 20 more minutes.
30 Viola! The deed is done!
31 < Remove the dutch oven from the Egg/oven
32 < Turn your Italian loaf out on to a rack to cool at least 30 min. before slicing. The inside of a loaf of any bread needs this rest time before slicing, or the inside of the bread can turn out "gummy."
33 Enjoy the best Italian bread you've ever had.
Recipe Type
Bread
Cooking Tips
if you want you can grate some cheese into it just do it when you do the first turn out tb 2008/08/26
Recipe Source
Author: Broc just across………………………………………………………………………………………………………
Source: BGE Forum 2008-01-17happy eggin
TB
Anderson S.C.
"Life is too short to be diplomatic. A man's friends shouldn't mind what he does or says- and those who are not his friends, well, the hell with them. They don't count."
Tyrus Raymond Cobb
-
I noticed they say some people just add water until it is almost too wet too handle. Learning a lot ready. Always thought baking was an exact measurement science, but starting to see it is also a "feel" thing.
Thanks Richard.
Chris -
That explains a lot. Thanks Rod!
I have lots of flour, so gonna try again!
Chris -
Geeze, I am glad to see you know how to post again!
-
hey todd have you seen my finger? :blink:
happy eggin
TB
Anderson S.C.
"Life is too short to be diplomatic. A man's friends shouldn't mind what he does or says- and those who are not his friends, well, the hell with them. They don't count."
Tyrus Raymond Cobb
-
Aw man, Terry. If you can do it, I can do it. I'm inspired ;-) hehe.
Thanks for that. Back up to the kitchen!
Chris -
When you nail it I have a version that uses about 1/2 whole wheat flour that makes a better bread IMO.
It was originally posted by TRex a year or so ago. -
if you have lots of flour throw yours out and try brocks!!!!
it is spot on right in fact i was told by vaidala1 to throw cheese in there before the first knead and i did and it turned out wonderful the whole family loves it.. (you did not meet them in the parking lot :( ) but trust me they are very picky :laugh:
although watch out for egret he told me "no knead is for people who do not know how to make bread" kinda hurt my feelings but he is kinda right so since then i have been trying my hand at others but if i have to make bread for people i will always go back to brock's way and everyone loves it
 ")
hope i have helped you as much as you have helped me over the times
happy eggin
TB
Anderson S.C.
"Life is too short to be diplomatic. A man's friends shouldn't mind what he does or says- and those who are not his friends, well, the hell with them. They don't count."
Tyrus Raymond Cobb
-
No, you'll have stand up and take it out! :pinch:
-
you @ home?
happy eggin
TB
Anderson S.C.
"Life is too short to be diplomatic. A man's friends shouldn't mind what he does or says- and those who are not his friends, well, the hell with them. They don't count."
Tyrus Raymond Cobb
-
Yeah, you want me to call this time?
-
Just tried your amounts. It still looks like a lumpy mess, but definitely wetter, and too wet to handle. I have the dry lumpy ball and the wet lumpy ball right next to each other, covered in plastic. Hope they look better in the mornin!
Thanks again, and the worst I could do from this experience is learn sumthin.
beers brutha.
Chris -
I remember seeing TRex's. That's one of the ones I printed out that went missing! LOL.
Whole wheat. Semolina. Hamster flour, I don't care. I just want to be able to make a good loaf of bread at will. Thanks a bunch for your help mang! Pretty soon I'll be able to crank out baguettes and sourdough like freakin wonder bread! Hee.
Chris -
-
Yes!!!
It looks just like the lumpy mess in that picture.
Printing this out now. Thank you sir!
Chris -
Yep -- more water.
Since my original posting, I have added an extra 1/2 tsp of salt...
Also, I now want a more lasting bread [not quite so much like French bread, which is dried out in a day], so, the second day, before baking, I mix in an egg, an extra 1/4 tsp of dissolved yeast, and two [that's "2"!] Tbs of butter.
I also kned a bitt-- and usually have to add in just a bit flour the second day... let it rest, tri-fold, then rise before baking.
Bring your cloche or cast iron to 400F, then just throw the dough in an' let 'er rip.
==
I have also begun a variation...
In addition to the autolyse [overnight fermentation] described in the first posting, I add in 1 Cup of "day 10 friendship bread" [sourdough]...
This means that the second day, in addition to adding the egg and the butter, it will absorb more flour before being ready to bench. I do use a mixer to do this, as it makes a softer bread, better crumb. The crust doesn't seem to be affected much.
If your crust comes out too thick, too hard [a common complaint about no-knead], simply buttter the loaf as it comes out of the oven... softens the crust immeasurably.
The over rest [autolyse, fermentation] is incredibly important. I often let it sit two days in the fridge before bringing it to room temp, benching, etc.
Bring the dough to readiness by chilling for a long time -- this will deepen the flavor significantly. Notice how store-bought bread is relatively tasteless... made within just a few hours. It is the development of the yeast which offers richer flavor... takes time!
~ Best!
~ Broc -
I made a few batches of no knead, but was not impressed with either the bread or the simplicity of the technique. Stirring it all up was a pita and I'm like you and not sure the water:flour ratio was right (from Artisan Bread in 5 Min a Day). I found this link afterwards but haven't tried this tip. This person recommends dumping water into the flour and allowing it to sit for a while before stirring. The water will be absorbed and most of the mixing will be done for you. Sounds even easier and less mess. Autolyse
-
I do something similar Broc. I add a couple tablespoons of sourdough starter to my dough at the beginning. I have also let mine go an extra 24 hours before baking.
It seems to really boost the acid production and gives the bread just a little more tang. -
Hey Terry that looks awesome, I am going to have to try this one. Nothing like fresh bread off the Egg.
-
Thanks very much for your help Broc!
Looking good this morning.
Chris


Categories
- All Categories
- 184K EggHead Forum
- 15.8K Forum List
- 459 EGGtoberfest
- 1.9K Forum Feedback
- 10.4K Off Topic
- 2.2K EGG Table Forum
- 1 Rules & Disclaimer
- 9K Cookbook
- 13 Valentines Day
- 93 Holiday Recipes
- 224 Appetizers
- 520 Baking
- 2.5K Beef
- 88 Desserts
- 167 Lamb
- 2.4K Pork
- 1.5K Poultry
- 33 Salads and Dressings
- 324 Sauces, Rubs, Marinades
- 548 Seafood
- 175 Sides
- 122 Soups, Stews, Chilis
- 44 Vegetarian
- 102 Vegetables
- 313 Health
- 292 Weight Loss Forum