Welcome to the EGGhead Forum - a great place to visit and packed with tips and EGGspert advice! You can also join the conversation and get more information and amazing kamado recipes by following Big Green Egg to Experience our World of Flavor™ at:
Want to see how the EGG is made? Click to Watch
Facebook | Twitter | Instagram | Pinterest | Youtube | Vimeo
Share your photos by tagging us and using the hashtag #BigGreenEgg.
Share your photos by tagging us and using the hashtag #BigGreenEgg.
Want to see how the EGG is made? Click to Watch
Egg-Nest Design Flaw?
BBbrew
Posts: 33
I have been dismantling and re-assembling my large egg for transporation to different cook-offs and I noticed that I cant get the egg to sit in the egg-nest without it resting on the screws that hold the bottom slide vent assembly in place. This scratches the paint off of the egg-nest (minor problem) and prevents the egg from seating properly (potential BIG problem). The egg is suspended about 1/2-inch off of the bottom support cross-arms. All of the weight is supported by the sides of the egg with a good portion of the stress presumably being placed on the weakest spot (the holes where the vent screws go through the egg). I tried to re-postion it several times, but if I shift it too much one way or the other, the vent is blocked, gets squished, and wont open.[p]What gives??
Comments
-
BBBrew,
Funny, but I guess I see it in a different light. First by not resting on the cross brace at the bottom that is giving the BGE an amount of security by having the legs spread and hold by friction. Likewise when the screw head digs into the back side of the leg I think of it as acting like a small set screw to keep the egg from turning in the nest. ^oo^~
-
kat,[p]Maybe I shouldnt worry. I hadnt even noticed until recently when I have been doing a lot of egg moving. It just seems like the egg should rest on the bottom cross-bars and the weight of the egg should hold it in place. If the upright support arms were just a tiny bit further apart, the protruding screw heads would still keep it from rotating.
If it was designed properly, you would still get the added security of friction holding the egg in placed, but without excess stress being placed on the screw holes. It would also make dismantling and transportation a lot easier.
-
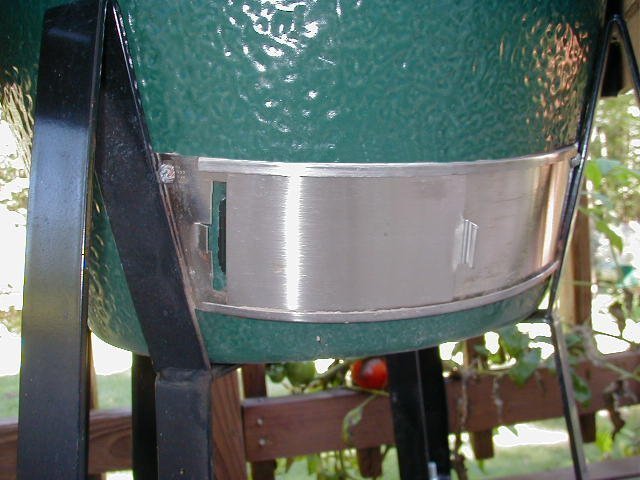
<p />BBBrew,[p]I removed the 2 offending screws and filled the holes with high temp silicone. That was 3 years ago when I put on the new SS vent. [p]Tim

-
BBBrew,all you have to do is back off the crossbrace bolt, spread the legs to clear the screws and retighten...[p]I did mine a long time ago, I agree with you, having all that stress on the bolt holes if friggin ridiculous....[p]Mop
[/b]
-
Mop,[p]Ahah! I new there was a simple explaination. I spend a lot of time staring at my egg while sitting on the back deck relaxing (most of the time with beer in hand and egg smoking away) and I have never noticed that it didnt sit in the nest properly - until that is, I started moving it to remote cooking locations. I must have tweaked the nest while in transit. I kept picking the damn thing up, rotating it 90 degrees, and placing in back in the nest, all the time thinking that the nest wasnt symetrical and I didnt have the orientation correct (my back is killing me). The problem is the the nest IS symetrical and you have to spread one side a bit to clear the scew hole.[p]I will fix it tonite as soon as I get home.[p]Thanks
-
Tim M,[p]Did you drill new holes for the bottom vent screws (sounds risky), or do you now just attach the new vent with the top screws?[p]My original vent is bashed up a bit and I was thinking of upgrading to the stainless soon.
-
BBBrew,thats the ticket...[p]you can actually do it with the egg in place, if you have a 'dead blow' hammer or a rubber hammer just back off the bolt a little bit, tap one leg then the other til they both JUST clear the screw heads.....[p]works like a charm...[p]Mop
[/b]
-
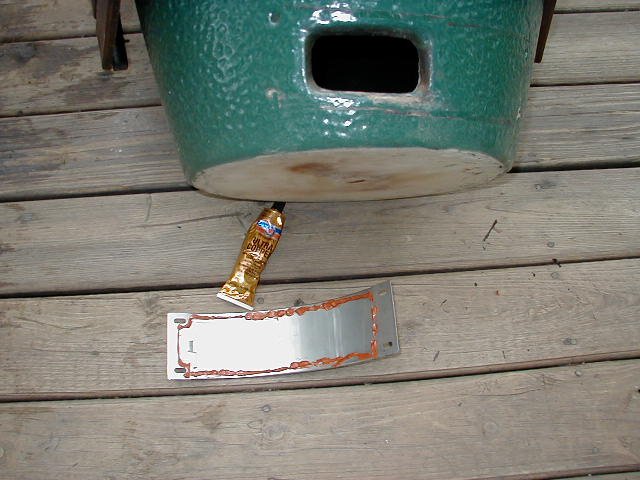
BBBrew,[p]Like I said, I did mine while putting on a new SS vent. I used silicone on the back of the vent to seal it and "glue" it on. I only used the two top holes. Just punch the screws out - squirt in high temp silicone and enjoy life again. [p]I spoke to BGE and they gave me the "loosen bolt, spread, retighten", but it didn't work on mine and still rested on the bolt heads. I guess there is a little difference from Egg to Egg and it works on some and not others. [p]Tim
-
<p />BBBrew,[p]here is a picture[p]Tim

-
Tim M, seriously, why would the legs not 'clear' the screw heads????[p]you only have to move them a little to clear??????[p]Mop
[/b]
-
Mop,[p]Look at the picture I posted - they don't move apart nearly enough to clear. I tried more than once and I had 2 nests that I tried with the same results. I am guessing that there is some small differences in the sizes of the large since some out there claim that theirs fits. Maybe differences in the nest - I am not sure but, I tried with no luck. Removing the screws was a fine fix and you surely don't need all 4 bolts along with the silicone behind the vent (they all come with it from the factory).[p]Tim
Categories
- All Categories
- 184K EggHead Forum
- 16.1K Forum List
- 461 EGGtoberfest
- 1.9K Forum Feedback
- 10.5K Off Topic
- 2.4K EGG Table Forum
- 1 Rules & Disclaimer
- 9.2K Cookbook
- 15 Valentines Day
- 118 Holiday Recipes
- 348 Appetizers
- 521 Baking
- 2.5K Beef
- 90 Desserts
- 167 Lamb
- 2.4K Pork
- 1.5K Poultry
- 33 Salads and Dressings
- 322 Sauces, Rubs, Marinades
- 548 Seafood
- 175 Sides
- 122 Soups, Stews, Chilis
- 40 Vegetarian
- 103 Vegetables
- 315 Health
- 293 Weight Loss Forum