Welcome to the EGGhead Forum - a great place to visit and packed with tips and EGGspert advice! You can also join the conversation and get more information and amazing kamado recipes by following Big Green Egg to Experience our World of Flavor™ at:
Want to see how the EGG is made? Click to Watch
Facebook | Twitter | Instagram | Pinterest | Youtube | Vimeo
Share your photos by tagging us and using the hashtag #BigGreenEgg.
Share your photos by tagging us and using the hashtag #BigGreenEgg.
Want to see how the EGG is made? Click to Watch
New Table Advice

mlc2013
Posts: 1,005
After a crazy month I finally got some time to try and build a egg table(s). I recently bought 2 new eggs a large and a M/M to add to my XL and haven't even taken them out of the box until the table(s) were built. So here is where im at and cant decide what the next step is so im looking for some help.
Im looking for something that last a long while outdoors and being I live in Long Island the salty sea water in the air destroys almost everything a little (lot) faster then living more inland. I also plan on leaving it out year round without a cover so sun snow rain etc is also a deciding factor. With that said I decided to use Italian Sepele Mahogany with a simple tongue oil that only should have to be reapplied every year or two. And a 11 gauge (⅛" thick) 316 stainless steel sheet with #4 finish as a counter top. Im also going to put the table on casters (6 total) as I would need to move it off the patio into the driveway from time to time which is why i also opted for the metal counter top verses a granite or cement (being it is lighter and hopefully easier to move)
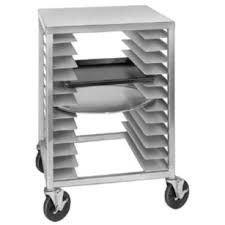
I made the frame where I plan on putting the egg on the right side of the table on the shelf. I plan on putting a sliding drawer under the shelf to store the platesetter. I also plan on putting a swinging door on the left side with a bunch of angle iron running up the left and right side of cabinet to store all the different grates I have (I am pretty much copying a pizza pie rack where they can slide in a bunch of metal trays with the angle iron only holding the sides) ill show some pictures of what I got done so far and the pizza rack for clarity.
So here is what im looking for advice on the back and side walls, I was originally going to put corrugated metal but I cant find it in 316 stainless with a #4 finish so it won't match and can only find it in galvanized steel which would eventually rust (as most metals do very quickly with the salt water in the air).
Im no woodworker and this is my first real project I decided I didn't want to use screws or nail so I made dominos (a type of mortise and tenon) in all the pieces and will attach with glue. My wife said I should just use more wood and make them look like cabinets (again I point out novice woodworker), Which sounds like a good idea and is probably what im going to try and do so I ask (I know this is personal taste) do you think the same wood and grain finished with the same color as the frame or contrasting color and grain for the front (cabinet door, Drawer) and sides and rear? Or is there something else you can suggest.
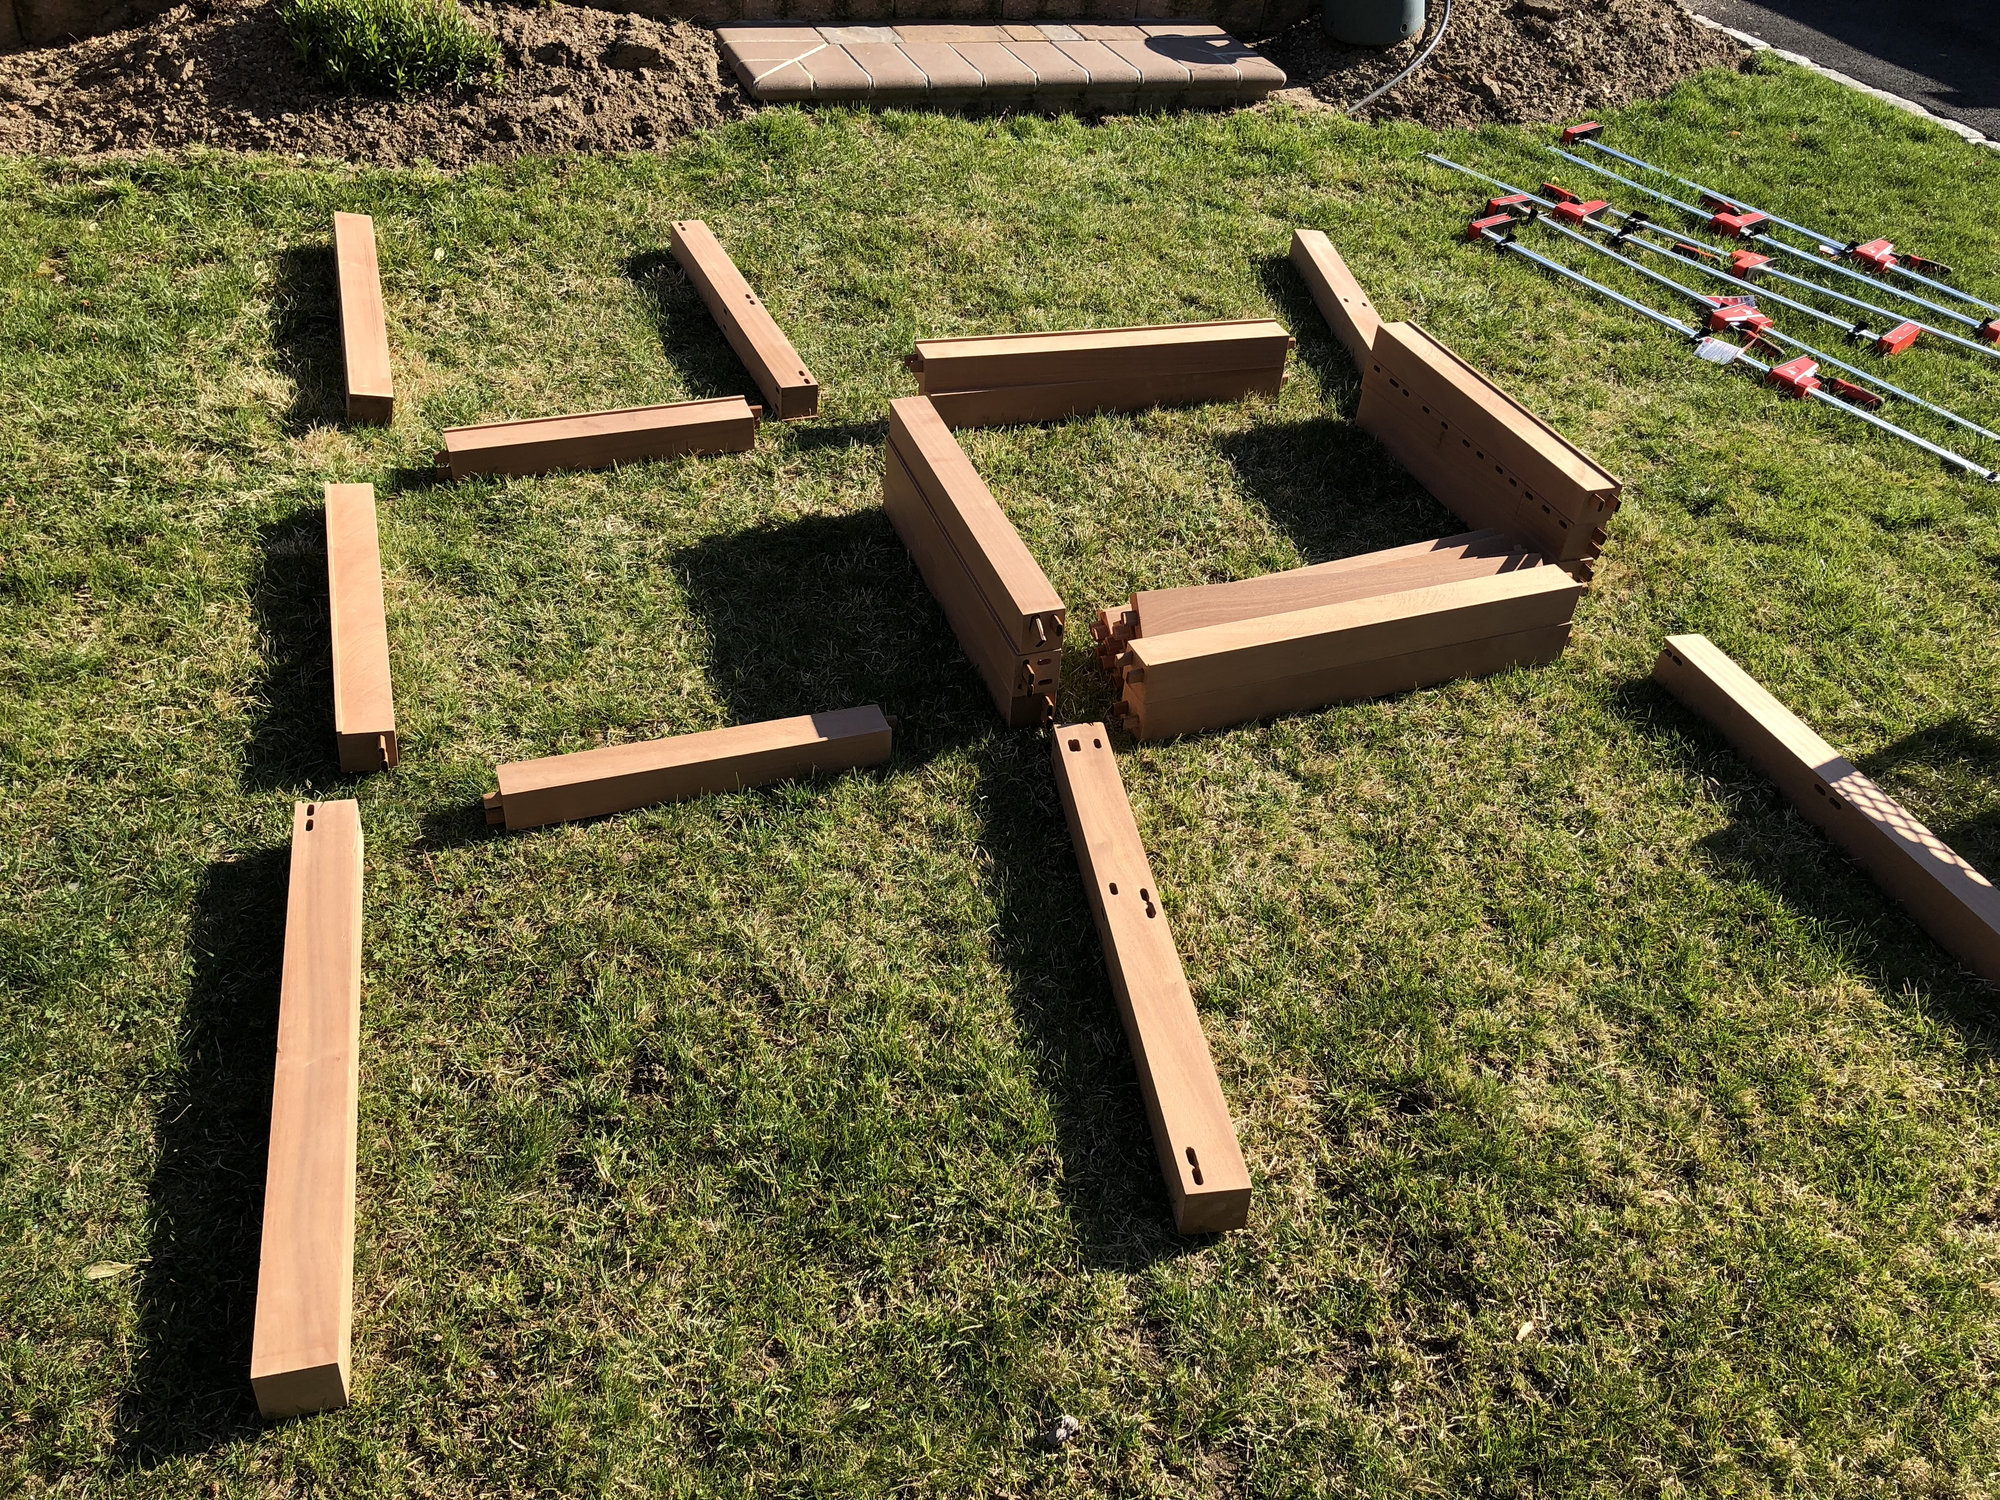
This is what I started out with 2x 17'x9.5"x9.5" boards and 2x 17'x17"x1" boards and had to mill them down to usable sizes which took a surprising long time (again im a novice)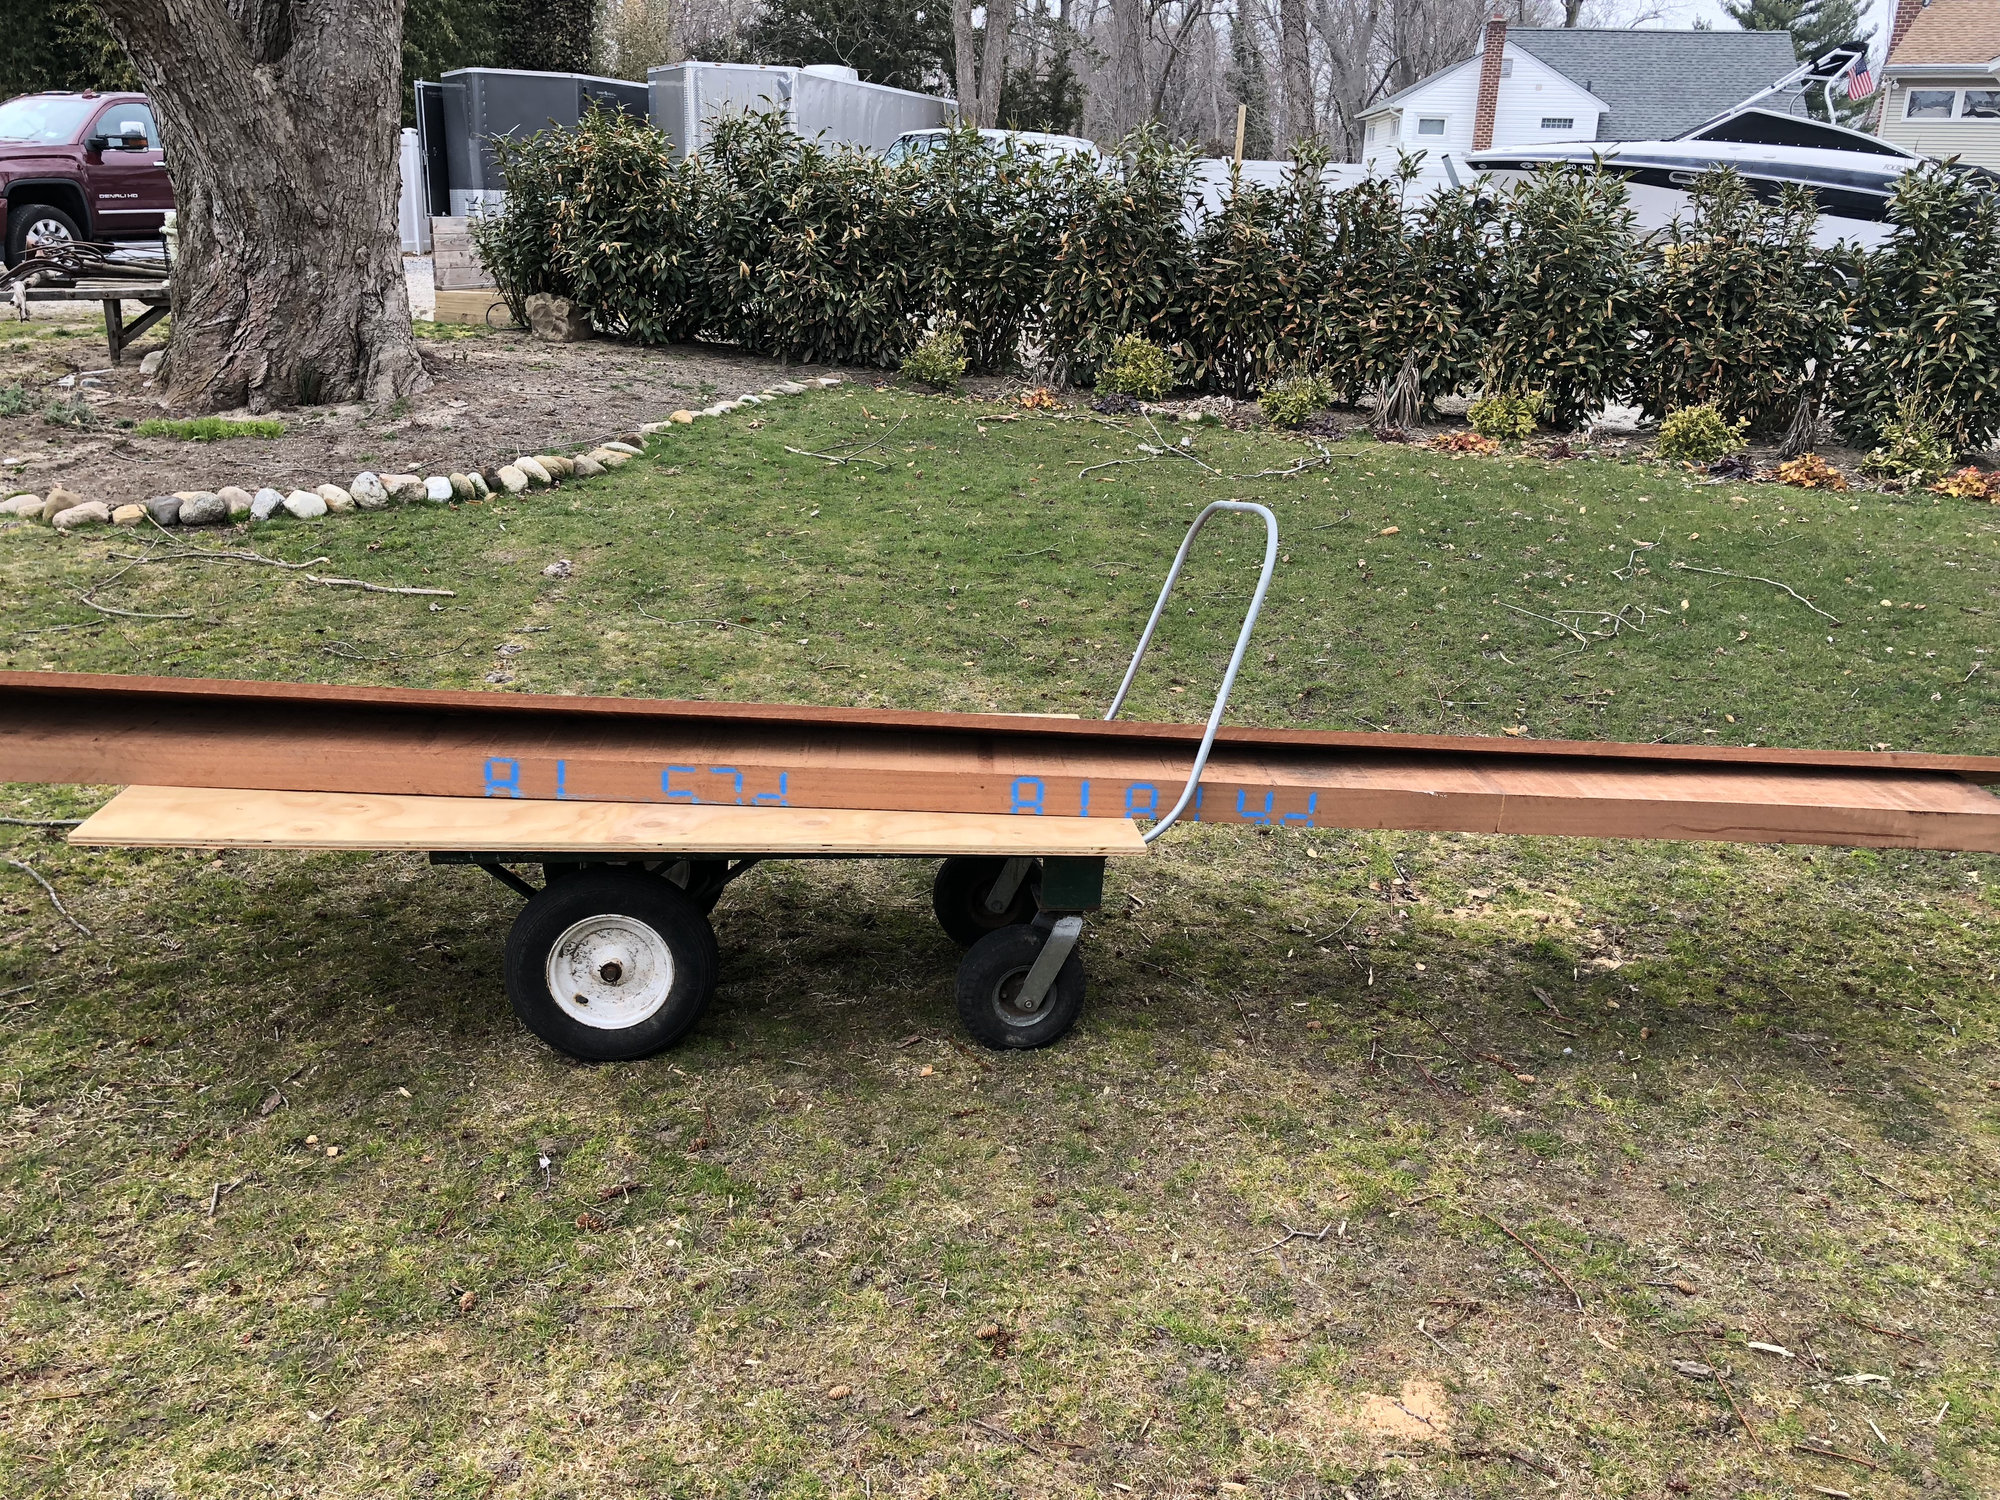
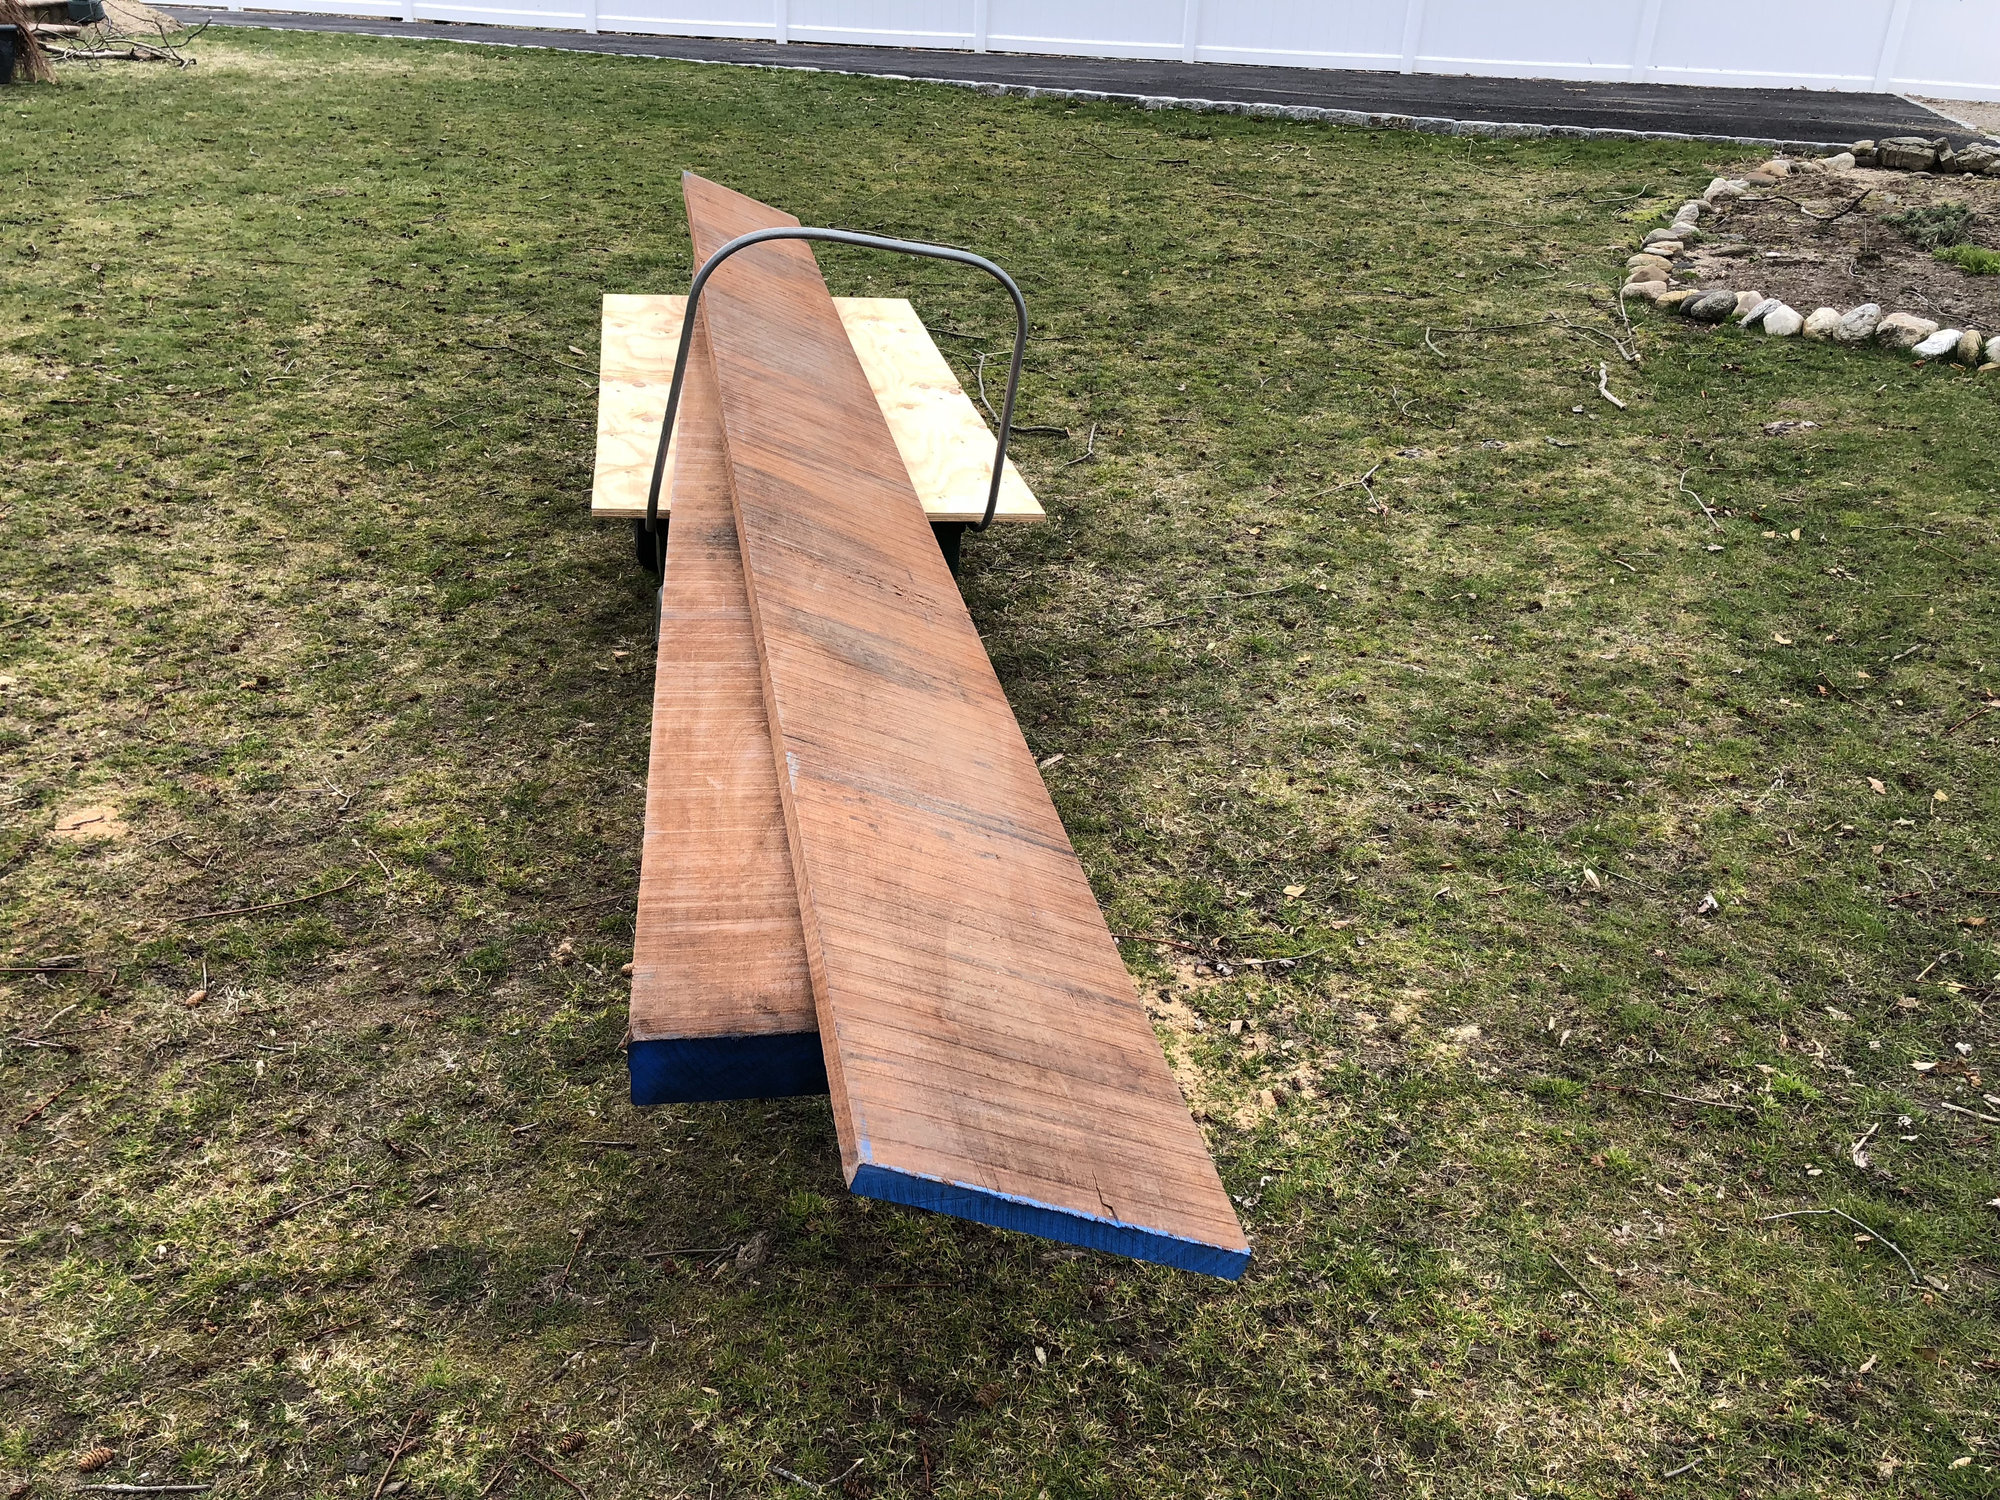
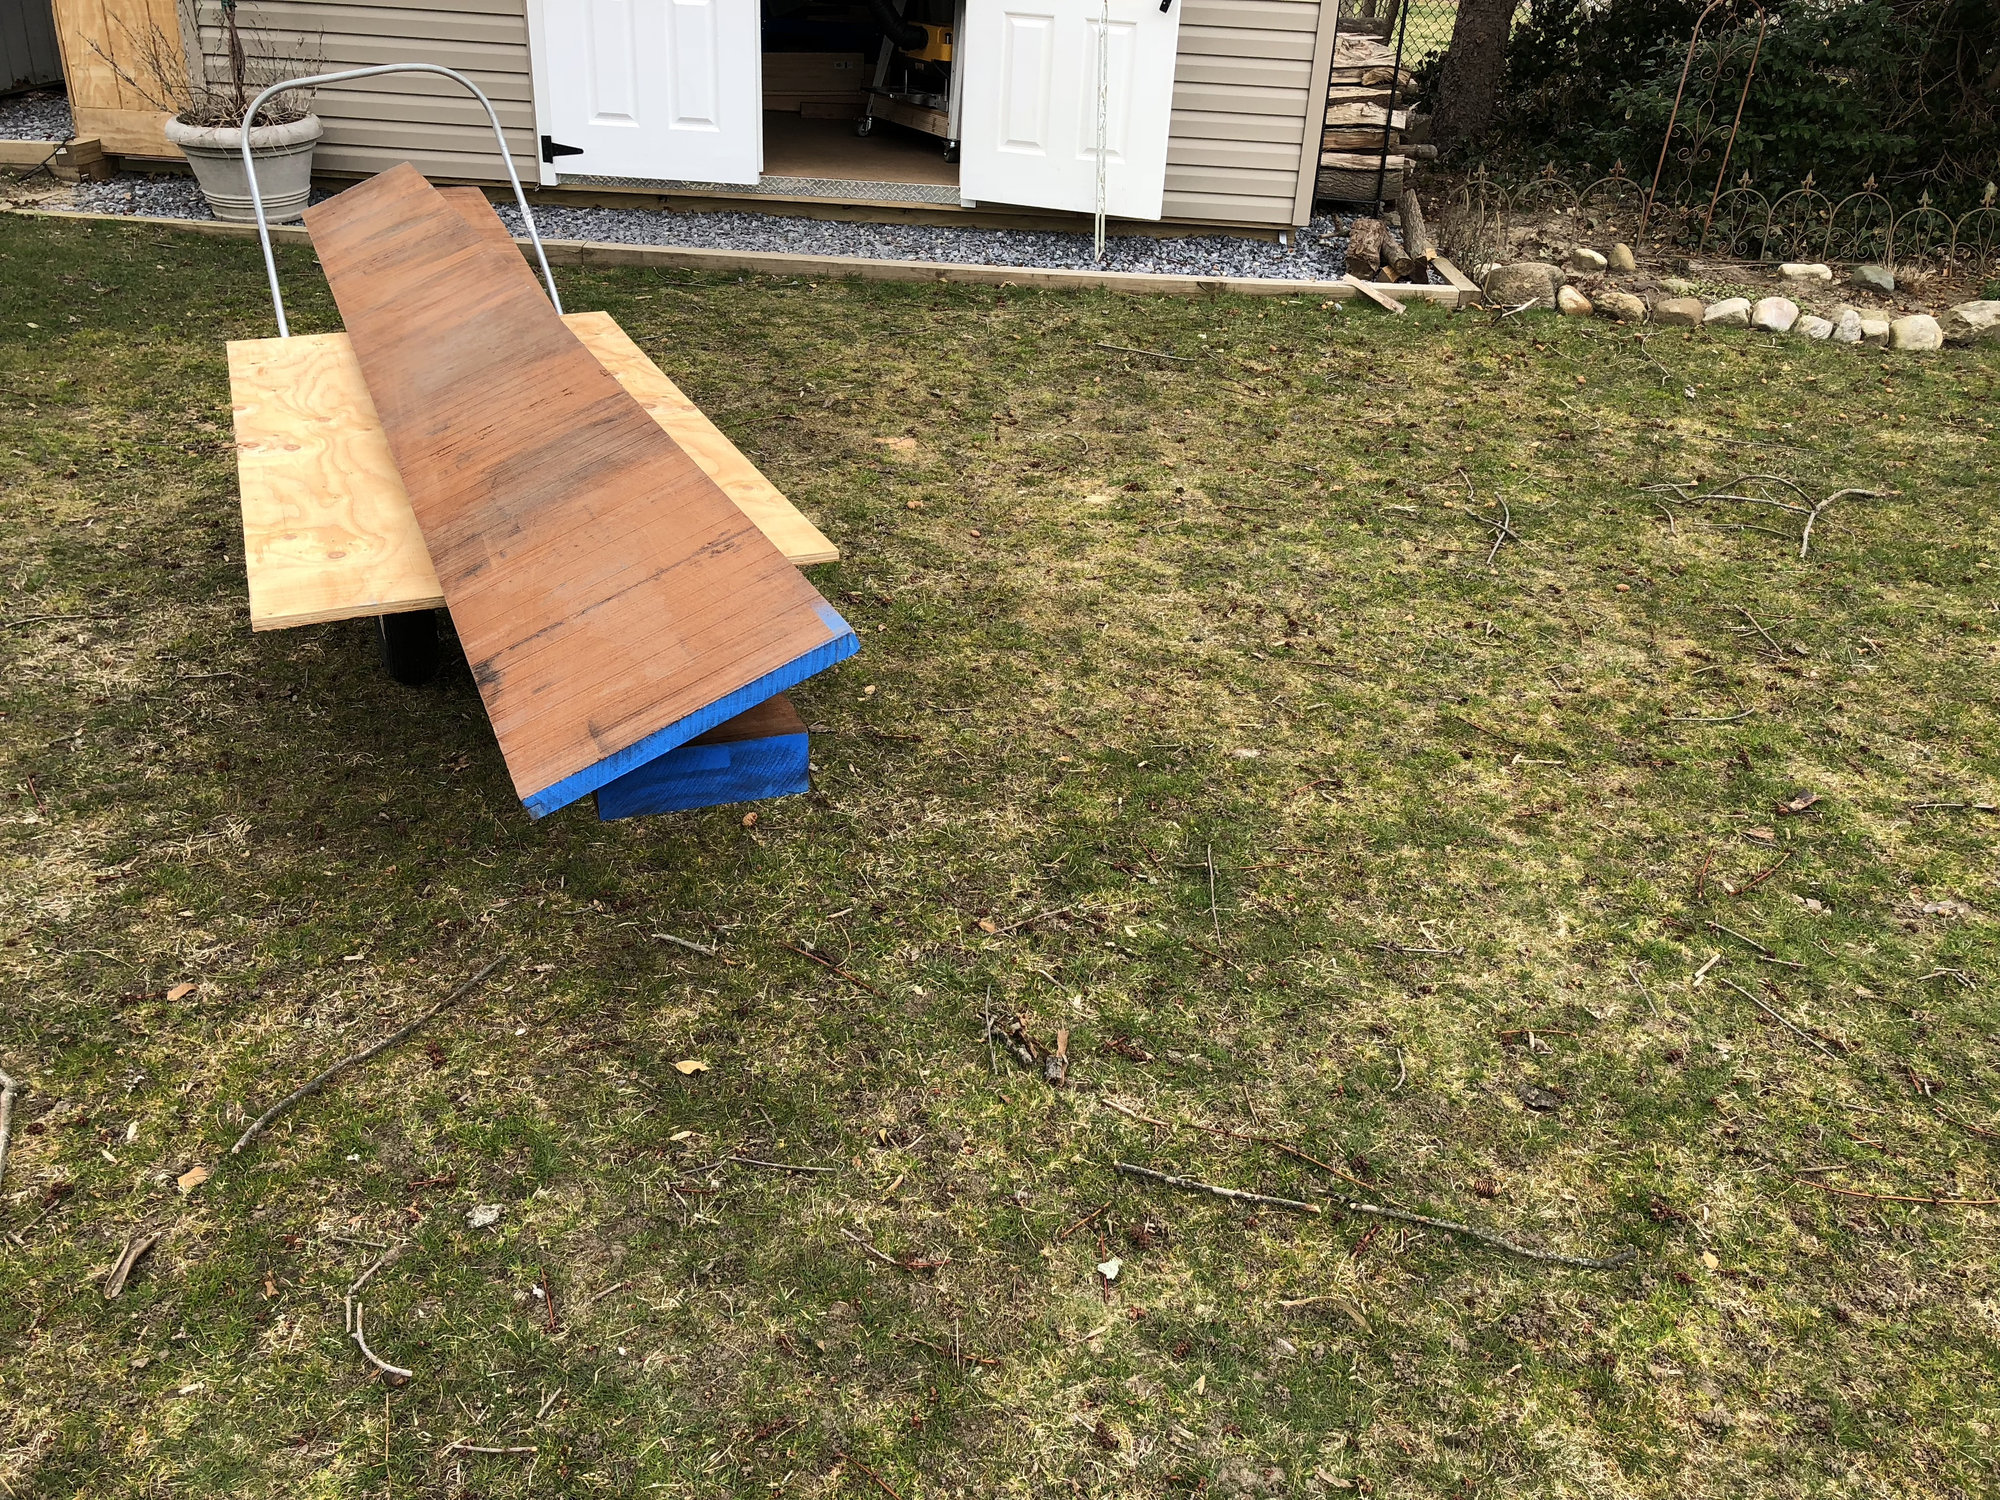
This is what I ended up with before assembly,
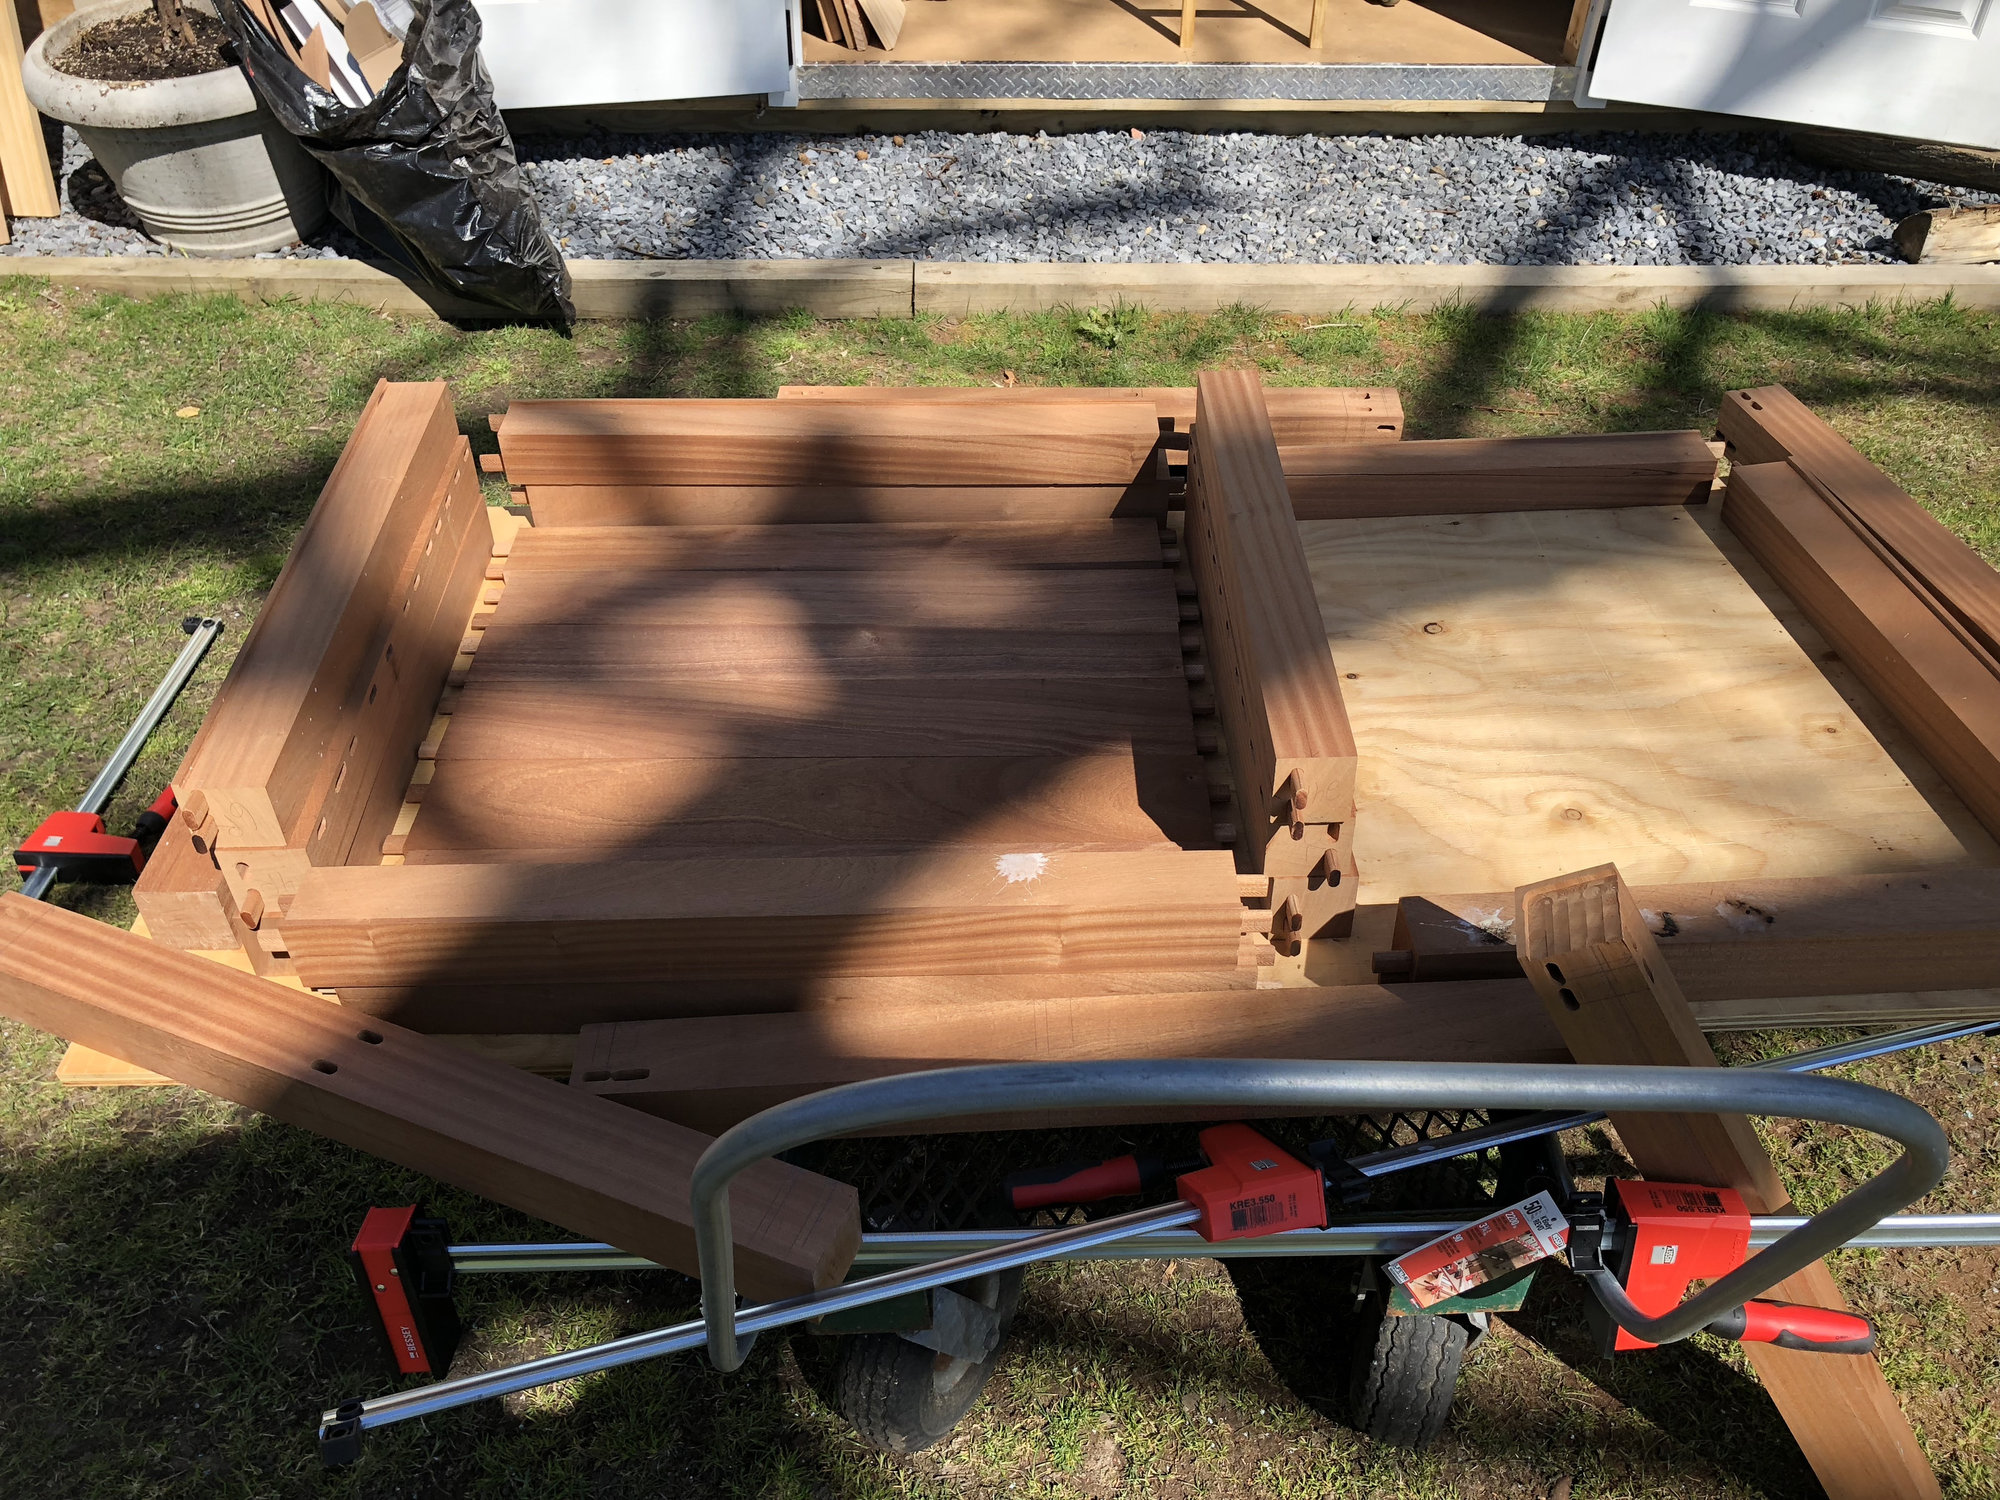
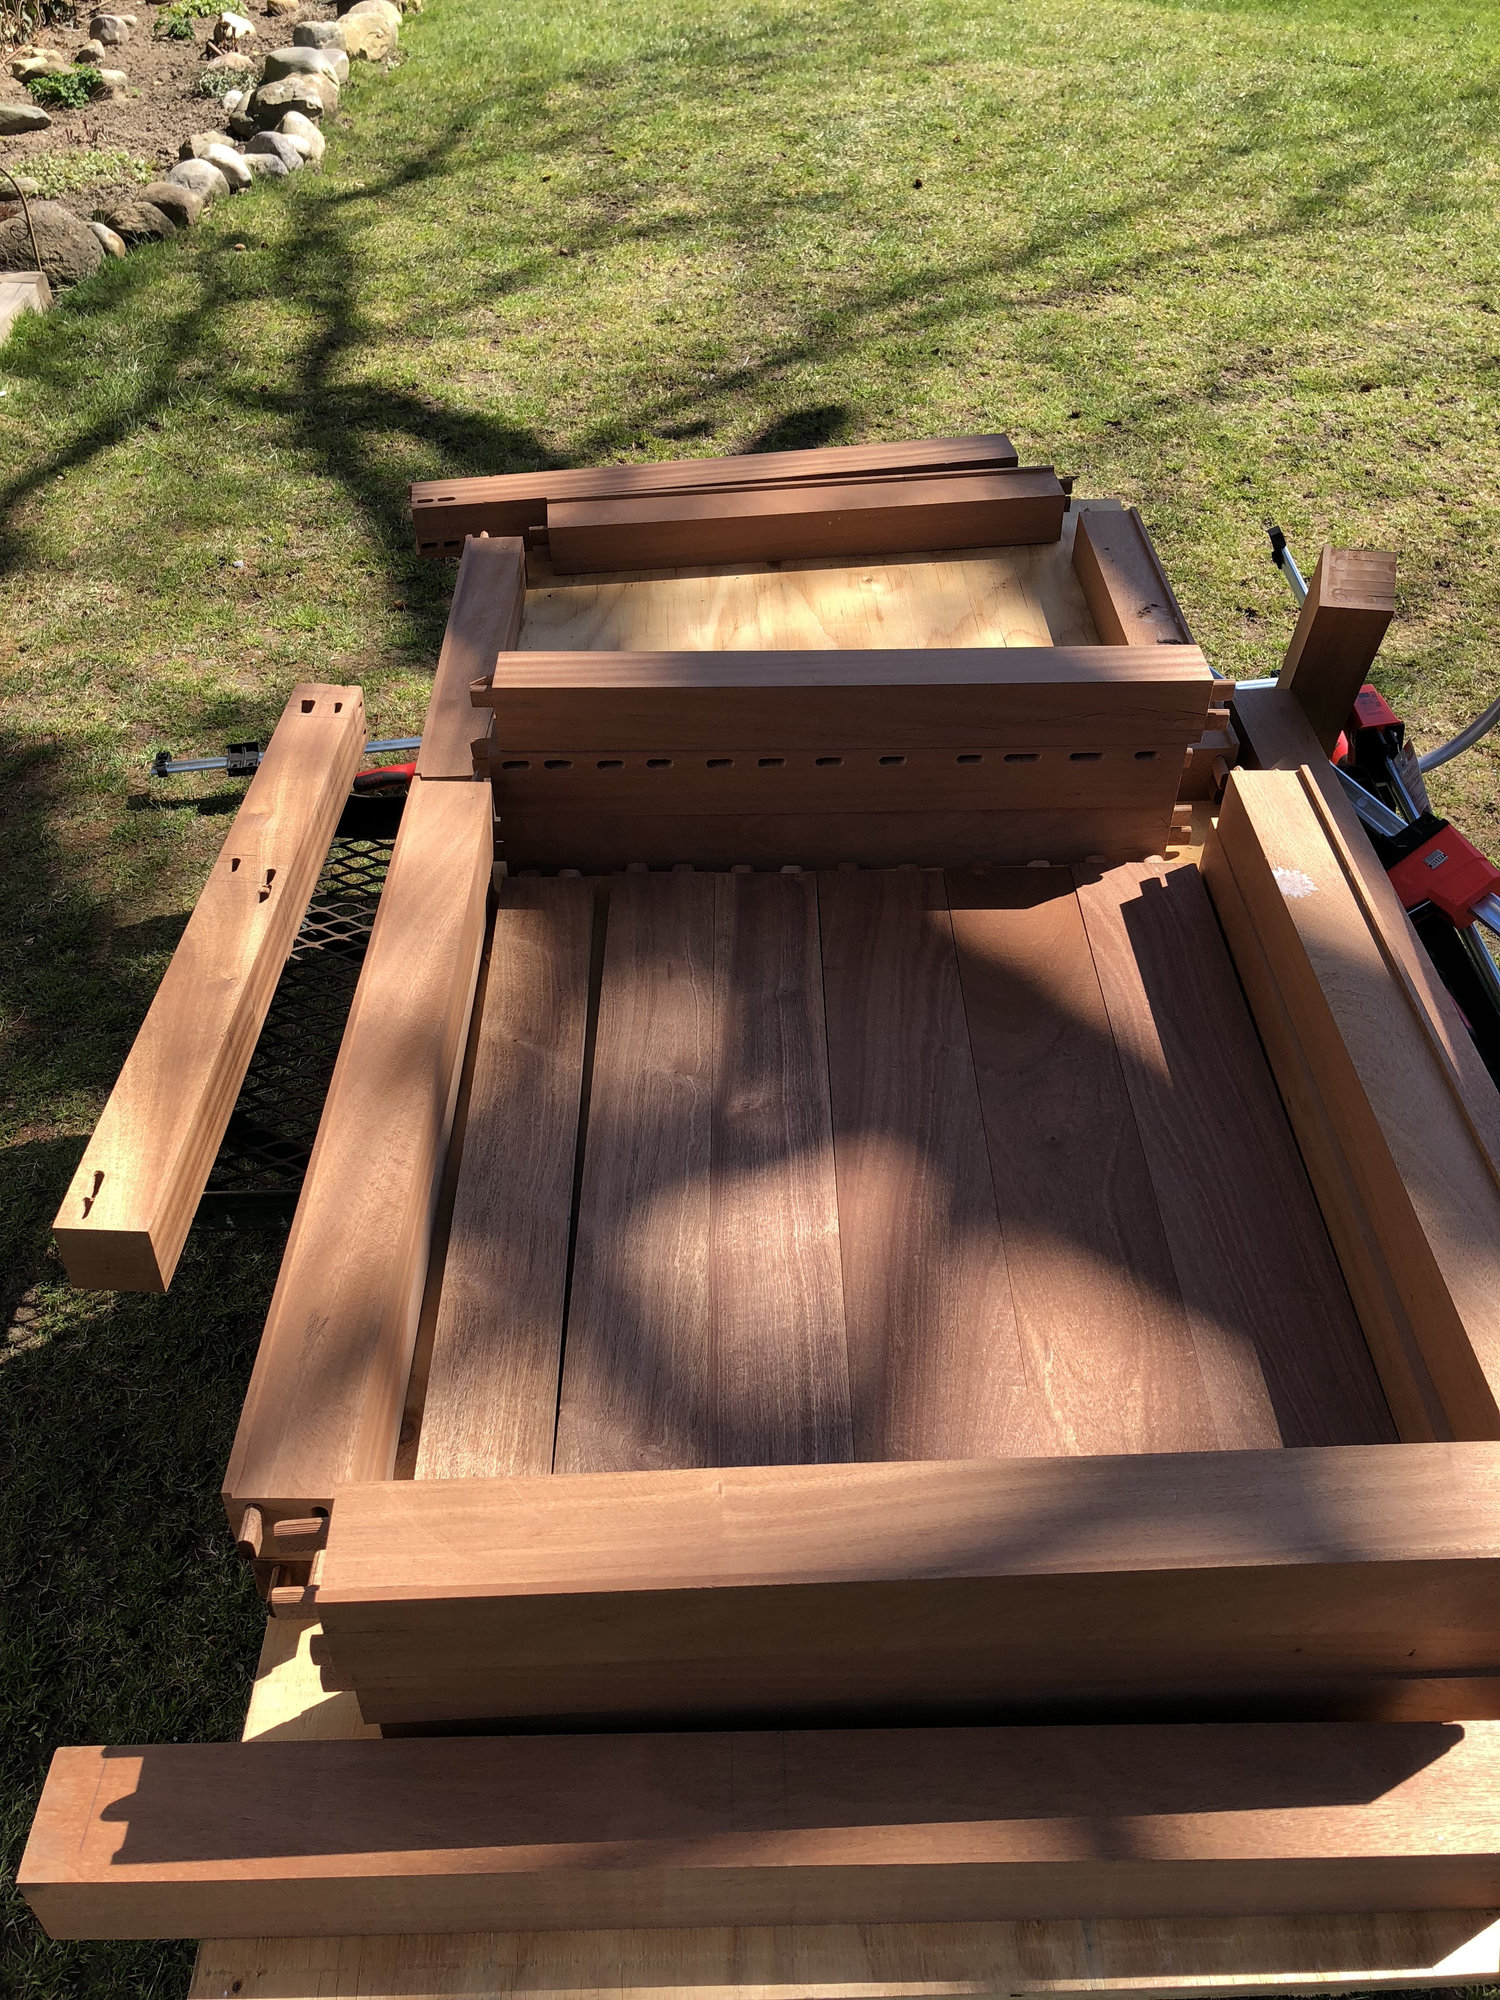

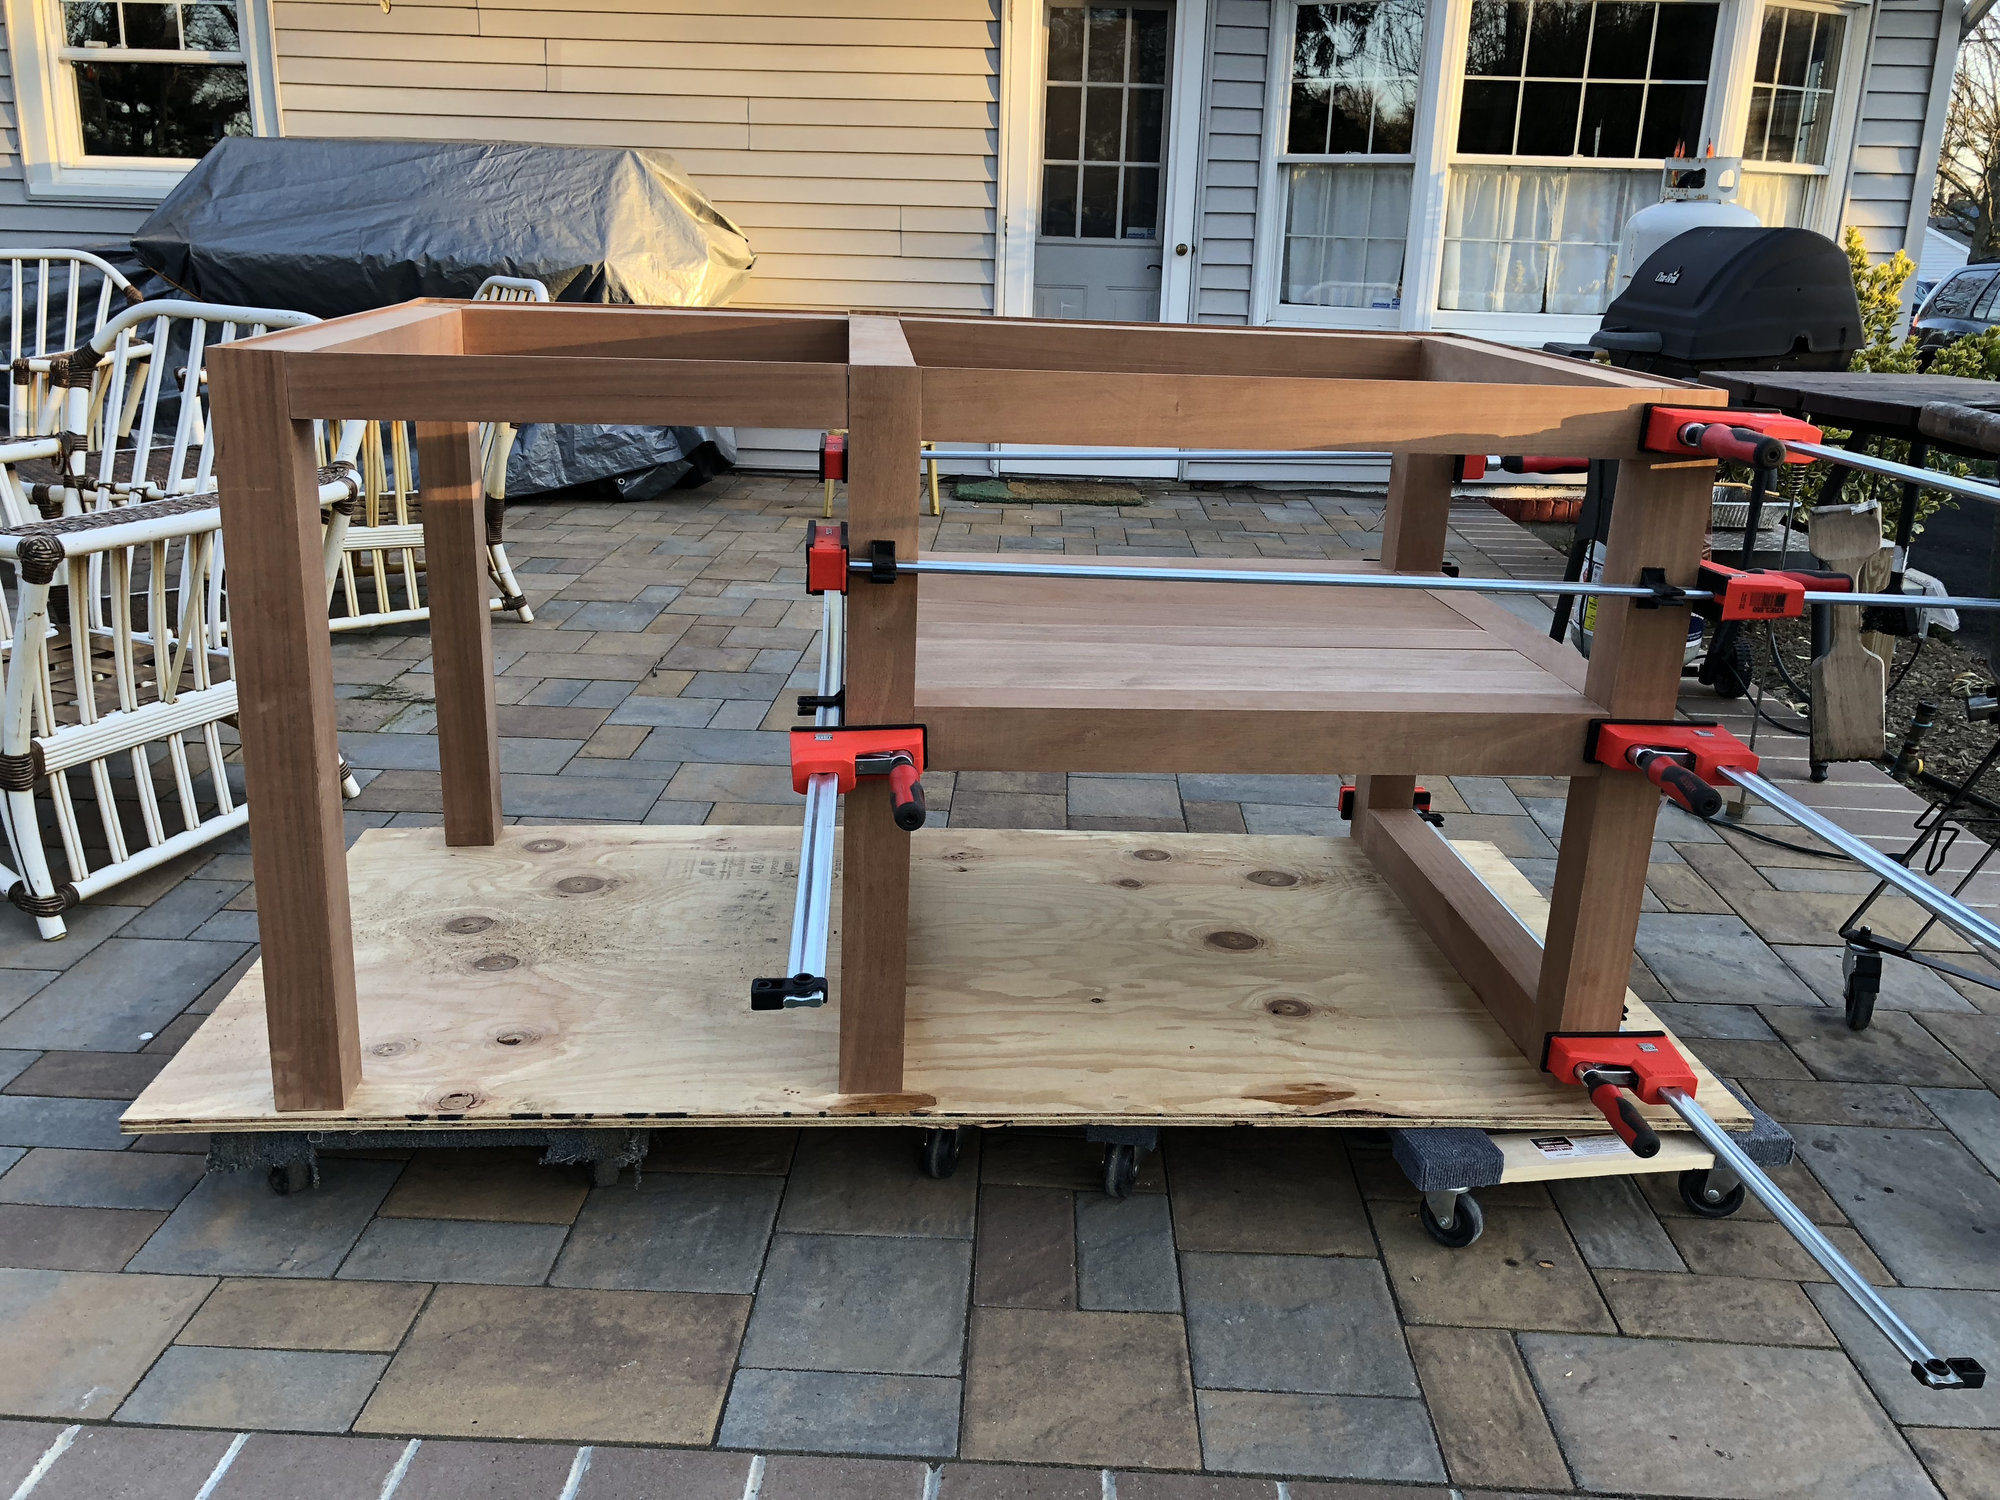
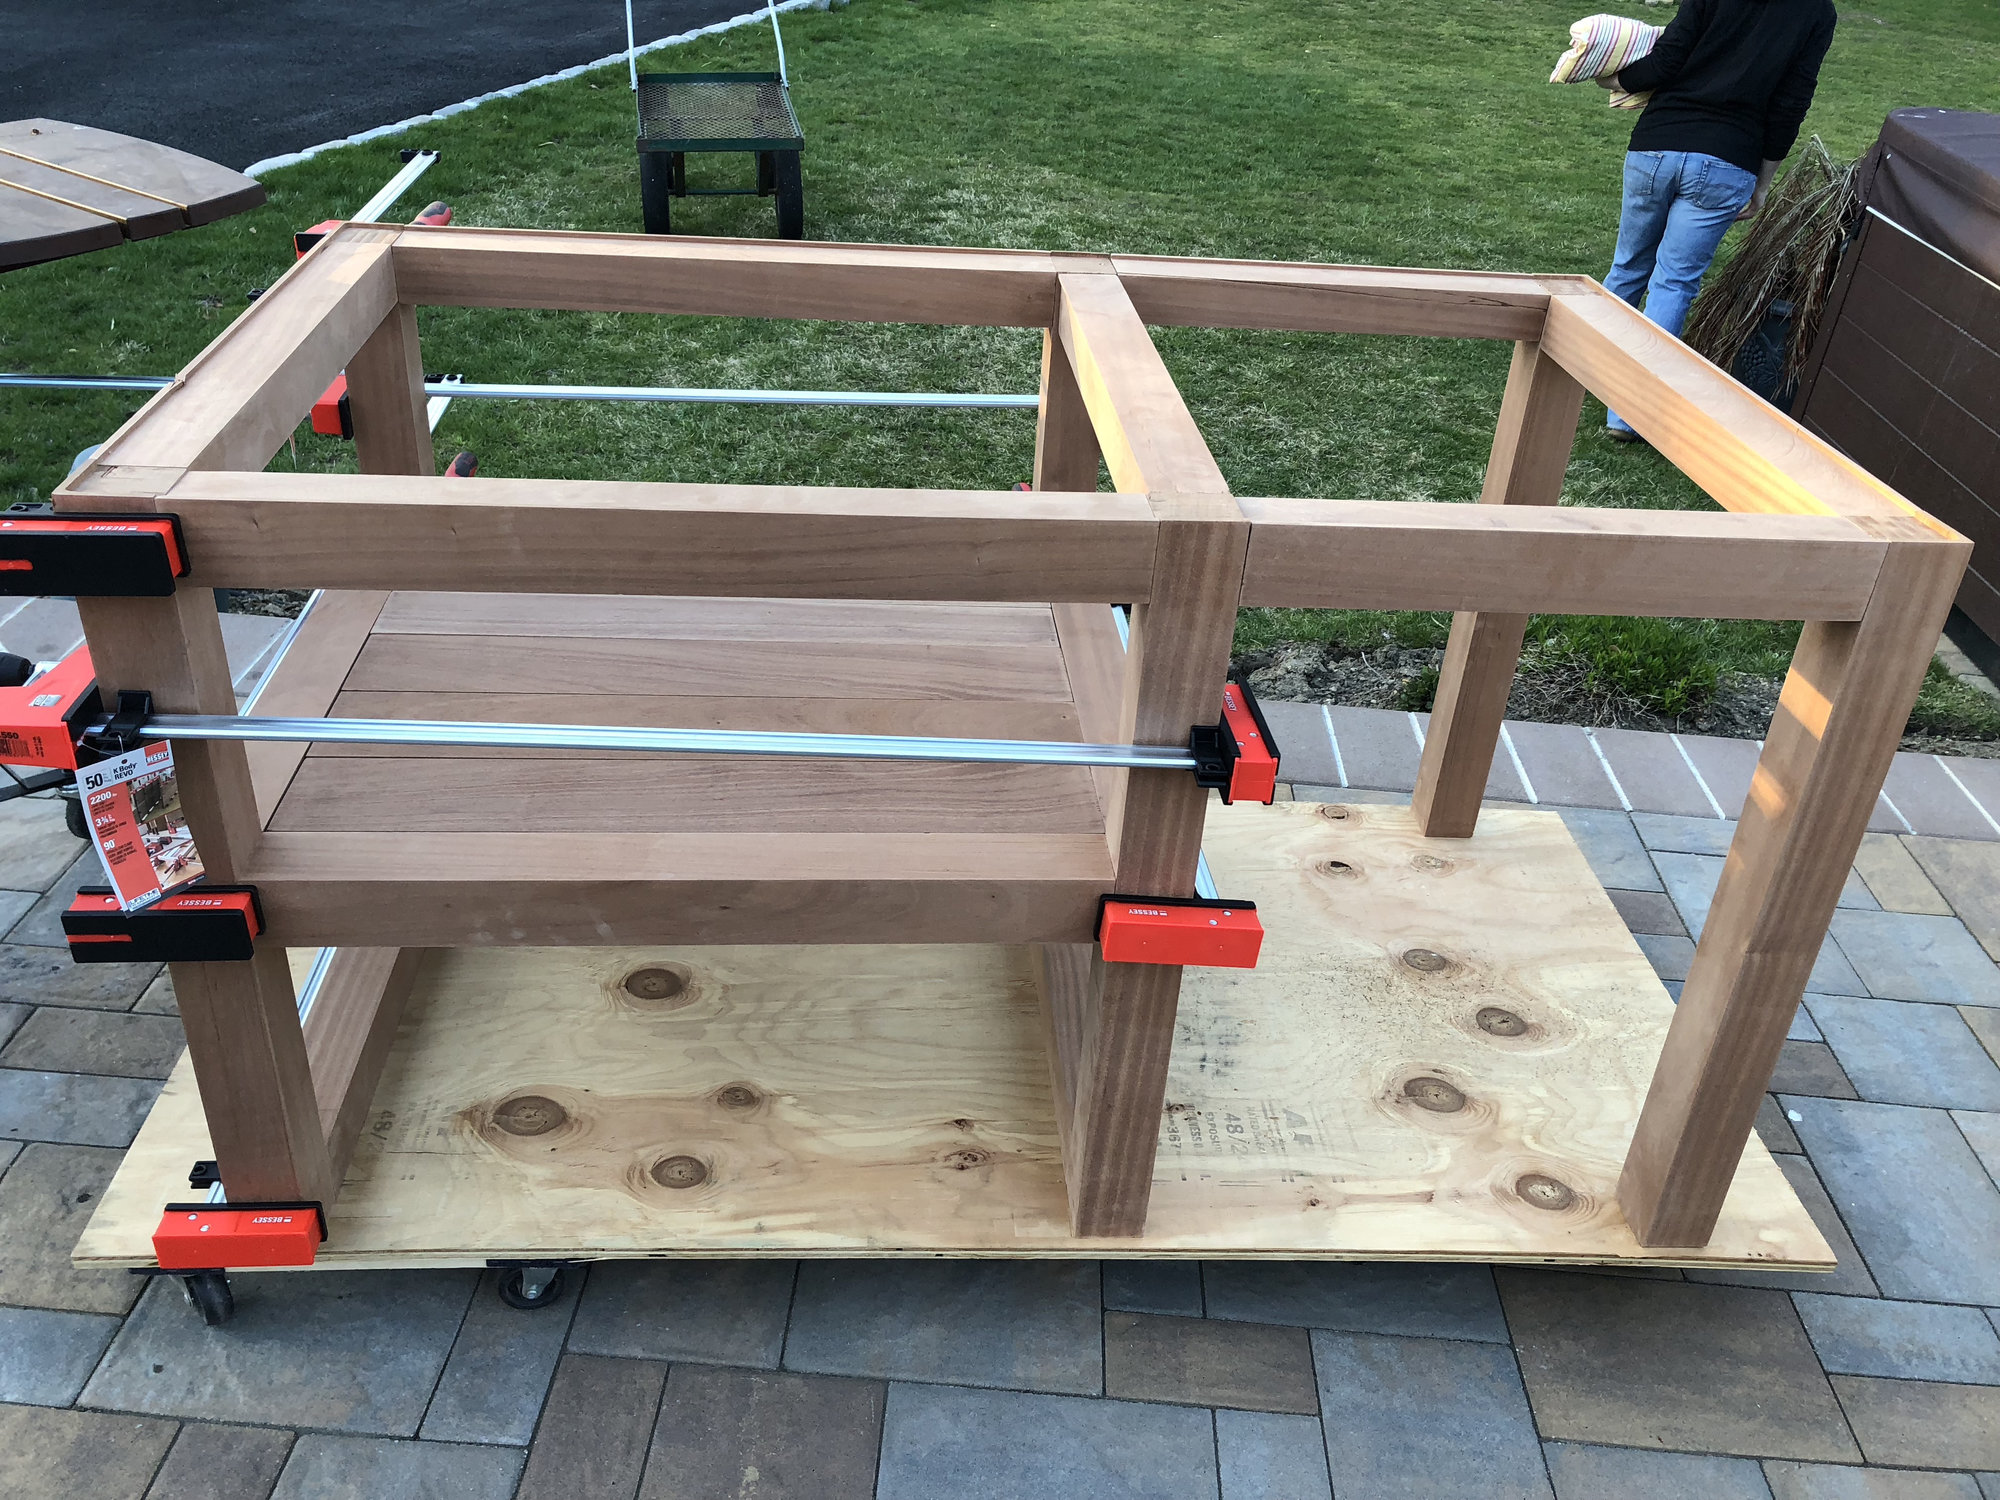
This is the table partially assembled without glue and no bottom for the left cabinet yet Im working on that this weekend;
Front view, front left will be a door of some sort that swings to the left and the bottom right will be a pull out drawer.
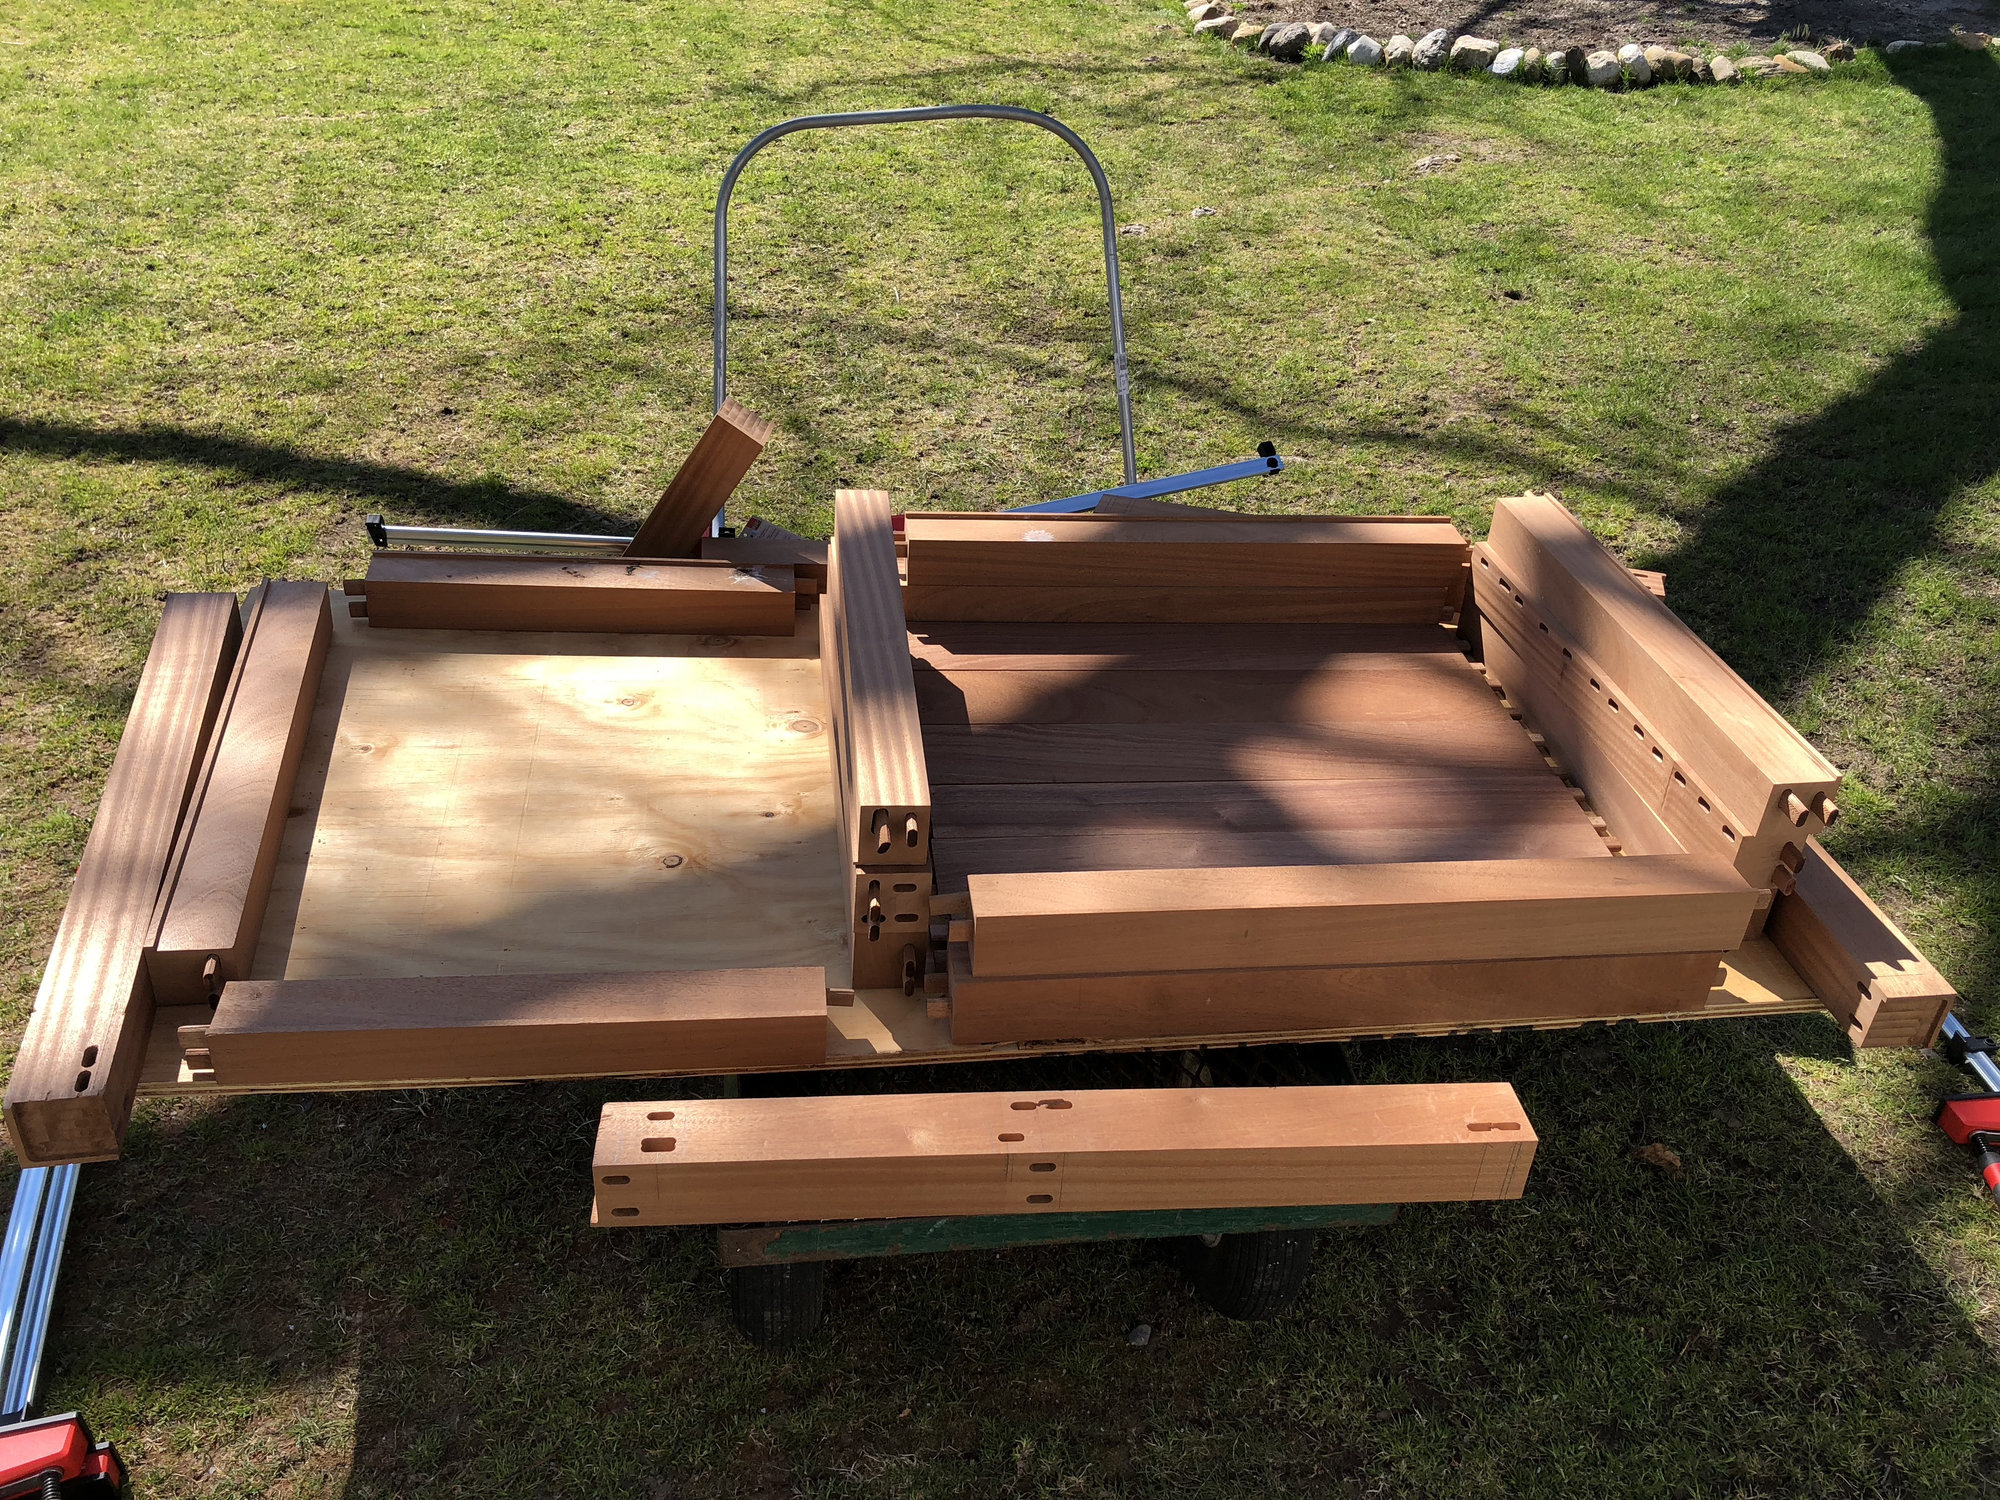
 Side view of the cabinet that will house the pizza style racks and the side im looking to close in with ??
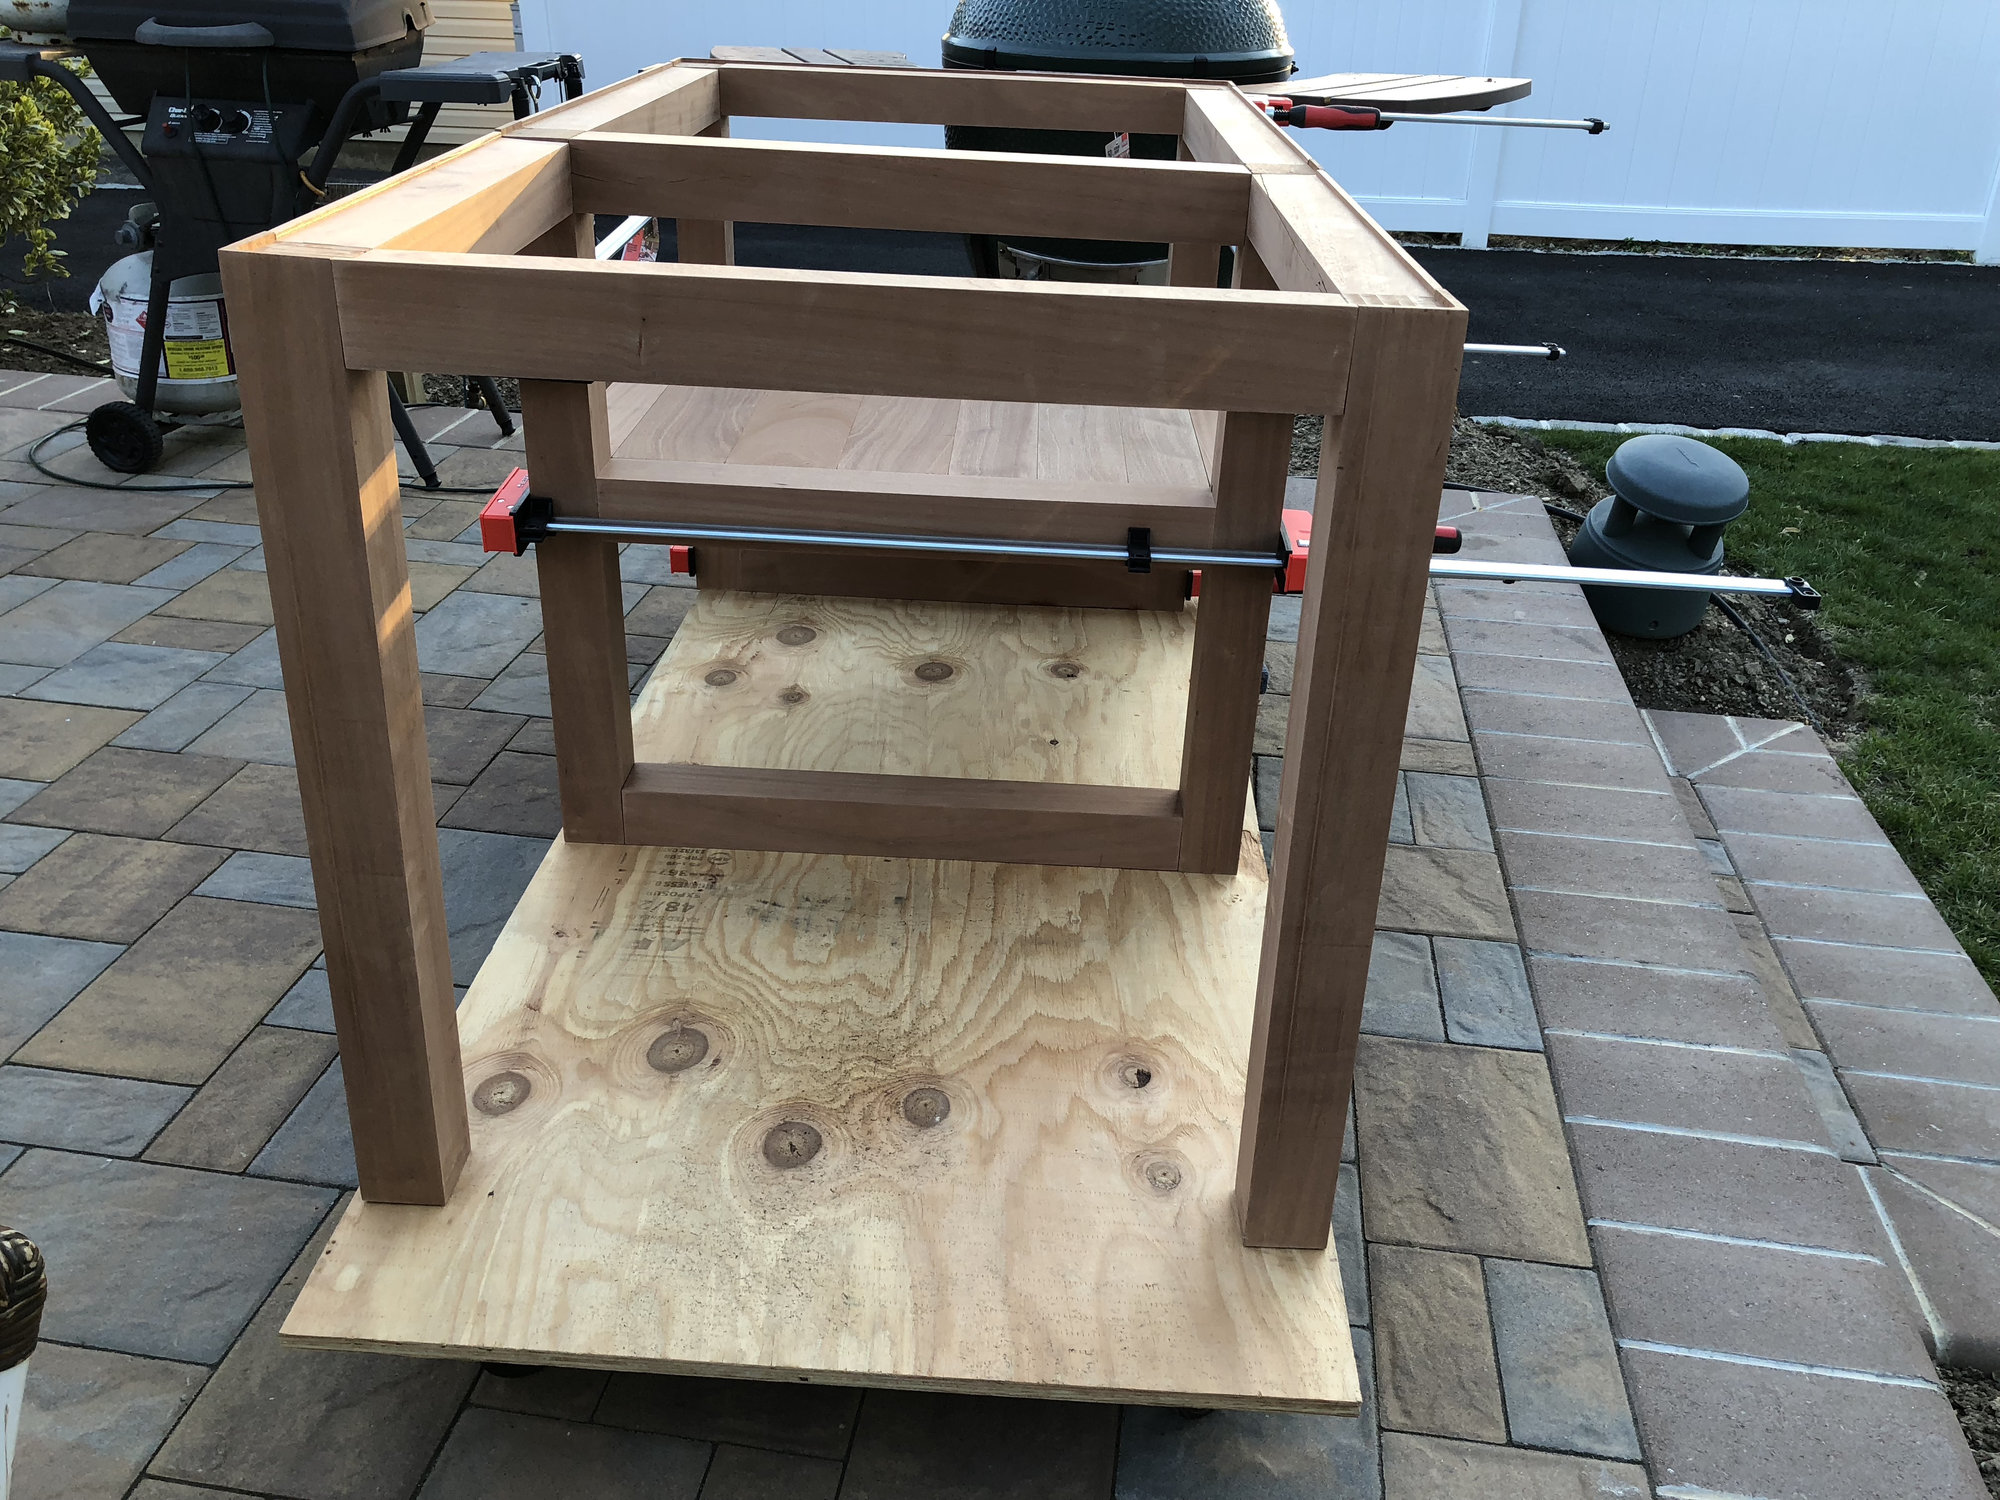 Top view of the shelf that will hold the egg, and the support rails for the S/S counter top with a ⅛" rabbet around the perimeter to hold counter top in place:
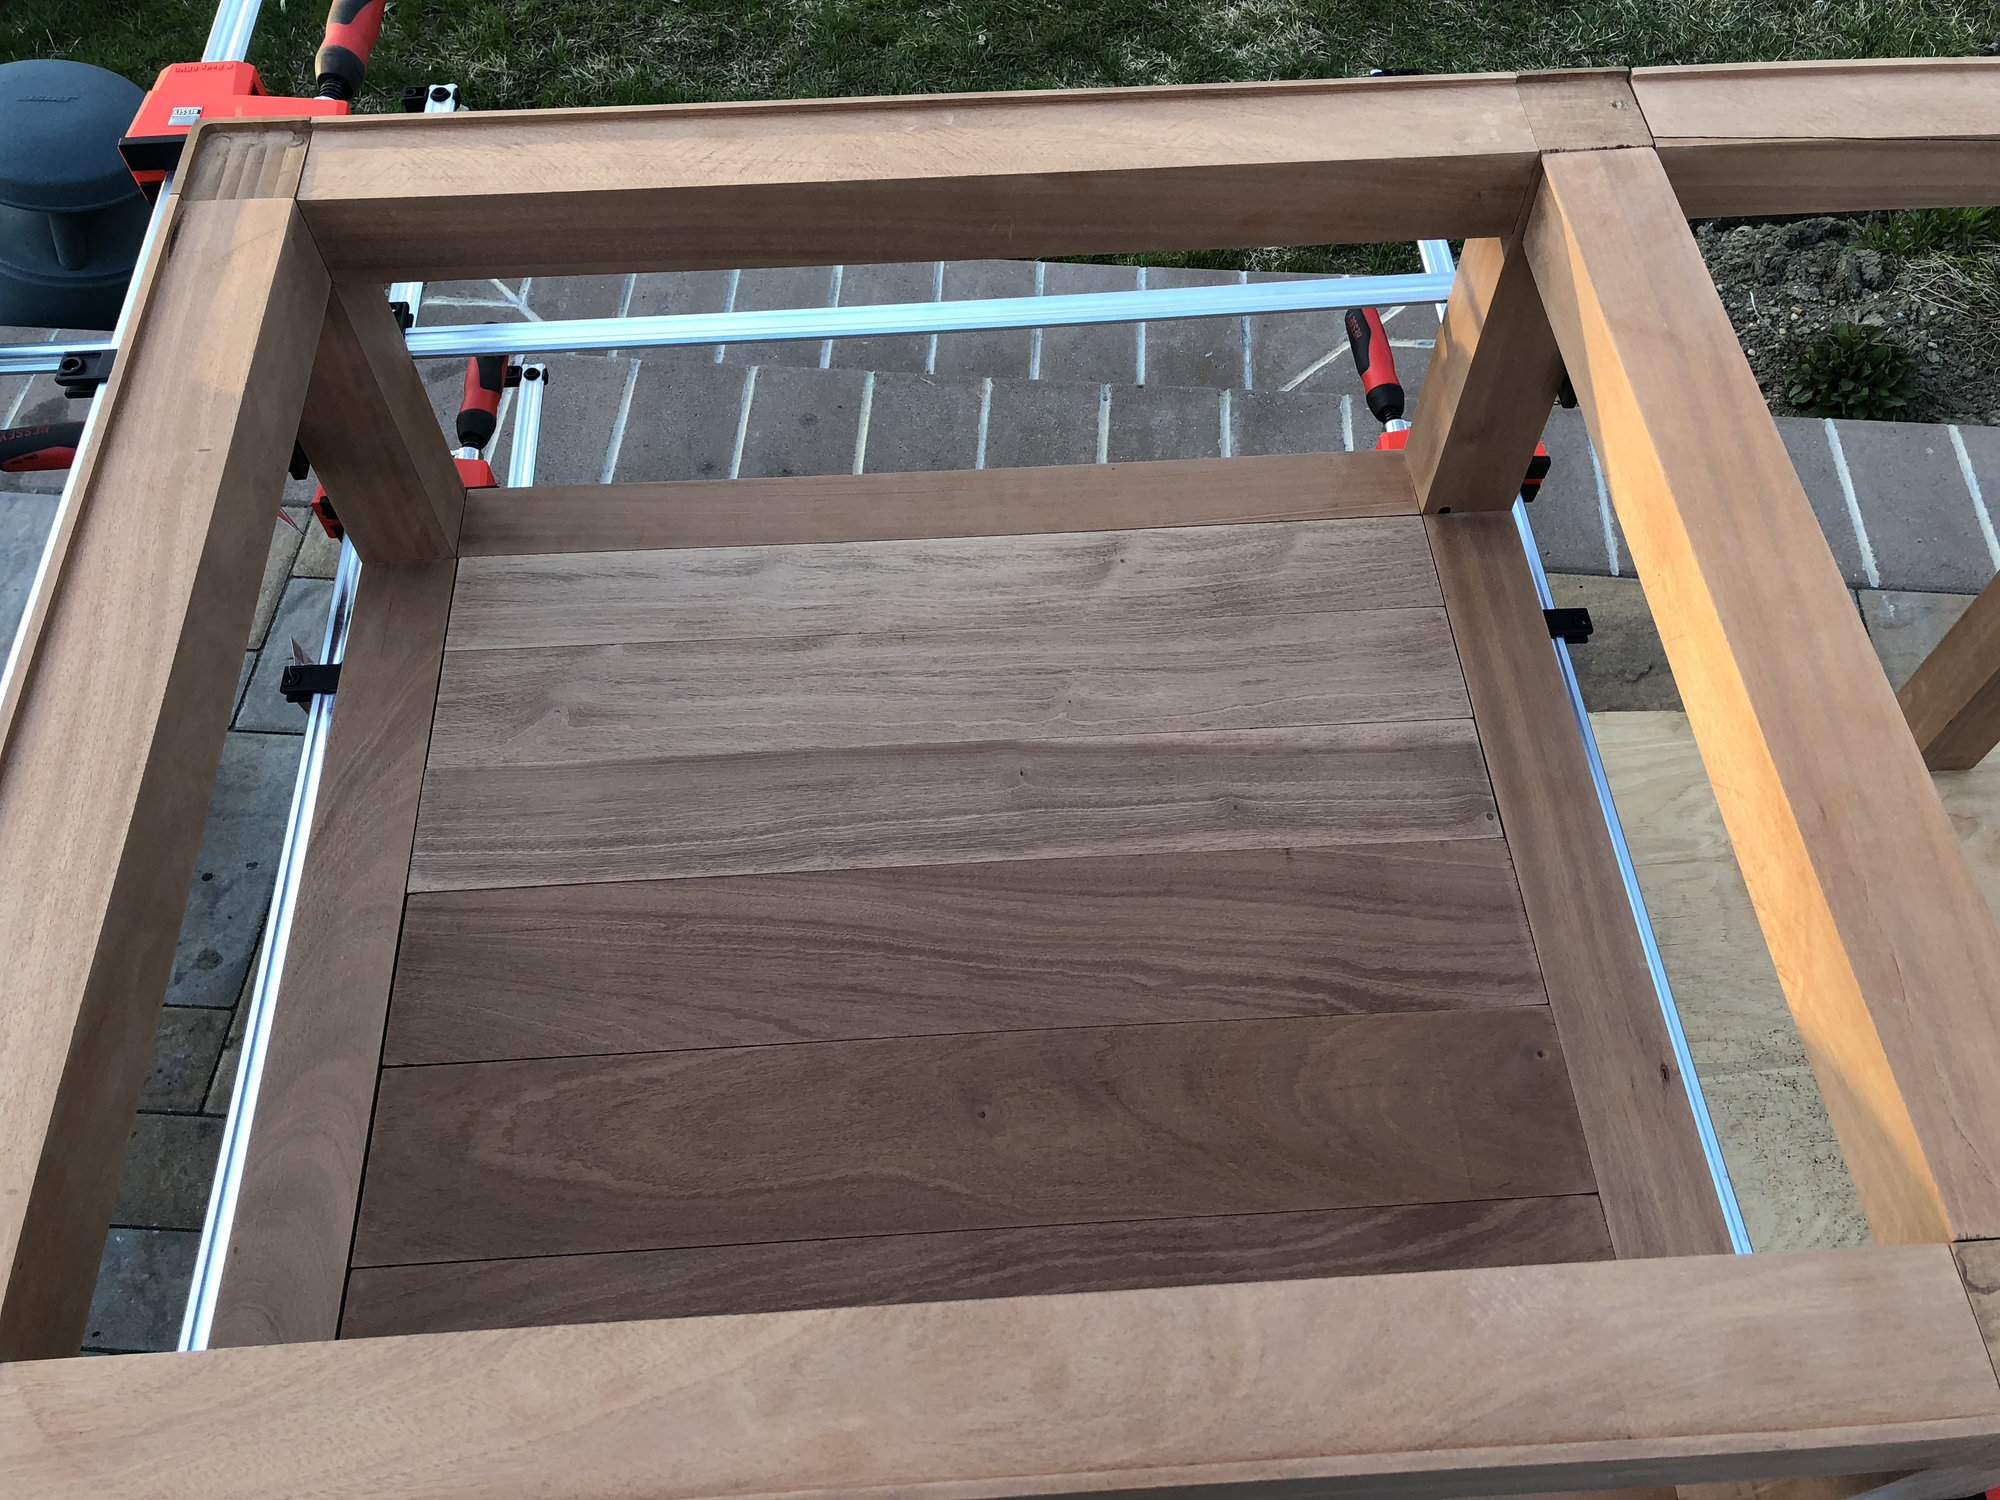 Back view:
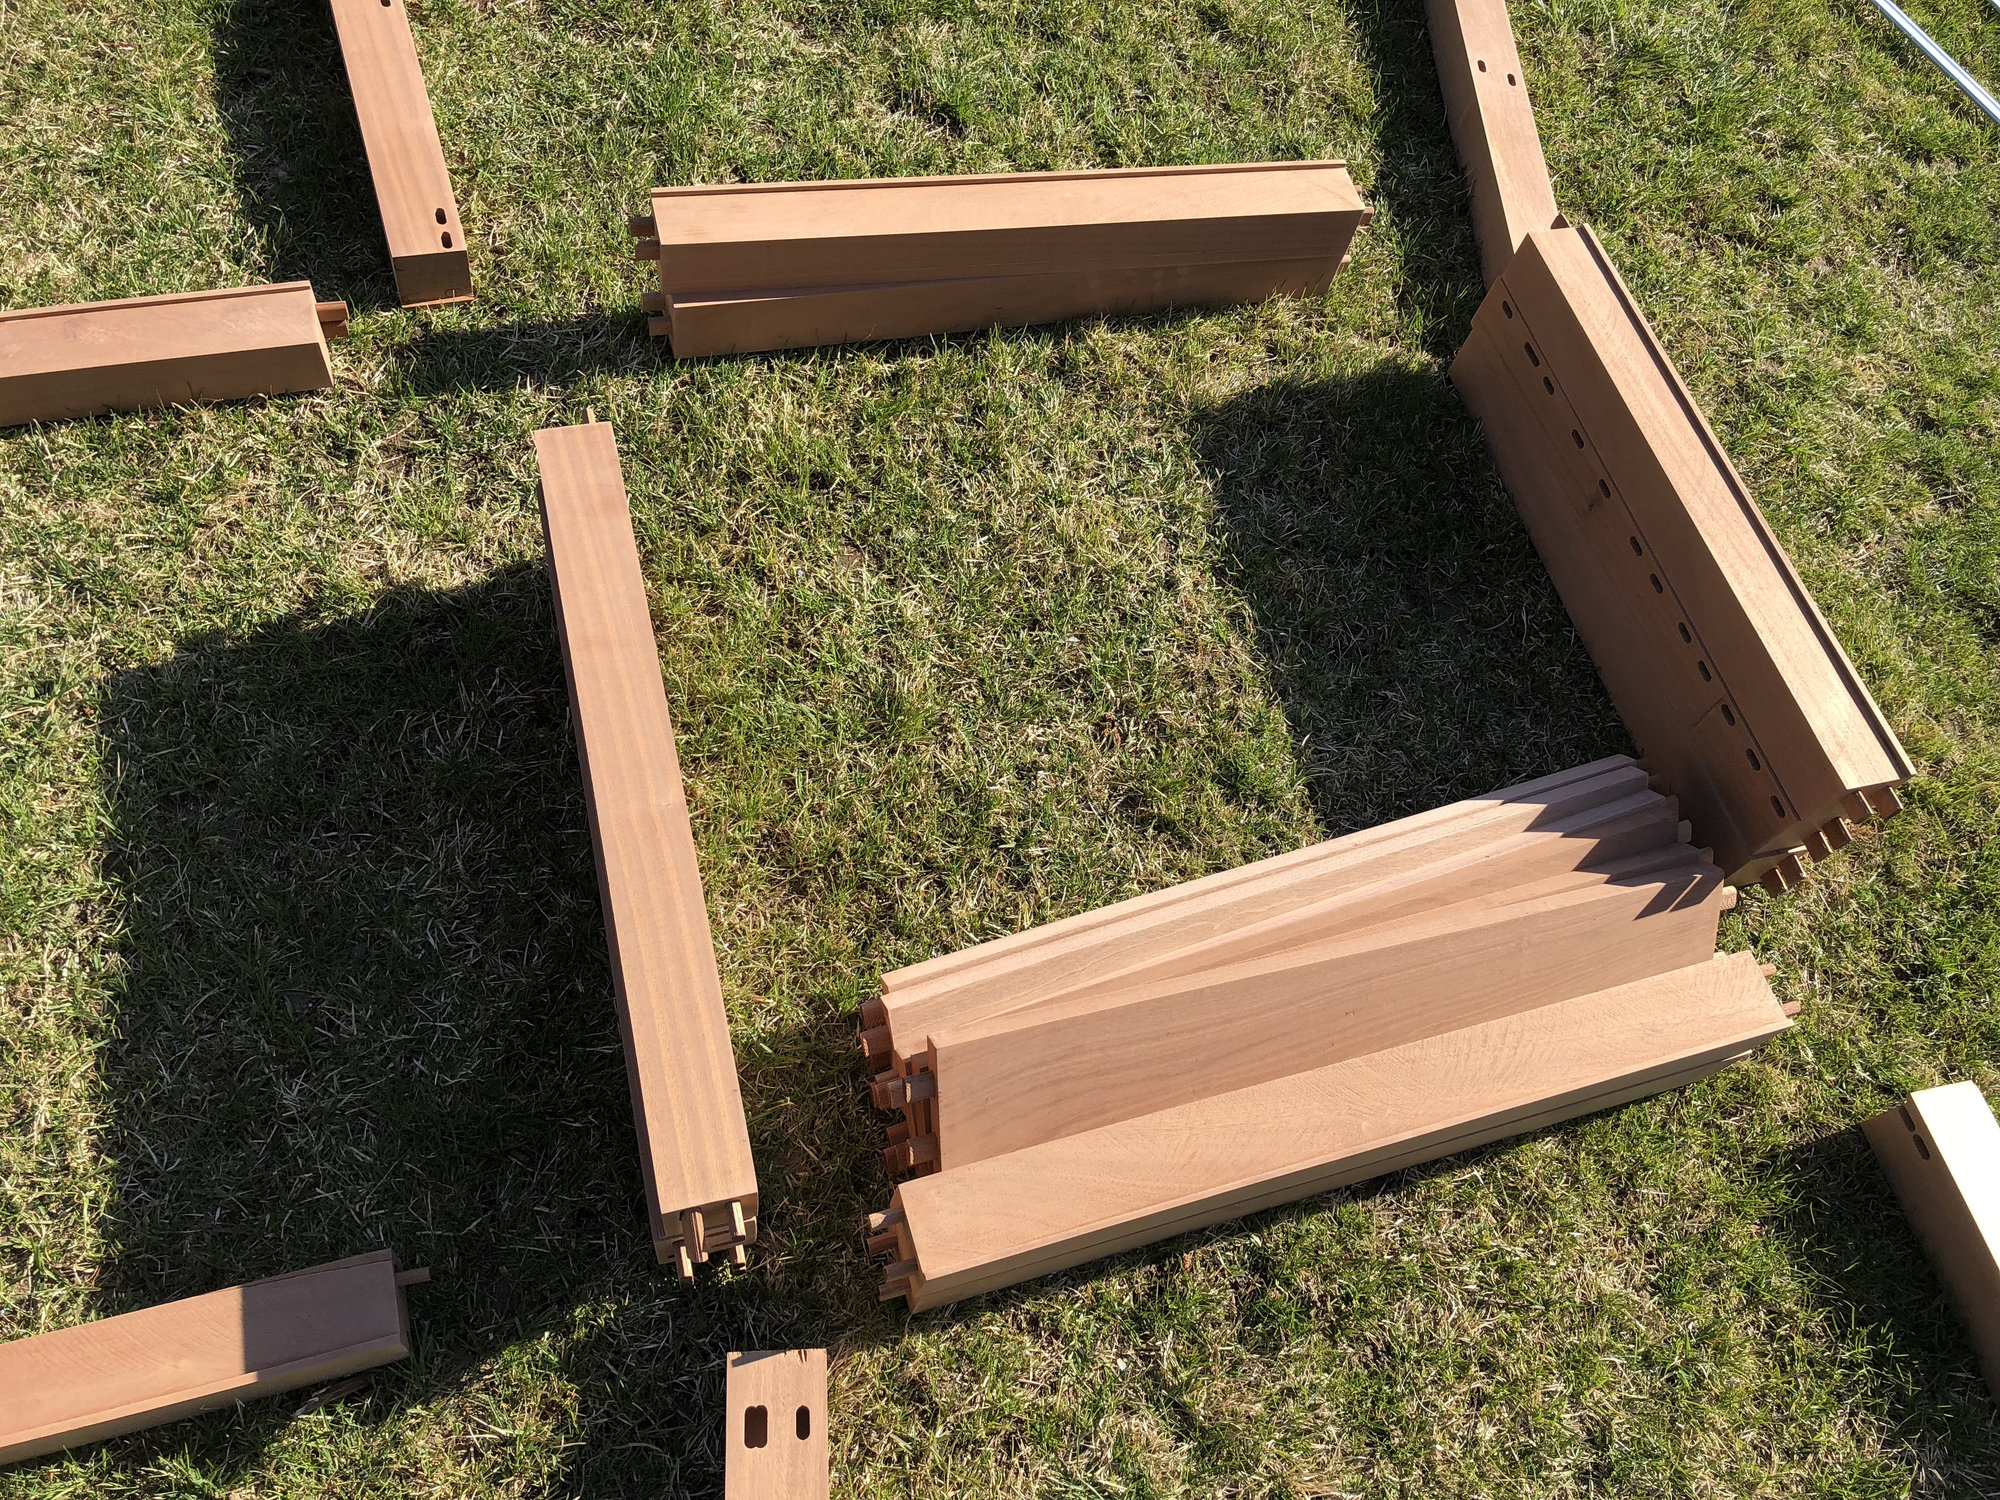
 This is the pizza holder im talking about and plan on accomplishing this by using 3" angle iron that I would attach tp the inside left and right legs of the left side of table;
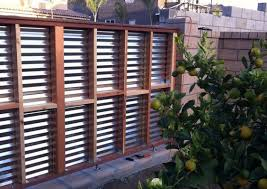
This is the look I was originally going for,
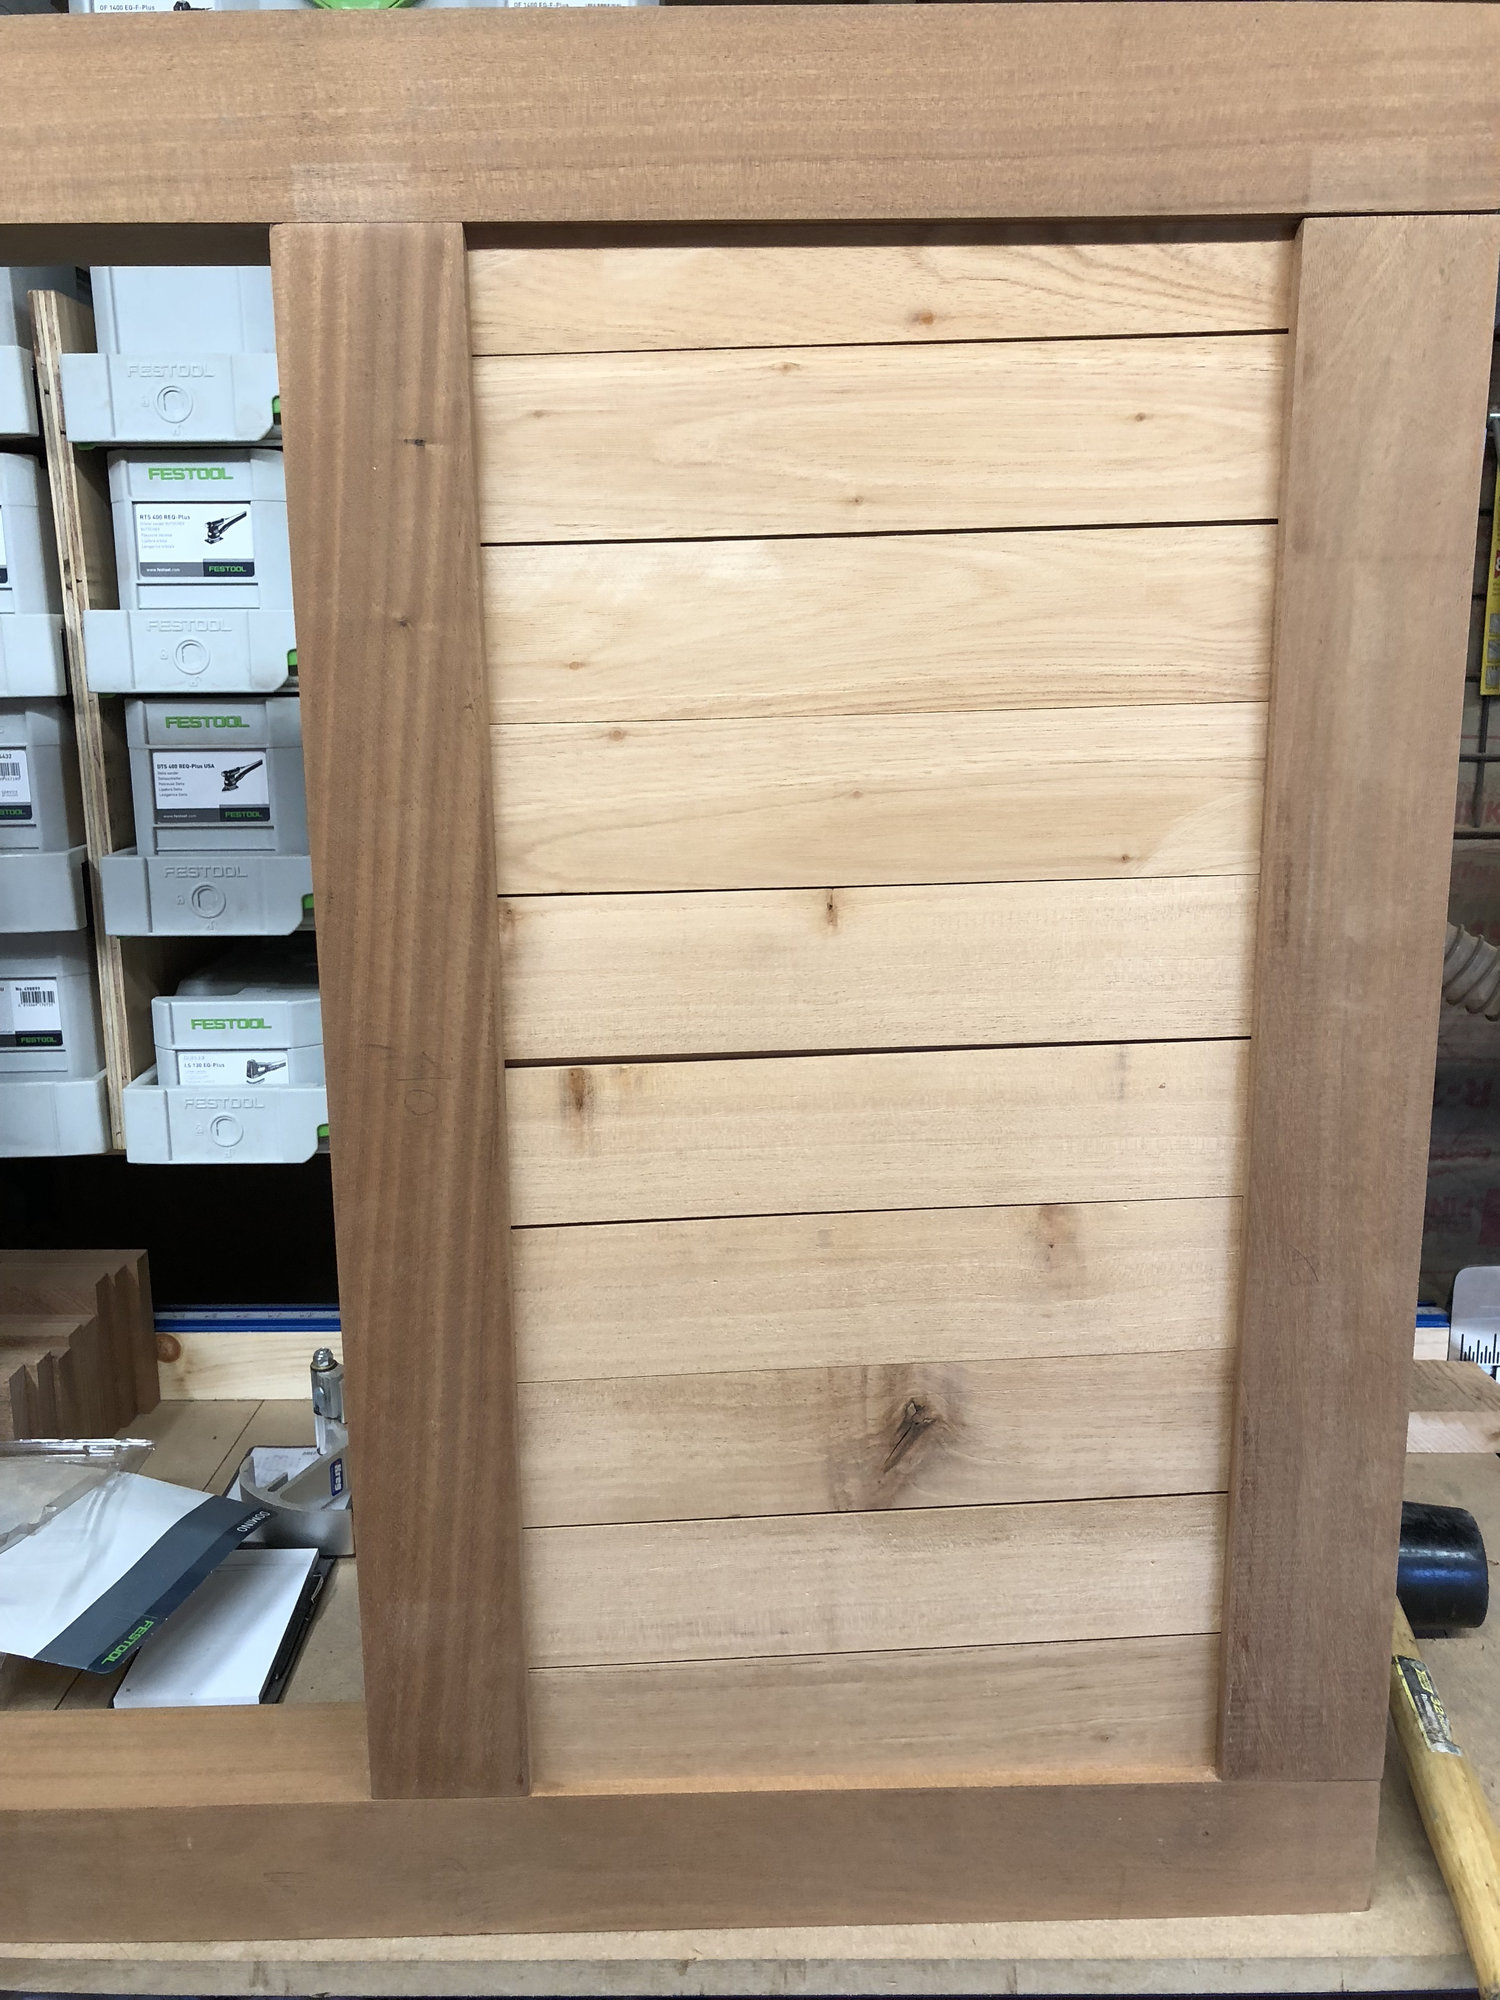
Now im looking for something like this but reversed where the fram will be darker and the doors and cabinet fronts will be lighter in color

Im looking for something that last a long while outdoors and being I live in Long Island the salty sea water in the air destroys almost everything a little (lot) faster then living more inland. I also plan on leaving it out year round without a cover so sun snow rain etc is also a deciding factor. With that said I decided to use Italian Sepele Mahogany with a simple tongue oil that only should have to be reapplied every year or two. And a 11 gauge (⅛" thick) 316 stainless steel sheet with #4 finish as a counter top. Im also going to put the table on casters (6 total) as I would need to move it off the patio into the driveway from time to time which is why i also opted for the metal counter top verses a granite or cement (being it is lighter and hopefully easier to move)
I made the frame where I plan on putting the egg on the right side of the table on the shelf. I plan on putting a sliding drawer under the shelf to store the platesetter. I also plan on putting a swinging door on the left side with a bunch of angle iron running up the left and right side of cabinet to store all the different grates I have (I am pretty much copying a pizza pie rack where they can slide in a bunch of metal trays with the angle iron only holding the sides) ill show some pictures of what I got done so far and the pizza rack for clarity.
So here is what im looking for advice on the back and side walls, I was originally going to put corrugated metal but I cant find it in 316 stainless with a #4 finish so it won't match and can only find it in galvanized steel which would eventually rust (as most metals do very quickly with the salt water in the air).
Im no woodworker and this is my first real project I decided I didn't want to use screws or nail so I made dominos (a type of mortise and tenon) in all the pieces and will attach with glue. My wife said I should just use more wood and make them look like cabinets (again I point out novice woodworker), Which sounds like a good idea and is probably what im going to try and do so I ask (I know this is personal taste) do you think the same wood and grain finished with the same color as the frame or contrasting color and grain for the front (cabinet door, Drawer) and sides and rear? Or is there something else you can suggest.
This is what I started out with 2x 17'x9.5"x9.5" boards and 2x 17'x17"x1" boards and had to mill them down to usable sizes which took a surprising long time (again im a novice)
This is what I ended up with before assembly,
This is the table partially assembled without glue and no bottom for the left cabinet yet Im working on that this weekend;
Front view, front left will be a door of some sort that swings to the left and the bottom right will be a pull out drawer.
Side view of the cabinet that will house the pizza style racks and the side im looking to close in with ??Top view of the shelf that will hold the egg, and the support rails for the S/S counter top with a ⅛" rabbet around the perimeter to hold counter top in place:Back view:This is the pizza holder im talking about and plan on accomplishing this by using 3" angle iron that I would attach tp the inside left and right legs of the left side of table;This is the look I was originally going for,
Now im looking for something like this but reversed where the fram will be darker and the doors and cabinet fronts will be lighter in color
Long Island NY
1 XL BGE 12/17, 1 LG BGE 3/18, 1 MM BGE 3/18
1 XL BGE 12/17, 1 LG BGE 3/18, 1 MM BGE 3/18
Comments
-
I can offer nothing, but just want to say I like where this is going.Stillwater, MN
-
Did I mention this is one of the 2 tables (hopefully identical) Im building. This one is for the XL and will is 48"x32" and after the casters are installed should sit 36" high and the second table will be 38"x32" and 36" high. My plan is to put the large egg on the left of the table. The final layout will be from left to right new table (with large egg on the left with counter to the right) and then have my 60" gasser that is 60x32 36" high in the middle and then the XL table (with counter to the left and egg to the right) to the right of gasser all can be pushed together to look like 1 big table but each one be able to be moved independently for ease.Long Island NY
1 XL BGE 12/17, 1 LG BGE 3/18, 1 MM BGE 3/18 -
StillH2OEgger Im afraid of what everyone is going to say, but at the same time I really am looking for some sort of input as Im hoping Im missing an easy solution.
Thanks for lookingLong Island NY
1 XL BGE 12/17, 1 LG BGE 3/18, 1 MM BGE 3/18 -
all I can offer is to make sure you use a table nest or something to provide an air gap so you don't burn it down.
2 Large Eggs - Raleigh, NC
Boiler Up!!
-
I should have clarified that I will be using a table nest for both eggs on both tablesKent8621 said:all I can offer is to make sure you use a table nest or something to provide an air gap so you don't burn it down.Long Island NY
1 XL BGE 12/17, 1 LG BGE 3/18, 1 MM BGE 3/18 -
In addition to the nest I will be using the stainless steal circle I cut out from the table top under theLong Island NY
1 XL BGE 12/17, 1 LG BGE 3/18, 1 MM BGE 3/18 -
11 Gauge on top seems over kill
-
I agree but was able to get 2 x 4’x8’ sheet 11 gauge 316 stainless with a #4 finish for $300.00 for the 2 so it became necessaryTspud1 said:11 Gauge on top seems over killLong Island NY
1 XL BGE 12/17, 1 LG BGE 3/18, 1 MM BGE 3/18 -
That looks great so far!
Large Egg with adjustable rig, Kick Ash Basket, Minimax and various Weber's.
Floyd Va -
Thank youbluebird66 said:That looks great so far!Long Island NY
1 XL BGE 12/17, 1 LG BGE 3/18, 1 MM BGE 3/18 -
Okay so I’m thinking Spanish cedar for the contrast and do a board batten style with a lap joint. Going to see what it looks like. I’ll post photos once I start itLong Island NY
1 XL BGE 12/17, 1 LG BGE 3/18, 1 MM BGE 3/18 -
So I just did one side really quick to get an idea of what it would look like this is the right bottom side below Egg support shelf. There is no stain on either wood yet. I know the sepele will get darker with the stain, but not sure of the Spanish cedar I have never worked with or seen used before.
 Long Island NY
1 XL BGE 12/17, 1 LG BGE 3/18, 1 MM BGE 3/18 -
okay so i got tied up with work again and had not got a chance to give the table any love until this afternoon so here is where im at so far:

^^^Still have to put a floor and swinging door on the left and a floor and pull out drawer on the bottom right. I already made the shelf for the egg to sit on its just getting glued up right now so I dont have it in there. Im going to use ⅛" aluminum on top of the wood shelf plus a table nest. Im also going to use ⅛" aluminum as a divider between the left and right half of the table to help seal the cabinet part
^^^This is pretty much what the back is going to look like (its not stained yet)
^^^This is what the left side is going to look like again not stained ^^^This is what the right side is going to look like again not stained and missing the egg support shelf.
The top is going to be stainless steelLong Island NY
1 XL BGE 12/17, 1 LG BGE 3/18, 1 MM BGE 3/18 -
For a novice woodworker you're sure starting out the right way with your tools. A Festool domino and those beautiful Bessey Revo clamps. Looks to me like your doing a superb job on the design. Great choice on the woods. On my cedar table (and entire patio, pergola, cedar beams etc.) I used a product by Wolman called F&P finish. It's a finish stain and preservative in one that has held up to Kansas seasons for 5 years now and still looks great. The horizontal surfaces will probably need a new application this spring. Iv'e been very happy with the results of this product. Come in several different colors. It's important to note the instructions specify doing your second coat while first is still wet. Good luck on the rest of your project.
-
Thank you this is my first big project, I have made a few benches and stools but non came out perfect. This project I’m taking my time, as far as festool I’m of the belief if your going to buy something save your money and buy the best you can afford so you only have to buy it once not twice, plus they work so well. I was just going to use pure tongue oil as it’s food safe and I didn’t want to change the color of the wood to much. Does the F&P finish make the wood much darker?Smolder said:For a novice woodworker you're sure starting out the right way with your tools. A Festool domino and those beautiful Bessey Revo clamps. Looks to me like your doing a superb job on the design. Great choice on the woods. On my cedar table (and entire patio, pergola, cedar beams etc.) I used a product by Wolman called F&P finish. It's a finish stain and preservative in one that has held up to Kansas seasons for 5 years now and still looks great. The horizontal surfaces will probably need a new application this spring. Iv'e been very happy with the results of this product. Come in several different colors. It's important to note the instructions specify doing your second coat while first is still wet. Good luck on the rest of your project.Long Island NY
1 XL BGE 12/17, 1 LG BGE 3/18, 1 MM BGE 3/18 -
So true on the tool philosophy. Be careful with that Festool thing. Speaking from experience, it becomes an expensive addiction. I'm pretty sure you can get all types of finishes, including natural. It's only $25 a gallon, also. Just checked online and they make a transparent variety also.
-
BECOMES!!! I laugh because that bug already bit and man did I get infested. I’m pretty impressed at how well my credit cards held up to the heat I gave them this winter.Long Island NY
1 XL BGE 12/17, 1 LG BGE 3/18, 1 MM BGE 3/18 -
I hear ya'. I think I'm past those days. I've pretty much bought all the Festool I think I need. The trick is to stay away from the forums. FOG in particular. They are a joy to use, though.
-
Okay so this took 6 weeks longer then I expected it to (I just could never give it the time it needed) and about triple the budget I set aside it’s ALMOST finally done. I say almost because still needs door and draw knobs and probably a T track along the top stainless and the magahony. Also another coat of tounge oil. But without further delay it’s ready to use and that’s the main thing. I also have to build one more of these for the large egg as well. So my goal was to use no nails or screws and everything be done with wood and for the most part (door hinges, draw track, metal shelve racks, casters, and knobs are all attached via screws) everything else is just wood. I’m pretty happy with this as my first wood project I made a ton of mistakes but hopefully learned a thing or two. I used the stainless under the egg nest and along side the egg as well so the egg is to have as little contact with with wood as possible.
The moment your all waiting for PICTURES:
I made these shelves so I can pullout the rack I need without having to move all the other racks to get to the one on the bottom
This is the rear view:
A front view with the door and drawer closed (no knobs yet):
Side view:
I will put all my racks and platesetters in the door and the woo and rig in the drawer
I used the stainless that I cut the hole out of as a base below the nest just as an added safety:
Table before door installed and top installed:
The rear without top:
side view with egg installed:

I put the stainless as a wall that is close to the egg again as a safety:


Long Island NY
1 XL BGE 12/17, 1 LG BGE 3/18, 1 MM BGE 3/18


Categories
- All Categories
- 184.1K EggHead Forum
- 15.8K Forum List
- 460 EGGtoberfest
- 1.9K Forum Feedback
- 10.4K Off Topic
- 2.2K EGG Table Forum
- 1 Rules & Disclaimer
- 9K Cookbook
- 13 Valentines Day
- 93 Holiday Recipes
- 224 Appetizers
- 520 Baking
- 2.5K Beef
- 88 Desserts
- 167 Lamb
- 2.4K Pork
- 1.5K Poultry
- 33 Salads and Dressings
- 324 Sauces, Rubs, Marinades
- 548 Seafood
- 175 Sides
- 122 Soups, Stews, Chilis
- 44 Vegetarian
- 102 Vegetables
- 313 Health
- 292 Weight Loss Forum