Share your photos by tagging us and using the hashtag #BigGreenEgg.
Want to see how the EGG is made? Click to Watch
Table Project
First I would like to introduce myself. Im Adam from La Crosse, WI. I haven't had an egg before but, have wanted one for years. After my father bought one last year on a whim...... I had to get one.
Ill start out by saying I sit behind a desk all day and I am not very handy. So this project has taken 3 times as long and im over budget but, its all worth it. I've had my LBGE for about 3 months. Its still in its box waiting for me to get done with my table.
First off after 6 months of planning I decided to build the frame out of steel. I am putting this on my deck and so no to block for the base and I work in Insurance so no wood for me (Too many fires). Here is a couple of photos of the frame being built. Thank god for friends who can weld. I took a turn but, I also enjoyed watching him work.
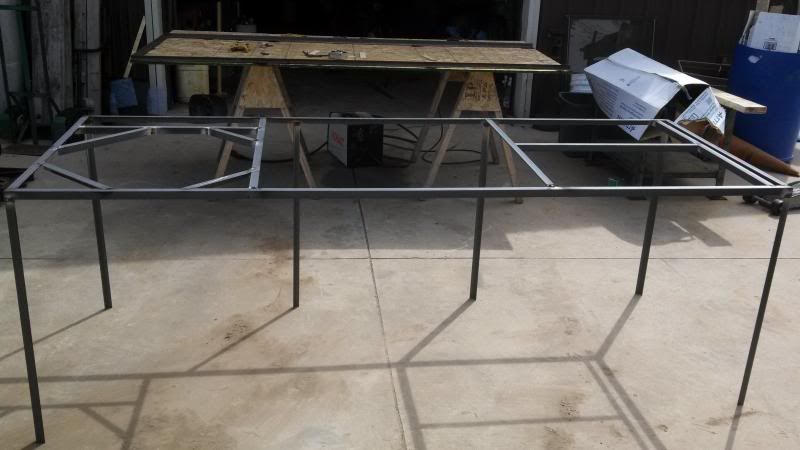
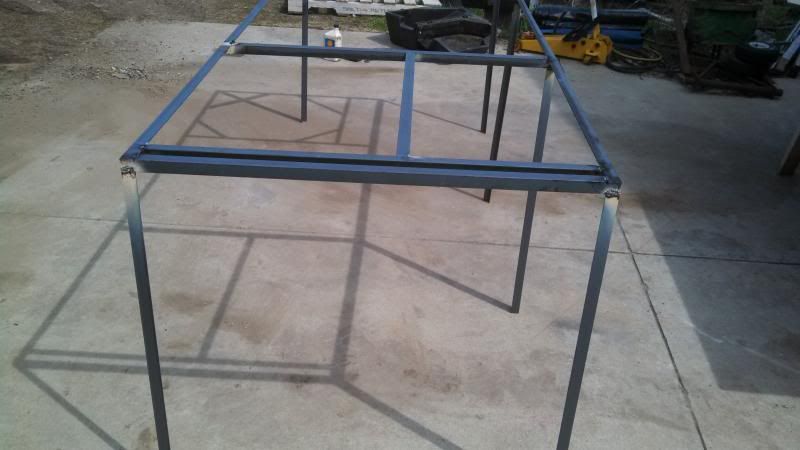
I didn't get a photo of it done but, There is no way this thing is going to move. It is 1x1 1/8" steel. As you can tell the octogan area is where the Egg is going. The other end is where my Gasser is going. I know this is Taboo but, My wife really likes our Holland Grill. So I had to buy the built in one that shiny stainless steel....
The egg will sit on a piece of decorative porch support from the 50's-70's that is 1x1 boxed steel so it wont be going anywhere.
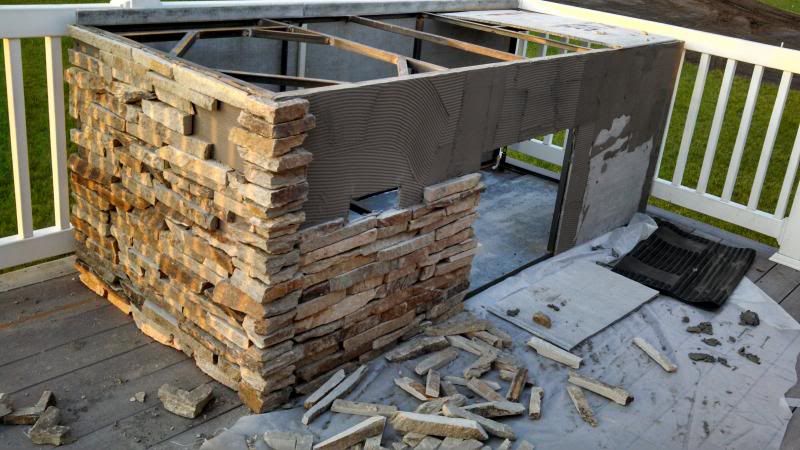
Next will be the facing of the island. I choose a stacked stone that I thought looked awesome for the front and side that will be exposed. ( The Back and other Side will be butted up to a deck railing so a simple Stucco for this. To keep it water proof.) This is the first time I have done any type of stone work. Thanks to the help of more friends who are masons they guided me along the way. They had me do the end panel on my sawhorses. Sticking stones on that horizontally was alot easier for my first time than doing it vertically. Here is a photo of the stone work done be me.
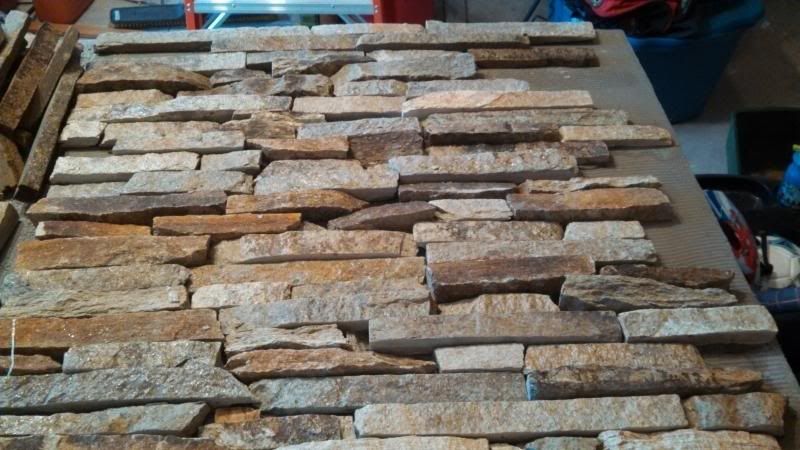
Once this was done I had to get this up and onto the deck and hold it into place for me to attach to the steel frame. This was a chore.... 10 lbs per sq ft. 3x3 sheet and you get the picture. Towards the bottom there is a 3"x8" vent for the island. Since Im piping nat gas into this thing. I didn't need a bomb.....
Next was to start facing the rest of the stone while it is sitting on the deck. Lots of placing on, Tearing off, falling off, and swearing going on while the stone is being set vertically. This is an art and I have a new appreciation for people who do this for a living. It's not hard to get the concept down but, extremely hard to get it done correctly and to look great. It is a true art. Here are two more photos of this. I got the corners and part of the face done in one night. I had to cut an opening for my bottom vent so I could access that.
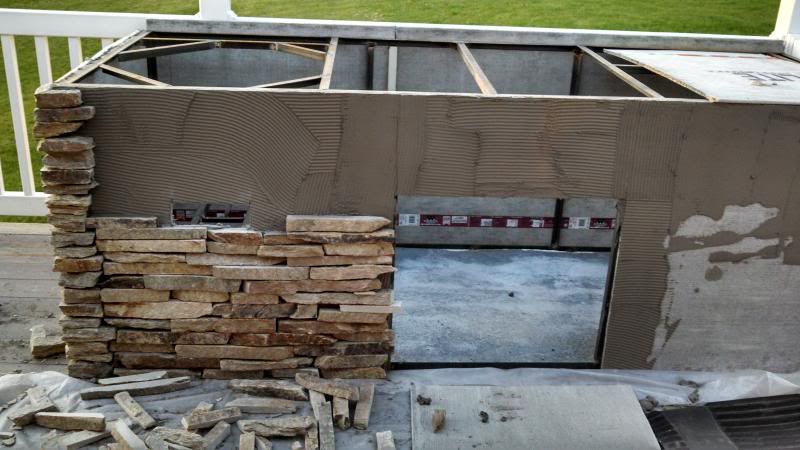
The opening in the middle is where I got access to the inside with a stainless door. The area to the right of that also is another stainless door without any thinset on it. Here are a couple of photos with a door set in there so my wife could see where they were going. Doors are 27" from BBQ guys. made out of 304 stainless.
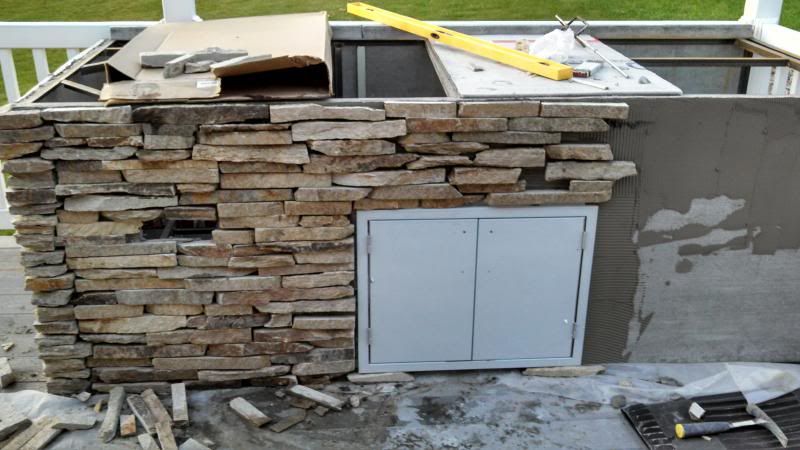
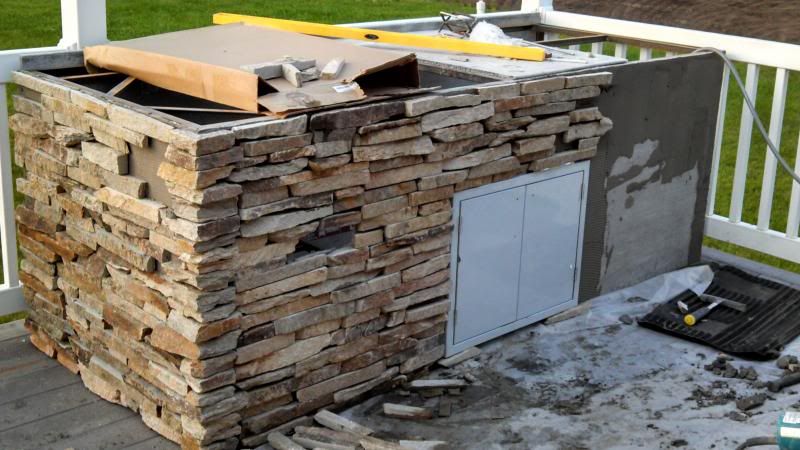
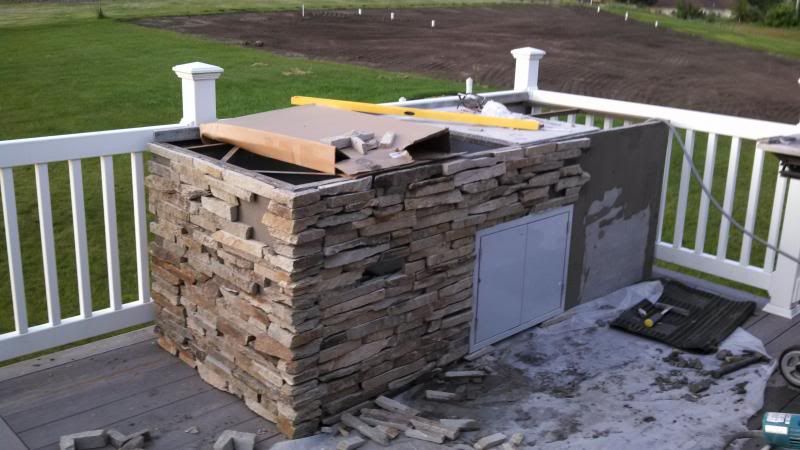
So there is my progress. I haven't taken any photos or done much work on it in the past 2 weeks. Excuses, Work and family obligations are getting in the way of finishing but, this weekend will be a huge push to finish it.
Stats and materials used. Island Size: Frame 3'x3'x8'. Aprox weight. 1200 lbs. 250 lbs for the grills. about 70lbs for the steel. 270 for the cement board about 400 lbs of stone. 150 lbs of thin set. 40 lbs for the Porceliann Tile. I am using a Porcelain Tile top with a rectified edge. 1/16" of an Acrylic grout to stand up to the Wisconsin Winters also to keep grease out of the grout. I'm having a local business cut my tile for me for around my egg. I havent found a good way other than them using thier waterjet table for cutting a round circle. I have 18" tiles for the top so will be needing to cut 4 tiles. Table edges will the Rondec Edges from Schluter Systems
Thanks for looking through my rambling and project, any hints or suggestion would be great.
Thanks,
Adam
Comments
-
Welcome to the lifestyle Adam from La Crosse. Looks like you're going to have one fantastic setup. I hope you've planned into your design an easy way to take the gasser out (by this time next year) when you eventually realize that you're not using it anymore.
 ---------------------------------------------------------------------------------Well, "spa-Peggy" is kind of like spaghetti. I'm not sure what Peggy does different, if anything. But it's the one dish she's kind of made her own.____________________Aurora, Ontario, Canada
 -
Table looks awesome. Dude, get the egg out... Put in on the concrete and start cooking. Three months? Dayum.Green egg, dead animal and alcohol. The "Boro".. TN
-
My thought eggacly, I don't think I could have waited 3 months to cook on mine. I had it out of the box and fired up within 3 hours. But congratulations, you'll love it. And the table looks great. You've got some good and handy friends.
Damascus, VA. Friendliest town on the Appalachian Trail.
LBGE Aug 2012, SBGE Feb 2014
-
Looks awesome, can't wait to see the finished photos.Packerland, Wisconsin
-
-
Great looking table project, Adam.
Don't even think about pulling the gasser out of there, they make wonderful storage bins for your eggcessories!
B-)John in the Willamette Valley of Oregon -
Looks great- I really like the design. Im not an engineer but will you need to add any additional support for the deck? I guess it is only 50# per square foot so sounds okay...
and +3 on getting the egg out on some cinder blocks- need to get that thing broken in
 Greensboro, NC
 -
Thanks for the support and yes I do need to get the egg out and break it in but....if I pull it out I will putz with that instead of getting on this. This weekend I will have 2 full days to work on it and Monday through Thursday I should have the evenings after work. I should have more than enough time but, this depends on how many Double Oaked from Woodfords I have in the evenings.
As to the weight on the deck. This sits across 6 2x10 joists with 2 4x4 at upright support under the island. There are 2-2x12 I bleive stringers is the correct word under all the joits coming off the house to be anchored to the vertical 4x4s. There are 4 other 4x4s on the other parts of the deck. They are all sunk in 5 feet to concrete pads. The deck only sits at the max part under the island about 4 feet off the ground. So structurly I should be more than fine. I beleive. If the deck starts to sag and creat an issue I will bring in some6x6's to help with support..
When I move and If I move there will be either a decision of selling with house..... or bring in a crane.....I will be opting for the selling as an enhancement to the house.
-
Might as well send the pic to Naked Whiz. It's a keeper. Good work. And welcome.Columbia, SC --- LBGE 2011 -- MINI BGE 2013
-
Weekends Progress.
I deceided to take a few of the front rock pieces off as it didnt look up to my standards. Now I got my hole cut and tonight going to take the tile for them to be cut. The Egg is closer to its new home.
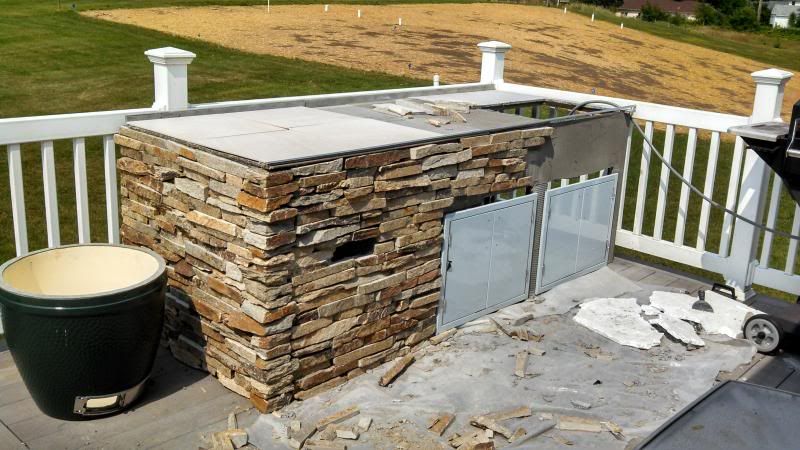
Now I need to reseach where to find a piece of insulation that can protect the egg from shifting and damaging the outside of it. I beleive that I saw something on a previous table discussion of a product made by 3M.
Now to get to work and not think about finishing the island and finally using the egg..... Yup this will be hard....
-
-
Looks really nice. One note--the bottom vent is used for cleaning out ash--might want to make sure you can get your cleanout tool and dustpan to the lower vent (or I guess you could just use a shop vac which would fit through the hold you have in front of lower vent). Anyway, quite the work of art.
-
Egg's In. I need to cook a little before I go crazy. I fired up the egg yesterday to get the funk off the new parts. I am a little dissappointed that it sits up so high over the counter top. I didnt factor in that the back hinge when rotated will move down alittle.
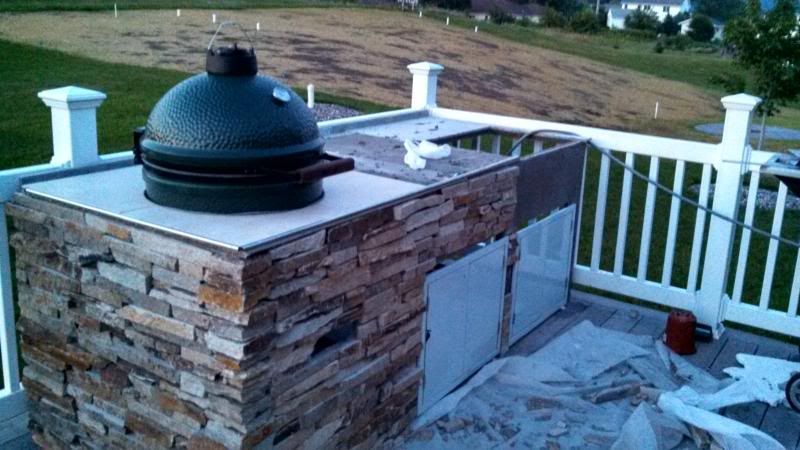
Tonight will be some burgers and tomorrow its time to do a turbo butt.
-
-
:Update:Steve
XL, Mini Max, and a 22" Blackstone in Cincinnati, Ohio -
Really like the setup- now that you are cooking on the egg you will never finish the project
 ) Greensboro, NC
 -
How do you get to lower vent
-
Here is one from a few years ago, I learned a few things doing this one.
Categories
- All Categories
- 184.1K EggHead Forum
- 16.1K Forum List
- 461 EGGtoberfest
- 1.9K Forum Feedback
- 10.5K Off Topic
- 2.4K EGG Table Forum
- 1 Rules & Disclaimer
- 9.2K Cookbook
- 16 Valentines Day
- 118 Holiday Recipes
- 348 Appetizers
- 521 Baking
- 2.5K Beef
- 90 Desserts
- 167 Lamb
- 2.4K Pork
- 1.5K Poultry
- 33 Salads and Dressings
- 322 Sauces, Rubs, Marinades
- 548 Seafood
- 175 Sides
- 122 Soups, Stews, Chilis
- 42 Vegetarian
- 103 Vegetables
- 315 Health
- 293 Weight Loss Forum


