Welcome to the EGGhead Forum - a great place to visit and packed with tips and EGGspert advice! You can also join the conversation and get more information and amazing kamado recipes by following Big Green Egg to Experience our World of Flavor™ at:
Want to see how the EGG is made? Click to Watch
Facebook | Twitter | Instagram | Pinterest | Youtube | Vimeo
Share your photos by tagging us and using the hashtag #BigGreenEgg.
Want to see how the EGG is made? Click to Watch
Another table thread
WisconsinJim
Posts: 27
Hi everyone, I'm new here and was just granted membership to join in the discussion. Very timely because I am in the process of building a table for my new Large Egg. Most of the hard part is finished but I've taken lots of pictures along the way. I'll upload some in the next couple of days to show my progress. I'm a little anxious about the build but I've followed the plan on the BGE website so hopefully it will all fit fine. I'm really looking forward to firing up the egg on Memorial Day. Hopefully it will all be together by then.
Any suggestions what my first cook should be? I know it's not supposed to get too hot on the first couple of burns so I've was thinking something simple like burgers and brats and maybe some corn on the cob. Can't wait! At any rate, I look forward to joining you all in the discussions on this forum. Looks like a fun place to hang out.
Comments
-
I'm just 2 weeks into my LBGE adventure and loving it. Right now it's sitting on the table next up on top of some scrap 6x6's from our deck and some landscape pavers. Hope to start the table this weekend.Also check out the table forum listed on the right. Lots of good ideas. Nakedwhiz.com also has a large database of table pictures to keep the creative juices flowing along with some great tips and recipes.As for your first cook, there are lots of possibilities. I would suggest something that is less temperature sensitive, burgers, chicken or the best choice is a spatchcock chicken. Easy to do, 350-375 degrees and in 1 hour you'll have some of the best chicken you've ever eaten.Welcome aboard.
-
Pork butt is always a good cook. Where are you located? There are a few of us Cheeseheads here.XL BGE - Large BGE - Small BGE - Traeger Lil' Tex Elite - Weber Smokey Joe
-
Charlie, thanks for the suggestions, I'll look into that chicken. I haven't unboxed my egg yet but it's getting closer. I wanted to wait till I got the table finished and I'm also waiting for a table nest to come in. Good luck on your table build, I'm going to be putting up some "in progress" pictures of my project when I get access to a real computer. This is not a woodworking forum but what the heck. Troutgeek, I've never made a pork butt roast, sounds good. We're in the boonies, closest "big city" is Wausau. Anyone ever done a Friday fish fry on the egg? :-)
-
The day I bought my egg I filled it up with lump and let it sit at 350 for 6 hours empty. Put inmthe table I made the very next day. I'm thinking of buying a cast iron griddle half moon for fishLBGE& SBGE———————————————•———————– Pennsylvania / poconos
-
This is going to be a rather small or compact table. about 51 inches x 26 inches. That's all I have room for in my garage and I will wheel it out on the driveway to cook.
Went to Menard's on Friday to get my wood for the table along with wheels and some other hardware. The table is in there, I just got to get rid of the excess wood :-).
I ripped the Cedar and had to glue pieces together for the legs.
After laying out the legs, I drilled for the mortises.
Then squared up the mortise with a chisel.
Oops, almost forgot to cut the hole for the bushing for the axle. It's a 3/4 inch hole for the bushing for a 1/2 inch axle
There are 5 mortises on each leg and the squaring up was the hard part. Need to get a new sharper chisel.
I cut tenons on the rails with the table saw but you can do this a lot of different ways too.
Then I dry-fit this part of the table together.
I've already cut the tenons and mortise for the cross members and hopefully will glue this all up tomorrow or the next day. Then I have to work on the table top. I think I'm going to glue up a solid cedar top but still have not decided on that yet.
The pile of wood is starting to shrink.
More to come!
-
Can I ask what kind of glue you're using with the cedar?
-
I'm using titebond 3 glue. It's waterproof and extremely strong. This table will spend most of the time out of the elements but even if it was housed outside all the time, the glue would hold up. I will also be putting a peg through the tenon to add strength.
-
Welcome. Jump in here and get involved
This is not a woodworking forum but what the heck
This is an egging forum. All discussion are welcome... Usually political views are avoidedGreen egg, dead animal and alcohol. The "Boro".. TN -
Didn't get much accomplished today but still have a goal for being finished this weekend in sight.
I sanded all of the wood and then used a chamfer bit in my router to add a decorative edge to the legs
Then I used a radi-plane to soften the edges of all the wood. This makes it look and feel better and also is better for the final finish. Having the softer edge it is less likely to chip off.
Then I squared up each end and glued them together.
This is the supports for the table top and there is a similar structure for the shelf which will support the egg.
This will all get glued together tomorrow along with another rail at the base to add support.
-
Very nice! I can't wait to see the finished product. This thread should be a "sticky" on how to build a table. Beautiful so far and great documentation!
-
Thanks Eggcelsior, I'm glad you are enjoying it. This is just one way to build a table and a person wouldn't need to go to the trouble of creating mortise and tenon joints for their table. I went to one of the local BGE dealers and they had a very basic table that they wanted $450.00 for. I figured I could build a much better one for about $120 in material and about 20 hours in labor. I have the tools and I enjoy woodworking so I figured I'd just make my own.
This morning I glued up the rail section that will hold the tabletop. One of the things a woodworker never has enough of it clamps. I didn't have enough bar clamps that will span the project so I had to improvise one clamp with the addition of the C-clamp. Creative clamping!
To make sure this assembly is squared up you have to measure the diagonals and they should be identical. Make any necessary adjustments with a diagonal clamp to keep the assembly in proper position while the glue dries.
When this is dry, I will do the same for the shelf assembly and then the whole frame can be glued together. I'm getting closer. :-)
I'm off to pick up my table nest, plate setter, lump charcoal and fire starters before work.
-
Tonight so far I've glued together the base assembly. Now I have to start gluing up the top and applying individual boards for the shelf that supports the egg. This has to be squared up the same way as the previous post by measuring on the diagonal. Since I already squared up the top member, this was perfectly square when I glued it together. I'm getting closer
-
Another awesome table build. Following closely. Looks great so far. Thanks for documenting the build.-Jody Newell (LBGE & a 36" Blackstone griddle).
Location: 🍺🍺 The back porch, Munford, TN. 🍺🍺 -
Looking great, I wish I had your skills.
-
My new one is cedar also. Smells nice huh.
XL BGE and Pellet smoker
-
Thanks guys, I don't think it's that I have the skills as much as that I have the tools. This really isn't very hard to do and as I said before adding the mortise and tenon joint isn't really necessary as much as it is what I wanted to do for the look I'm after. Yes, sticks, the cedar smells good, I wonder if you could use it as a plank for cooking.
The next step is to peg and plug the tenons. The tenons are 5/8 inch wide so if I have to plug it from above as I do for the cross members, I use a 1/4 inch pin. If I am plugging through from the side, I use a 3/8 in pin. In both cases I plug with a 3/8 inch plug because that is the only plug cutter I have. To make the plug I use this plug cutter.
And use it in my drill press. Simply cut a bunch of plug in a piece of cedar.
and then remove the plugs with a chisel.
This shows the two size pins.
When I've pinned from above using the 1/4 inch pin, I first drill the hole for the plug with the 3/8 inch bit and I put tap on the bit for a depth gauge.
I would then use the 1/4 inch bit and drill for the pin using the same setup for a depth gauge. You have to drill about 1/4 inch deeper than the length of the pin so you then have room to put in the plug.
This shows driving a 1/4 inch pin from above,
Here is driving a 3/8 inch pin through from the side.
Obviously glue was applied to these pins before placing. To put plugs in, just apply glue and tap down lightly with a hammer. Once dried, I use a flexible saw to cut off the plug to the surface.
And then sand it all for a nice, smooth finish. Presto!
The base is now done, next step is laying out the table top and shelf.
Till next time.
-
I worked on the table top today and decided to glue up a solid top instead of individual divided boards. To do that I first had to run the boards through a jointer to get a perfectly straight edge.
Then lay out the boards the way you want.
Mark where to put the biscuits to join the boards.
Cut the biscuit slots.
Glue and apply biscuits.
Clamp it up tighten clamps till glue starts to spill out of the joint.. Alternate the clamps on each side of the board.
Do the same thing with the next board, etc, etc etc, till finished.
When the glue dried, I sanded the top and then I cut a slight rounded edge on the sides. You can't put a round egg in a square table. I also took a round over bit with the router and rounded over the table edge to give a more finished look.
Then I carefully determined where the egg was going to be in the table top and I cut out the hole for the egg and rounded over the edge of that too.
I started working on the egg support shelf too and am going to glue these boards up too but that's gonna have to wait till tomorrow. I should be able to put this all together tomorrow and maybe start applying the finish. Doesn't look like I'll make my Memorial Day deadline because it'll take a few days to get the finish dried. Bummer.
-
This is a beautiful thread of a beautiful table build. Thanks so much for sharing. I'm staying tuned to see how you finish it so i can learn how to!#1 LBGE December 2012 • #2 SBGE February 2013 • #3 Mini May 2013A happy BGE family in Houston, TX.
-
Wait a minute! I thought you said you had no skills! I'm quite jealous.
-
-
This is a beautiful table so far and good craftsmanship. What type of finish are you planning?
-
wow...I wish I had half of those tools!
Very nice craftsmanship...indeed.
-
Thanks guys, yep it's all in the tools. Fun to do but a lot of work too. Hope I can do as well when I'm using my BGE.
Thebaron, I'm planning on staining and then a good quality uv resistant polyurethane. This is going to be housed in the garage unless using. I just want the urethane to help resist stains, Cedar is a very soft wood. I would have preferred a stronger, resistant wood but there is nothing locally I can get.
I'm working on the lower shelf now and though I'm doing it the same as the table top, I have to do it a glue it up a little differently so that it will fit.
The boards on the end are a little wider so they will fit around the leg and they also have to be notched out for the leg.
I have to leave the last board off but it is all glued up as was the table top.
I also cut some mitered blocks to support the table top around the egg. These will be applied with glue and screws
Added the last board to the bottom shelf and glued it up and clamped.
-
This is a table that would be worth the 450 dollar price tag that BGE charges. I love this thread.
-
I applied the top with screws through the top. I first drilled a hole for the plug and then drilled through the table top with the appropriate size drill bit for the #8 stainless steel screw. I plugged the holes like I showed before.
Did the same for the shelf unit and it is now essentially done.
Now up onto the finish table.
After 1 coat of a Chestnut colored stain.
Just need to decide on if I want another coat, then polyurethane 3 coats and apply wheels and the egg. Then I can fire it up. Can't wait.
-
Beautiful!
-
Thanks much. I really wanted to be done by tomorrow but don't think I should rush it at this point. I should be able to fire it up Tuesday instead.
-
Happy Memorial Day everyone. Remember what this holiday is really about while you are doing the family BBQ today. My thanks to anyone and everyone who has served.
I'm about finished with my table and I am going try something new using epoxy on the end grain. I read about doing that somewhere and it's called packing the end grain. I'm going to use a 5 minute clear gorilla epoxy. It helps by strengthening the end grain and making it so the polyurethane doesn't just seep in. I'm also using epoxy to glue in the bushings for the back axle.
I pre-drilled using a centering bit for the front casters.
Then applied the epoxy to the end grain on the tip of the leg
While the epoxy was still wet, I installed the casters. I wanted the epoxy to strengthen the legs where the screws hold the casters.
I also epoxied the bushings for the real axle in place.
I also applied epoxy for the bushings for the real axle
Installed the bushing.
Once epoxy dried, I started applying the polyurethane. I've got one coat on and 2 more to go and then I'm supposed to wait 3 days till really dry. Bummer. I've also temporarily put in the back axle to get the table off the ground a bit.
What a difference lighting makes with color. I used a flash on this picture.
I guess that's it for the table build. Nothing more to do except apply more polyurethane and then I get to add the egg. I think I might also add a piece of pvc conduit to cover the axle in case that starts to look rusty after awhile. Thanks for watching this build, the next picture I show will be when the egg is installed and that won't be for a couple of days.
Happy Memorial Day.... Remember!!!!
-
Can't wait to see the 'crown' on this table!
-
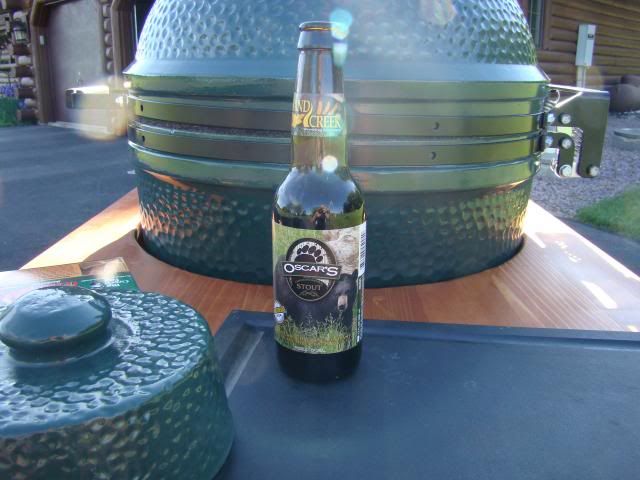
I finished her up and laid the egg :-)
First I installed the back axle which is a 1/2 inch steel rod. I put a piece of underground pvc conduit over the rod which is a dark grey color so that hides the axle in case it starts to rust. I then put a 1/4 inch spacer on the axle to hold the wheel away so that it doesn't rub on the table.
Then I put a stainless steel washer, the wheel, another stainless steel washer and then this cap to hold on the wheel.
I then cut off the excess axle on the other side with a hack saw and applied the other wheel the same way.
After all that, here she is.
I'll probably add a handle/towel bar along with a bottle opener and some other hooks and hardware along the way as I learn what I need. It's been a fun project and I'm now looking forward to learning how to use the BGE. Thanks for coming along with me during this project. Happy Egging.
Categories
- All Categories
- 183.2K EggHead Forum
- 15.7K Forum List
- 460 EGGtoberfest
- 1.9K Forum Feedback
- 10.4K Off Topic
- 2.2K EGG Table Forum
- 1 Rules & Disclaimer
- 9K Cookbook
- 12 Valentines Day
- 91 Holiday Recipes
- 223 Appetizers
- 517 Baking
- 2.5K Beef
- 88 Desserts
- 167 Lamb
- 2.4K Pork
- 1.5K Poultry
- 32 Salads and Dressings
- 320 Sauces, Rubs, Marinades
- 544 Seafood
- 175 Sides
- 121 Soups, Stews, Chilis
- 37 Vegetarian
- 102 Vegetables
- 314 Health
- 293 Weight Loss Forum