Welcome to the EGGhead Forum - a great place to visit and packed with tips and EGGspert advice! You can also join the conversation and get more information and amazing kamado recipes by following Big Green Egg to Experience our World of Flavor™ at:
Want to see how the EGG is made? Click to Watch
Facebook | Twitter | Instagram | Pinterest | Youtube | Vimeo
Share your photos by tagging us and using the hashtag #BigGreenEgg.
Share your photos by tagging us and using the hashtag #BigGreenEgg.
Want to see how the EGG is made? Click to Watch
XL Gasket Replacement (Pic heavy)
Options

NautiRogue
Posts: 118
Smoke has been leaking out my gasket for a couple of months now. I've been procrastinating on changing it because it seems like an intimidating project, but we're having a big family gathering for Christmas soon. I'm smoking both a fresh turkey and a fresh ham, and I want them to come out PERFECTLY!


So, last week, I went to my local Ace Hardware to pick up the gasket and the 3M Super 77 adhesive. I got back home, and was juuuuuust about to start ripping the old gasket off, when I realized that I was damned cold. The adhesive won't cure right in cold weather, and it was in the low 20s. The project got a valid postponement with that realization, but yesterday and today were in the 50s. I decided to take another whack at it after I got home from work last night.
Here's the Egg after the old gasket was removed. At first, I had tried to do this without taking the dome off, but it was just too tight in the back to do the job right. The dome comes off easily, so I decided it won't be that big of a deal to re-seat it when the gasket is replaced. I used a painter's tool to scrape the gasket from the ceramic and a wire brush to remove the remaining adhesive, then I wiped the ceramic down with Acetone to get rid of any remaining adhesive.
After letting the Acetone dry, I applied painter's tape to protect the ceramic from any overspray from the 3m Super 77. The tape didn't really need to be perfect. I just wanted to protect from a really big mess.
I tried to be careful with the spray, but it still dripped inside both the dome and the bottom. I'll need to try to clean the biggest part of the drips before cooking again.
After letting the Super 77 sit and dry for just a couple of minutes until it was tacky, I applied the gasket. (I had previously measured out correct lengths and cut them just a few inches long for any mistakes.) I made sure that the seam where the ends come together were placed at different locations on the dome and the bottom to prevent any air leaks at these points from being in exactly the same spot. When the gasket was in place, I cut the extra off with a sharp pair of scissors, but left it just an 1/8 or a 1/4 inch long to provide for any possible shrinkage.
I replaced the dome on top of the base without tightening the band on it. At this point, I just wanted the dome to weight down and put pressure on the newly installed gasket as it cures for 24 hours.
And yes, the temperature during the day was in the 50s, but it was going to get colder during the night. I covered the Egg with a tarp and placed a space heater under it to keep it warm overnight.
When I get home tonight, it should be dry. I'll straighten the dome on the base, retighten the band and reseat the dome.
Overall, this was not a big deal. As you can see, it was even dark when I did this project! The dome removes easily and I just tipped it upside down on top of a rag to cushion the chimney against my concrete patio. The old gasket came off easily and the cleanup wasn't any big deal at all. The 3M 77 was a little messy, but I think I'll be able to remove any remaining drips with Acetone.
I have my first gasket replacement under my belt, and it was a lot easier than I had expected. Next time, though, I might look at replacing with Nomex or Rutland.
Comments
-
Should be tighter than a frogs…Anyhow- great job! One question, how do you tighten the springs so the lid definitively stays open. My lid sometimes likes to be a performance artist and shut itself on the large and I really need to fix that before I get a broken hand or spill my drinkThanks-Proud resident of Missoula, MThttps://www.facebook.com/GrillingMontanahttp://grillingmontana.com
https://instagram.com/grillingmontana
Check out my book on Kamado cooking called Exclusively Kamado:
http://bit.ly/kamadobook -
Your springs may be shot or your egg is not on level ground or is your band on upside down? Meaning the spring is assisted by gravity! It should look like this:allsid said:Should be tighter than a frogs…Anyhow- great job! One question, how do you tighten the springs so the lid definitively stays open. My lid sometimes likes to be a performance artist and shut itself on the large and I really need to fix that before I get a broken hand or spill my drinkThanks-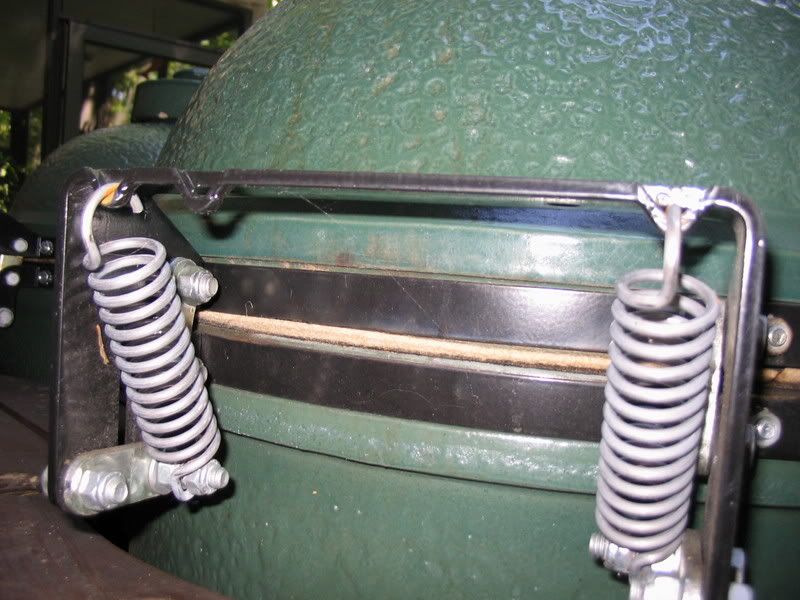 Re-gasketing America one yard at a time.
 -
Good write up and pics!
If it's cold outside and you can't scrape everything off, use a torch to scorch the remaining glue and/or use a heat gun with the scraper/paint removing head. They work great together or by themselves. Either way, there's not much left to hit with the abrasive wheel after that.


Categories
- All Categories
- 182.7K EggHead Forum
- 15.7K Forum List
- 459 EGGtoberfest
- 1.9K Forum Feedback
- 10.3K Off Topic
- 2.2K EGG Table Forum
- 1 Rules & Disclaimer
- 9K Cookbook
- 12 Valentines Day
- 91 Holiday Recipes
- 223 Appetizers
- 516 Baking
- 2.4K Beef
- 88 Desserts
- 163 Lamb
- 2.4K Pork
- 1.5K Poultry
- 30 Salads and Dressings
- 320 Sauces, Rubs, Marinades
- 543 Seafood
- 175 Sides
- 121 Soups, Stews, Chilis
- 35 Vegetarian
- 100 Vegetables
- 313 Health
- 293 Weight Loss Forum