Welcome to the EGGhead Forum - a great place to visit and packed with tips and EGGspert advice! You can also join the conversation and get more information and amazing kamado recipes by following Big Green Egg to Experience our World of Flavor™ at:
Want to see how the EGG is made? Click to Watch
Facebook | Twitter | Instagram | Pinterest | Youtube | Vimeo
Share your photos by tagging us and using the hashtag #BigGreenEgg.
Share your photos by tagging us and using the hashtag #BigGreenEgg.
Want to see how the EGG is made? Click to Watch
OT: How to make chicken stock - Very LONG

Boilermaker Ben
Posts: 1,956
I posted this as OT simply because I didn't do this on the egg.
Highpress asked me about chicken stock, so here we go.
Chicken stock is made by simmering chicken parts in water. Bones, joints, skin and other parts contain lots of collagen which, with slow cooking, is converted into gelatin, giving stock a nice, rich body. This is essentially the same process that turns a chewy chunk of pork shoulder into lip-smacking BBQ goodness (also why stock and BBQ both take so darned long, and can't be rushed). In the stock-making process, wonderful flavor is extracted from the chicken, so in the end, you get a flavorful, rich stock which is the perfect base for soups, stews, gravy and the like.
I almost always buy chickens whole at the market, and whether I cut them up into pieces, or spatchcock them, I freeze whatever is left (cooked or raw). When I've got a good stockpile of chicken parts, I make stock. Stock takes a long time, but isn't hard at all. Below is my process.
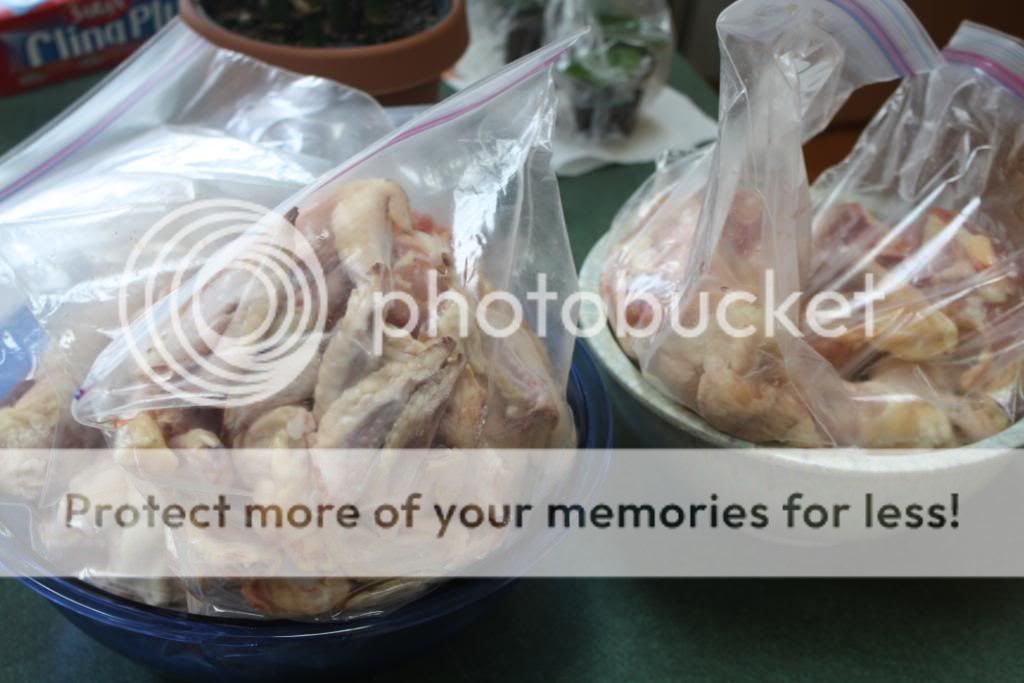
In the middle of the week, I emptied my freezer to see just how much chicken I had in there. I had four 1 gallon ziplocks of wing tips, necks, back bones, roasted carcasses, gizzards and hearts, and miscellaneous other parts. In all, I had about 17 lbs of chicken to make stock with. I decided to make a brown chicken stock this time. When stock is made from any meat, one has the option to roast the meat and bones first, for a brown stock, or to leave them raw for a "white" (or in the case of chicken, yellow) stock. This is my first time making brown chicken stock.
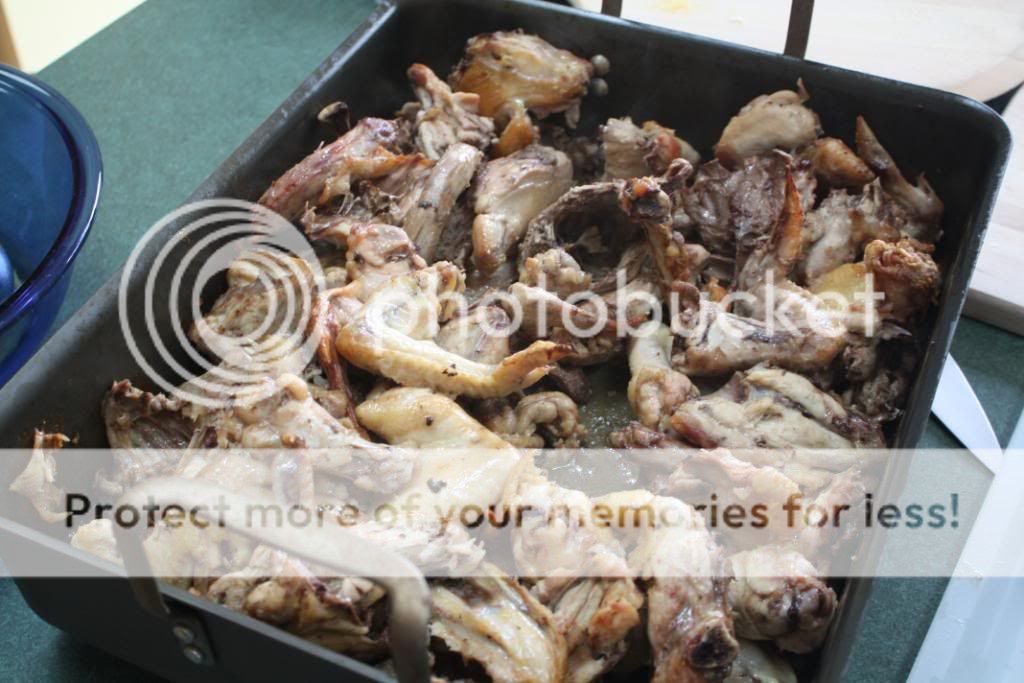
I rinsed and dried the chicken parts, cut the bigger pieces into 3-4 inch chunks, and tossed everything into a roasting pan that had been pre-heated in a 450degF oven. This was a mistake. I had WAY too much chicken for that roasting pan. I should have used a few pans, or roasted it all in batches. I roasted it for over an hour, stirring and turning the pieces every 10 minutes or so, and siphoning off the liquid that kept building up in the bottom of the pan. Because the pan was so crowded, and there was so much liquid in the pan, only some of the parts got browned, so in the end, I kind of had a light-brown chicken stock. Oh well. It also took a lot longer than it should have, because of the crowding. It should be about 450 for 30-45 minutes.
I dumped the chicken into my stock pot, deglazed the pan over a stove burner with water, scraping up the (alas, very small amount of) brown bits in the bottom of the pan, and added that water to the pot. I then filled the pot with cool water, to cover the chicken by an inch or two. This is important, the water should be cool. That much water will take a long time to come up to temperature, but don't try to get a head start by getting hot water out of the tap. There's something about the cool water penetrating the bones easier, or some such...but all instructions agree, cool water. It should be about 1 gallon per 8 lbs of meat, but I don't really ever measure it...I just go with 1-2 inches above the level of the chicken, and it tends to work out.
I put the pot on the stove and brought it to a simmer. This is another important point, at no time should the stock boil. A simmer means that bubbles rise to the surface only occasionally, not boiling. When the pot just starts to simmer, you can see the water circulating under the surface, without bubbling. If the stock comes to a boil, it agitates the chicken too much and you will get a cloudy stock. This shouldn't affect the flavor too much, so if you accidentally boil it, your stock will still be usable, very flavorful and still better than anything that comes from the supermarket shelf, just cloudy. There's actually a temperature associated with simmering, I'm not sure how low it goes, but obviously, it's below 212...probably 200-212, or something in that neighborhood.
Once I got the pot to a simmer, I placed it in a 200 degree oven. Many people make their stock entirely on the stove. I find that it can be finnicky, trying to keep the pot just under a boil on the stove top. But the oven will keep your stock at the right temperature all day long. The pot in the oven should be lidded, to prevent evaporation. Unfortunately, the temperature dial on my oven is a little too easy to turn, and I frequently bump it while working at the stove, or when reaching into the oven. I was making chili at the same time as my stock, and didn't pay much attention to the oven for a few hours. I came back at one point and saw that the dial had been bumped up to 250, and sure enough, the stock had been boiling for who knows how long. Grrr.
During the first hour or so, a kind of scum rises to the top of the stock pot and will need to be skimmed off every 15 minutes or so. It's just proteins and miscellaneous sediment from the chicken, but it will cloud the stock if it's not removed.
Stock takes time. Chicken stock takes about 5-6 hours of simmering, beef and veal stock take even longer. If you go shorter, you won't dissolve all the collagen, and your stock won't be as rich, but it will still taste good. You can always reduce it down later to give it more body. When my stock had been in the oven for about 5 hours, I prepared the aromatics. Many instructions for stock say to put your aromatics in at the beginning. This really isn't necessary, and can be detrimental. It only takes about 30 minutes to an hour to extract the flavor from your vegetables and herbs, and if you go longer, they can discolor the stock (particularly if you're using carrots). One lb of vegetables (half onion, a quarter carrots, a quarter celery, and toss in a few whole cloves of garlic) should be used for 8 lbs of chicken (so 8 lbs chicken; 1 gallon, that's 8 lbs, water; 1 lb veggies... 8:8:1 ratio by weight, easy to remember, easy to scale up or down). The longer you plan on simmering the vegetables in the stock, the larger you cut them. I did about 1" pieces, and cooked them for about 45 minutes in the stock.
Because I was making brown chicken stock, I browned the onions, carrots, garlic and celery in a saute pan, first, in that order: add a little bit of oil to the pan, and when hot, saute the onions until they start to brown, then add the carrots, and a few minutes later, the garlic. Once they have all become nicely golden brown, add the celery. Otherwise, the moisture in the celery can prevent browning in the other vegetables.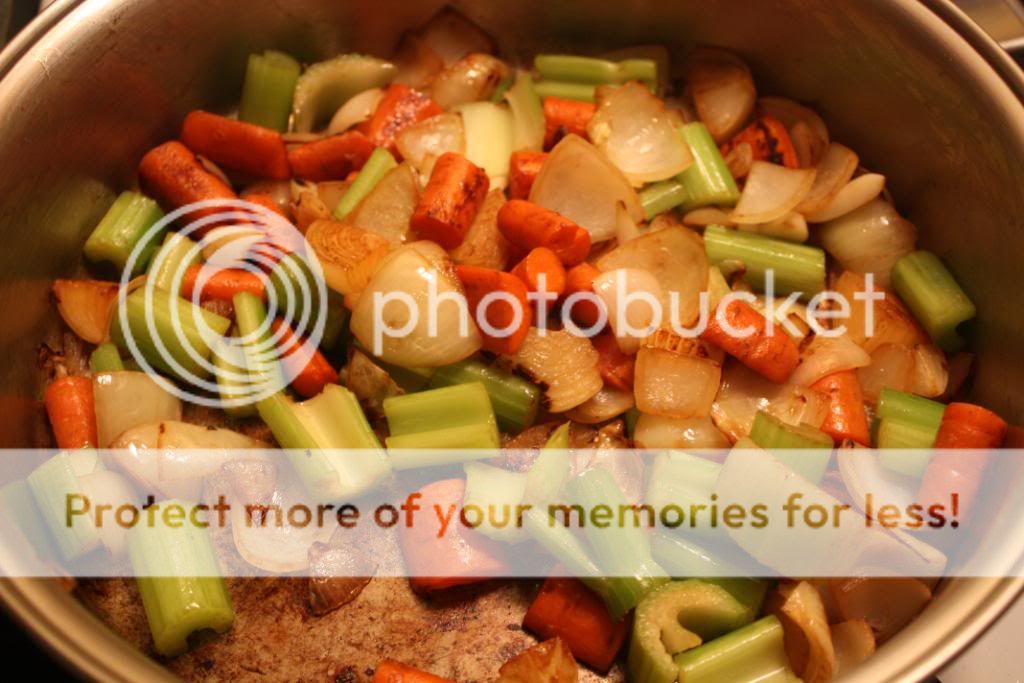
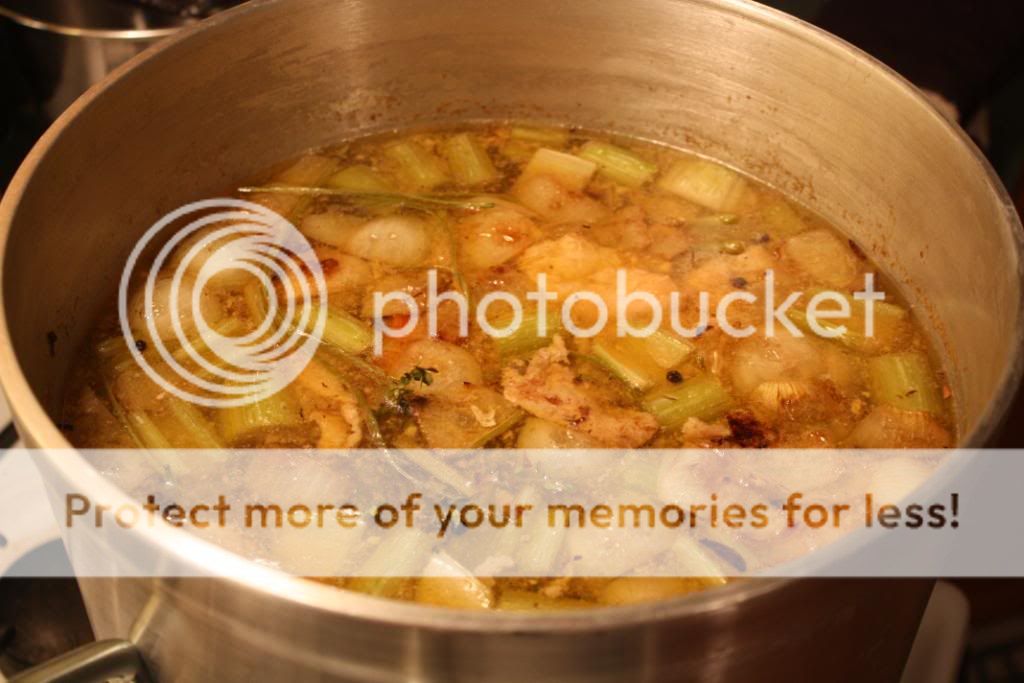
Once the veggies are browned, add them to the stock pot, and deglaze the saute pan with a little stock, scraping up the browned bits in the bottom of the pan. Return the liquid to the stock pot, to get all the flavor you can out of roasting the veggies. Other aromatic vegetables can be used, to get different flavors in the stock. When making white stock, many people replace the carrots with parsnips, to prevent discoloration. I also add parsley stems (no leaves, they can turn the stock grey/green), a few sprigs of fresh thyme (leaves are fine here), a tablespoon of whole peppercorns, and a couple bay leaves. Again, other herbs can be used, for different effect...these are pretty standard.
After another 30-60 minutes, your stock should be done.
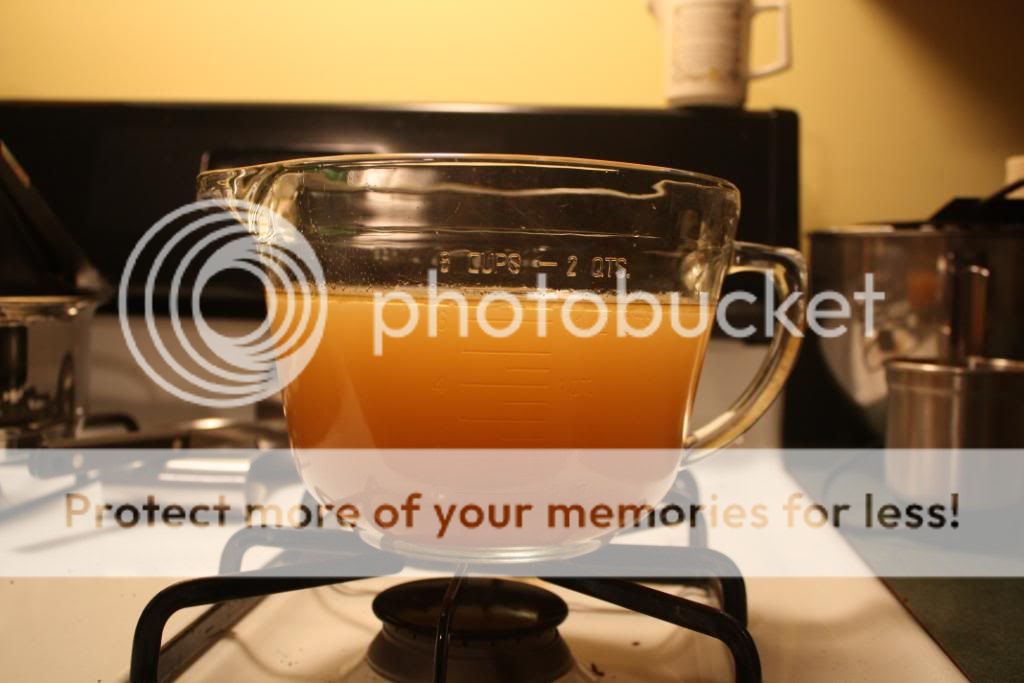
Remove it from the oven, and strain it through cheesecloth. I like to put a big pot in the sink, put a collander in it, and line the collander with cheesecloth, folded into a few layers. I use clothes pins to keep the cheesecloth secure in the collander. Then I ladle the stock into the collander, until I feel confident that I can pick up the pot and dump it in without burning myself, or splashing stock all over. For this batch of stock, I had to do this in batches, because I didn't have another pot big enough for all the stock, so I had to use a few smaller pots and mixing bowls, and all the chicken parts couldn't fit in the collander. Press the chicken parts to squeeze out all the stock. You'll probably notice that the bones are very brittle, even the leg bones snap easily, and the cartilage is usually very soft and almost jelly-like. After straining, you should be left with a nice brown (or yellow, if you don't roast the chicken and veggies) mostly clear stock. As you can see, mine isn't very brown, and is a bit cloudy, because of the problems with overcrowding the roasting pan, and letting the temp get out of control in the oven. Not my best effort, but it's still delicious, and will make great, if not very clear, soup.
Cool the stock, and then put it in the fridge. I use my sink as a big ice bath to cool the stock most of the way before refridgerating. You don't want to put that much hot liquid in your fridge; it won't be able to keep up, and the temperature in your fridge will spike. Once the stock is totally cold, the fat on top will have solidified, and can be scraped off and discarded (or re-used, I suppose). This is much easier than trying to scoop it off the top of the hot stock. When cold, your stock will have a jello-like consistency from all the wonderful gelatin that you have extracted. If you didn't cook it long enough, or you used too much water for your amount of chicken parts, or your chickens just didn't have much collagen (I hear that younger animals have more collagen, which is why veal stock is so popular as a sauce-base), it might now firm up like jello. You can always return it to the stove, and reduce it down (no fear of boiling here). When re-heated, it will be a nice, rich, smooth liquid.
Notice that there was no salt added to this stock. If you make soup, you will need to add salt to get the best flavor. But since you will use this stock for many different purposes, it's best to have salt-free stock, so you can control the salt-content of your finished dish better. If you taste the stock you just made, it might taste a little bland. Put a little bit in a cup or bowl and add a little salt, your stock will come alive. Boxed or canned commercial stocks have stabilizers, flavor enhancers (like MSG) and, unless you get low-sodium stock, tons of salt. Homemade stock is very flavorful, completely natural, salt free, healthy, and freezes well. I keep my freezer well...stocked.")
Highpress asked me about chicken stock, so here we go.
Chicken stock is made by simmering chicken parts in water. Bones, joints, skin and other parts contain lots of collagen which, with slow cooking, is converted into gelatin, giving stock a nice, rich body. This is essentially the same process that turns a chewy chunk of pork shoulder into lip-smacking BBQ goodness (also why stock and BBQ both take so darned long, and can't be rushed). In the stock-making process, wonderful flavor is extracted from the chicken, so in the end, you get a flavorful, rich stock which is the perfect base for soups, stews, gravy and the like.
I almost always buy chickens whole at the market, and whether I cut them up into pieces, or spatchcock them, I freeze whatever is left (cooked or raw). When I've got a good stockpile of chicken parts, I make stock. Stock takes a long time, but isn't hard at all. Below is my process.
In the middle of the week, I emptied my freezer to see just how much chicken I had in there. I had four 1 gallon ziplocks of wing tips, necks, back bones, roasted carcasses, gizzards and hearts, and miscellaneous other parts. In all, I had about 17 lbs of chicken to make stock with. I decided to make a brown chicken stock this time. When stock is made from any meat, one has the option to roast the meat and bones first, for a brown stock, or to leave them raw for a "white" (or in the case of chicken, yellow) stock. This is my first time making brown chicken stock.
I rinsed and dried the chicken parts, cut the bigger pieces into 3-4 inch chunks, and tossed everything into a roasting pan that had been pre-heated in a 450degF oven. This was a mistake. I had WAY too much chicken for that roasting pan. I should have used a few pans, or roasted it all in batches. I roasted it for over an hour, stirring and turning the pieces every 10 minutes or so, and siphoning off the liquid that kept building up in the bottom of the pan. Because the pan was so crowded, and there was so much liquid in the pan, only some of the parts got browned, so in the end, I kind of had a light-brown chicken stock. Oh well. It also took a lot longer than it should have, because of the crowding. It should be about 450 for 30-45 minutes.
I dumped the chicken into my stock pot, deglazed the pan over a stove burner with water, scraping up the (alas, very small amount of) brown bits in the bottom of the pan, and added that water to the pot. I then filled the pot with cool water, to cover the chicken by an inch or two. This is important, the water should be cool. That much water will take a long time to come up to temperature, but don't try to get a head start by getting hot water out of the tap. There's something about the cool water penetrating the bones easier, or some such...but all instructions agree, cool water. It should be about 1 gallon per 8 lbs of meat, but I don't really ever measure it...I just go with 1-2 inches above the level of the chicken, and it tends to work out.
I put the pot on the stove and brought it to a simmer. This is another important point, at no time should the stock boil. A simmer means that bubbles rise to the surface only occasionally, not boiling. When the pot just starts to simmer, you can see the water circulating under the surface, without bubbling. If the stock comes to a boil, it agitates the chicken too much and you will get a cloudy stock. This shouldn't affect the flavor too much, so if you accidentally boil it, your stock will still be usable, very flavorful and still better than anything that comes from the supermarket shelf, just cloudy. There's actually a temperature associated with simmering, I'm not sure how low it goes, but obviously, it's below 212...probably 200-212, or something in that neighborhood.
Once I got the pot to a simmer, I placed it in a 200 degree oven. Many people make their stock entirely on the stove. I find that it can be finnicky, trying to keep the pot just under a boil on the stove top. But the oven will keep your stock at the right temperature all day long. The pot in the oven should be lidded, to prevent evaporation. Unfortunately, the temperature dial on my oven is a little too easy to turn, and I frequently bump it while working at the stove, or when reaching into the oven. I was making chili at the same time as my stock, and didn't pay much attention to the oven for a few hours. I came back at one point and saw that the dial had been bumped up to 250, and sure enough, the stock had been boiling for who knows how long. Grrr.
During the first hour or so, a kind of scum rises to the top of the stock pot and will need to be skimmed off every 15 minutes or so. It's just proteins and miscellaneous sediment from the chicken, but it will cloud the stock if it's not removed.
Stock takes time. Chicken stock takes about 5-6 hours of simmering, beef and veal stock take even longer. If you go shorter, you won't dissolve all the collagen, and your stock won't be as rich, but it will still taste good. You can always reduce it down later to give it more body. When my stock had been in the oven for about 5 hours, I prepared the aromatics. Many instructions for stock say to put your aromatics in at the beginning. This really isn't necessary, and can be detrimental. It only takes about 30 minutes to an hour to extract the flavor from your vegetables and herbs, and if you go longer, they can discolor the stock (particularly if you're using carrots). One lb of vegetables (half onion, a quarter carrots, a quarter celery, and toss in a few whole cloves of garlic) should be used for 8 lbs of chicken (so 8 lbs chicken; 1 gallon, that's 8 lbs, water; 1 lb veggies... 8:8:1 ratio by weight, easy to remember, easy to scale up or down). The longer you plan on simmering the vegetables in the stock, the larger you cut them. I did about 1" pieces, and cooked them for about 45 minutes in the stock.
Because I was making brown chicken stock, I browned the onions, carrots, garlic and celery in a saute pan, first, in that order: add a little bit of oil to the pan, and when hot, saute the onions until they start to brown, then add the carrots, and a few minutes later, the garlic. Once they have all become nicely golden brown, add the celery. Otherwise, the moisture in the celery can prevent browning in the other vegetables.
Once the veggies are browned, add them to the stock pot, and deglaze the saute pan with a little stock, scraping up the browned bits in the bottom of the pan. Return the liquid to the stock pot, to get all the flavor you can out of roasting the veggies. Other aromatic vegetables can be used, to get different flavors in the stock. When making white stock, many people replace the carrots with parsnips, to prevent discoloration. I also add parsley stems (no leaves, they can turn the stock grey/green), a few sprigs of fresh thyme (leaves are fine here), a tablespoon of whole peppercorns, and a couple bay leaves. Again, other herbs can be used, for different effect...these are pretty standard.
After another 30-60 minutes, your stock should be done.
Remove it from the oven, and strain it through cheesecloth. I like to put a big pot in the sink, put a collander in it, and line the collander with cheesecloth, folded into a few layers. I use clothes pins to keep the cheesecloth secure in the collander. Then I ladle the stock into the collander, until I feel confident that I can pick up the pot and dump it in without burning myself, or splashing stock all over. For this batch of stock, I had to do this in batches, because I didn't have another pot big enough for all the stock, so I had to use a few smaller pots and mixing bowls, and all the chicken parts couldn't fit in the collander. Press the chicken parts to squeeze out all the stock. You'll probably notice that the bones are very brittle, even the leg bones snap easily, and the cartilage is usually very soft and almost jelly-like. After straining, you should be left with a nice brown (or yellow, if you don't roast the chicken and veggies) mostly clear stock. As you can see, mine isn't very brown, and is a bit cloudy, because of the problems with overcrowding the roasting pan, and letting the temp get out of control in the oven. Not my best effort, but it's still delicious, and will make great, if not very clear, soup.
Cool the stock, and then put it in the fridge. I use my sink as a big ice bath to cool the stock most of the way before refridgerating. You don't want to put that much hot liquid in your fridge; it won't be able to keep up, and the temperature in your fridge will spike. Once the stock is totally cold, the fat on top will have solidified, and can be scraped off and discarded (or re-used, I suppose). This is much easier than trying to scoop it off the top of the hot stock. When cold, your stock will have a jello-like consistency from all the wonderful gelatin that you have extracted. If you didn't cook it long enough, or you used too much water for your amount of chicken parts, or your chickens just didn't have much collagen (I hear that younger animals have more collagen, which is why veal stock is so popular as a sauce-base), it might now firm up like jello. You can always return it to the stove, and reduce it down (no fear of boiling here). When re-heated, it will be a nice, rich, smooth liquid.
Notice that there was no salt added to this stock. If you make soup, you will need to add salt to get the best flavor. But since you will use this stock for many different purposes, it's best to have salt-free stock, so you can control the salt-content of your finished dish better. If you taste the stock you just made, it might taste a little bland. Put a little bit in a cup or bowl and add a little salt, your stock will come alive. Boxed or canned commercial stocks have stabilizers, flavor enhancers (like MSG) and, unless you get low-sodium stock, tons of salt. Homemade stock is very flavorful, completely natural, salt free, healthy, and freezes well. I keep my freezer well...stocked.
Comments
-
This is why I go to my local grocer and get me some Swanson's Stock in a box :woohoo: :laugh:
-
Looks good. One of the reasons for cold water is that you do not want to cook with hot water from you hot water heater.Salado TX & 30A FL: Egg Family: 3 Large and a very well used Mini, added a Mini Max when they came out (I'm good for now). Just given another Mini to add to the herd.
-
Cheater.
-
I bet you buy all that BBQ at Sonny's to take to your troop cooks too.
-
Perhaps, but I will be eating my soup before you do

-
Great post.
I always save the carcasses from spatchcock chickens and tips from all the wings I cook and make a big batch of stock every autumn. Very similar to what you have done here.
The difference in the product is absolutely worth the time and effort. -
HUSH!!!
-
great descriptive post!!!....i usually don't roast my parts when i make stock, but i do like that part of it (you can read my stock making description as part of the mad max turkey methodology). .. one question though .. .you talk about draining off the liquid while roasting. ..i would think there is a whole lot of great flavor being run down the drain when you do that ... . i would be adding that to my stock pot after roasting, then skimming it back off the top after letting it add to the flavor of the stock. . .
also, when you skim that fat off after cooling, you want to save that... in yiddish, thats referred to as "schmaltz". ..used when making chopped liver and other good stuff. .. my grandfather, who lived to 94 (and was in great mental health right up to the day before he died) used to smear it on his toast every morning like butter .... -
Thanks, Max.
I know, I know, I should have added the liquid to the stock, BUT it had a LOT of suspended solids, and I was worried about pouring that into the stock pot. What I SHOULD have done was to strain it and THEN add it to the stock. I noticed, when I was making the stock, that I didn't have to skim off as much scum as I normally do...thinking back on it, I wonder if that's because most of it came out during the roasting process. Alas, it's hard to pull that stuff back up out of the drain.
Regarding schmaltz: I've never used it for anything. My cooking fats are generally peanut and vegetable oils, lard and butter. I've saved bacon drippings, rendered beef fat, etc, on occasion, but almost never wind up using them (ok, I use bacon drippings occasionally, but never in the quantities that I save), and wind up throwing them out. I've used bacon drippings when I want what I'm cooking (brussels sprouts) to taste a little bacony, but I can't say that I've ever desired to have a vegetable, or cornbread taste a little more chickeny. -
Ben,
Good tutorial! I have found that roasting the parts skin side up produces more brown bits. If you use white wine to deglaze the bits will come off easier and dissolve better. The wine adds a nice flavour to the stock as well.Steve
Caledon, ON
-
great descriptive post!!!....i usually don't roast my parts when i make stock, but i do like that part of it (you can read my stock making description as part of the mad max turkey methodology). .. one question though .. .you talk about draining off the liquid while roasting. ..i would think there is a whole lot of great flavor being run down the drain when you do that ... . i would be adding that to my stock pot after roasting, then skimming it back off the top after letting it add to the flavor of the stock. . .
also, when you skim that fat off after cooling, you want to save that... in yiddish, thats referred to as "schmaltz". ..used when making chopped liver and other good stuff. .. my grandfather, who lived to 94 (and was in great mental health right up to the day before he died) used to smear it on his toast every morning like butter .... -
Max,
That was very informative the first time you posted it too. :laugh:
SteveSteve
Caledon, ON
-
Great post Ben! I Pulled my chicken part collection out last Sunday and made my bi-annual batch of stock. Did it all on the stove top, don't think my stock pot will fit in the oven. Kept it between 195 and 200 for 6 hours. I skimmed the fat off while hot because of the way I chill it. Getting it from 200 down to under 40 in less than 4 hours can be difficult so I strain it off into another pot in the sink then surround it with ice and water. Then I put frozen water bottles in the stock. Once cool enough to handle, using a 2 cup measuring cup, I fill sandwich sized ziplocks which I drop back into the ice water in the sink. This super cools the stock. Then I dry them off and lay them flat in the freezer. This gives me convenient sized portions, comparable to a can of broth. -RP
-
Randy,
I also cool with frozen water bottles (I think this was a Good Eats tip), but then I cool it the rest of the way in the fridge, and use tupperware to portion it into 2 cup and 1 cup portions (I use different shapes for each, so they're easy to identify), and freezer trays for 1/8 cup portions that are good for sauces, vegetables etc. -
I make stock about once a month, just about exactly like Ben does. Having homemade stock in the freezer is the next best thing to having an egg towards improving your cooking. One thing I'd add to what Ben said is the egg does a fine job of roasting the bones for dark stock.
Doug -
Awesome info, thanks again Ben. Very detailed. From now on i will not throw away all those chicken parts! Would have never thought to make my own stock. It looks time consuming, but i'm sure it's worth it. Looks fantastic!


Categories
- All Categories
- 184K EggHead Forum
- 15.8K Forum List
- 459 EGGtoberfest
- 1.9K Forum Feedback
- 10.4K Off Topic
- 2.2K EGG Table Forum
- 1 Rules & Disclaimer
- 9K Cookbook
- 13 Valentines Day
- 93 Holiday Recipes
- 224 Appetizers
- 520 Baking
- 2.5K Beef
- 88 Desserts
- 167 Lamb
- 2.4K Pork
- 1.5K Poultry
- 33 Salads and Dressings
- 324 Sauces, Rubs, Marinades
- 548 Seafood
- 175 Sides
- 122 Soups, Stews, Chilis
- 44 Vegetarian
- 102 Vegetables
- 313 Health
- 292 Weight Loss Forum