Share your photos by tagging us and using the hashtag #BigGreenEgg.
Want to see how the EGG is made? Click to Watch
My Aluminum LBGE table in progress
Comments
-
pinballLooking said:
I cut the reinforcement wire. Then I laid out the broken glass that will become the top when I take it out of the mold.
I mixed the cement that had Charcoal color dye. The first batch I put on carefully not to move the glass around.
I put ½ the concrete in the mold then I put the reinforcement wire in. I added the rest of the concrete with some crushed glass in.
I vibrated it for about 2 hours to get the as much air out as I could.
I then covered it with white plastic to keep the moisture in so it can cure slowly and be strong.
This is my first time doing a cement top. I based all the steps off this project.
http://www.diypete.com/diy-polished-concrete-coffee-table-crushed-glass/
Wow, two hours is excessive. Hopefully all the aggregate didn't settle to the bottom. Looking forward to seeing the finished product. Great idea.
-
I did not have a concrete vibrator I was just using a palm sander. I have the top on two steel welding stands. I was vibrating the stands it was working but not like a concrete vibrator. I used it on the sides also. Once I stop seeing air bubbling up I stopped.
I would have a better setup if I did it again and it would go much faster.
Hopefully it worked I know there is a happy medium where the air is out the aggregate does not go to the bottom.
I can’t wait to take the mold off. Some people say wait 48 hours others say four days.
-
This weekend I sanded/sealed the top. It is ready to go on the table. I am very close to putting the table all together I just ran out of day light. I removed the top from the mold.
-
awesome!
-


I took some time and finished it. I will change out the feet for a table nest soon.
Here is a good reason to not just use feet over wood.

-
@pinballLooking beach/ocean glass? Looking good as you progress.LBGE 2013 & MM 2014Die Hard HUSKER & BRONCO FANFlying Low & Slow in "Da Burg" FL
-
Two small bags sea glass (Hobby lobby). A few Heineken beer bottles this glass was more fun than the other glass.
")
A few colored mason jars.
The mason jars were not colored the whole way through and some of it sanded clear but that just added more colors and variety.
-
I just called my local BGE dealer and the have the table nest in stock for $35. My wife will pick it up for me later today. I am going to make some diamond plate covers with small skirt that go over the top castors.
-


The video I posted said you could use 50 grit diamond pads for sanding the first pass. These ware out way to fast. (all the other grit pads worked great) I went to home depot and bought 4” double row diamond cup wheel this work so much better to expose the aggregate. This did the job in a 1/10 the time it worked so well.
The reviews said that it worked on big countertop top and he loved it, he was so right.
Just a tip in case someone else wants to do this. -
Great job and info. No telling how much table building you have spawned
-
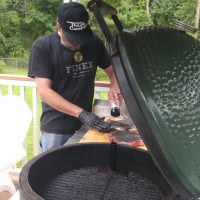
I like it better with the nest table stand. Back to cooking tonight.

-
Great looking table. Nice work!
Any road will take you there if you don't know where you're going.
Terry
Rockwall, TX -
And that......is how it is done. Very nice job!Ellijay GA with a Medium & MiniMax
Well, I married me a wife, she's been trouble all my life,
Run me out in the cold rain and snow -
Thanks, it is a very simple design but is holding up well. We have been enjoying it.
I am doing a first car project with my son and I aluminum welded a timing cover.
Without doing this project I would not have had enough practice/ experience to do that job.
-
How did you keep everything square while you were welding it?Large BGE and Medium BGE
36" Blackstone - Greensboro! -
-
MaskedMarvel said:How did you keep everything square while you were welding it?
If you look at the first page of the this post the first image it shows the clamping. It is clamped to the welding table then I use a carpenter’s square. I welded all four corners then welded the middle supports.
I now have a Welders 2-Axis Welders Angle Clamps that would work prefect for that project.

-
Mrrrrph.... I really do have to get a welder now... grrrrLarge BGE and Medium BGE
36" Blackstone - Greensboro! -
When I weld legs or something that needs to be square, I use magnetic squares or a framing square. Something I'm doing a lot of, I make a jig.
It will never be perfect, but a good technique is to make a couple "bumps" in one plane, tac on both sides of the "leg" or whatever it is. Once tacked, you can bend it like a hinge, the weld should have some give before it breaks, then tack a third point.
Be prepared to bust it apart and redo.
Welding is fun!
______________________________________________I love lamp..


Categories
- All Categories
- 184.1K EggHead Forum
- 16.1K Forum List
- 461 EGGtoberfest
- 1.9K Forum Feedback
- 10.5K Off Topic
- 2.4K EGG Table Forum
- 1 Rules & Disclaimer
- 9.2K Cookbook
- 16 Valentines Day
- 118 Holiday Recipes
- 348 Appetizers
- 521 Baking
- 2.5K Beef
- 90 Desserts
- 167 Lamb
- 2.4K Pork
- 1.5K Poultry
- 33 Salads and Dressings
- 322 Sauces, Rubs, Marinades
- 548 Seafood
- 175 Sides
- 122 Soups, Stews, Chilis
- 44 Vegetarian
- 103 Vegetables
- 315 Health
- 293 Weight Loss Forum