Welcome to the EGGhead Forum - a great place to visit and packed with tips and EGGspert advice! You can also join the conversation and get more information and amazing kamado recipes by following Big Green Egg to Experience our World of Flavor™ at:
Want to see how the EGG is made? Click to Watch
Facebook | Twitter | Instagram | Pinterest | Youtube | Vimeo
Share your photos by tagging us and using the hashtag #BigGreenEgg.
Share your photos by tagging us and using the hashtag #BigGreenEgg.
Want to see how the EGG is made? Click to Watch
Concrete Counter: More pics
Options

ColoradoCook
Posts: 152
I got quite a few inquiries on the Egg concrete counter. Here are the remaining pictures for those interested.
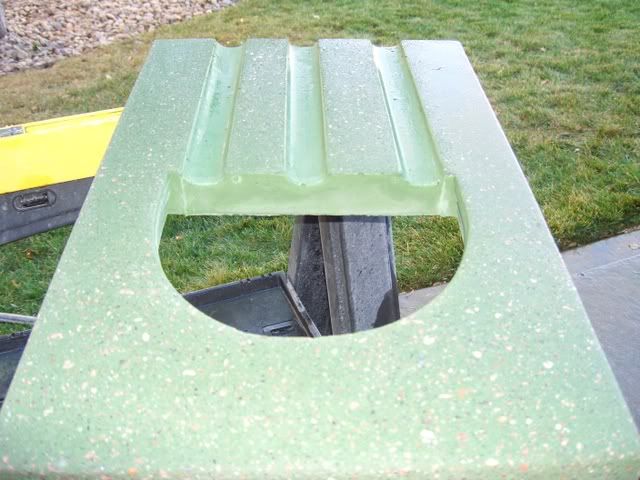
I call this the Egg Setter, designed to allow air flow under Egg and a hole to drop ash through. I used a piece of flexible molding I had for that curve:
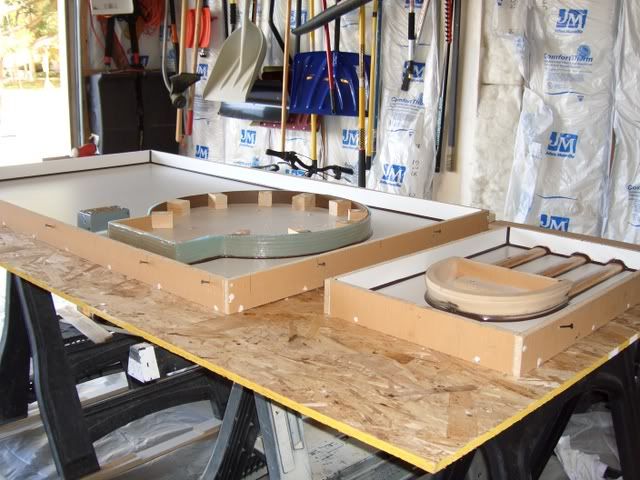
Form for top and Egg Setter. Notice the slot for the Egg hinge, this is not needed if you like your egg sitting high, I like mine lower so the grill grate is flush with table surface. I don't have pics of when the reinforcement went in (remesh and rebar):
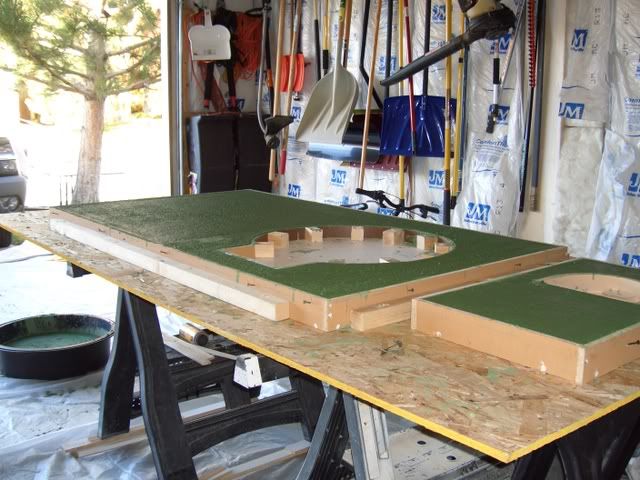
After pour, I let it set up for about 5 days. My concrete was Quikrete's Countertop Mix. Quikcrete told me no need for placticizer or fiberglass as it contained the former and was configured not to need the latter...we'll see:
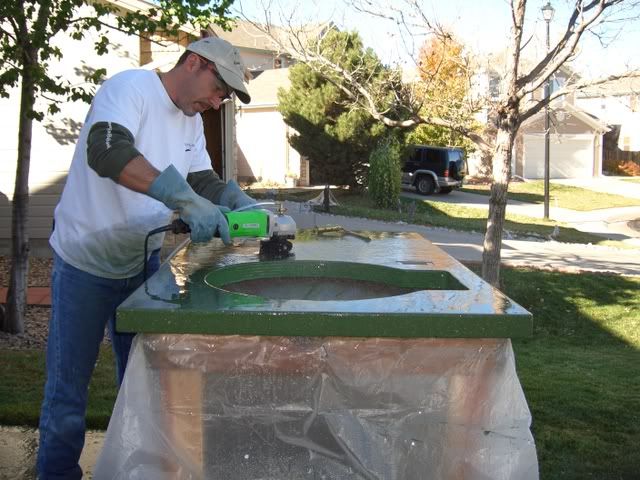
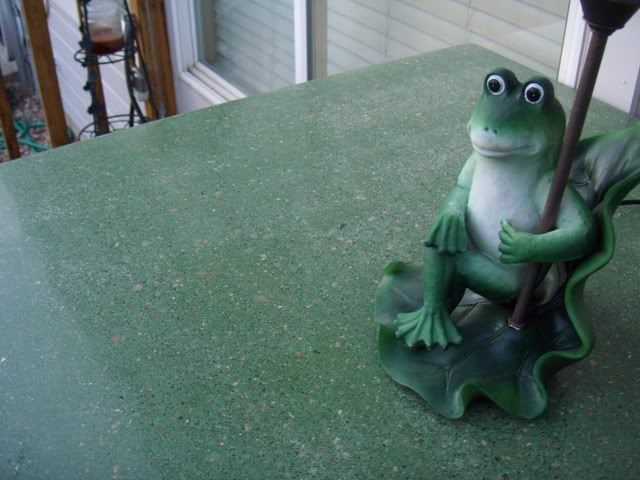
It came out perfect out of form. You can sand with 120 then 220 grit paper at this point then buff in beeswax or carnuba wax. This gives you a solid color look. I chose to grind to reveal aggragate:

I let it set for about 2 weeks prior to grinding and polishing. Cheng says to grind at about 2 weeks or so, the concrete is still somewhat soft and it's less work this way. He suggested polishing at the 4 week point when concrete is fully cured, but winter was coming quick and I was impatient. I would suggest doing this project in late spring or early fall. You need the right temps and humidity levels to pull this off in a garage or outside.
All done, I didn't polish Egg Setter, I was too exhausted and it's covered with ash all the time anywhoo:
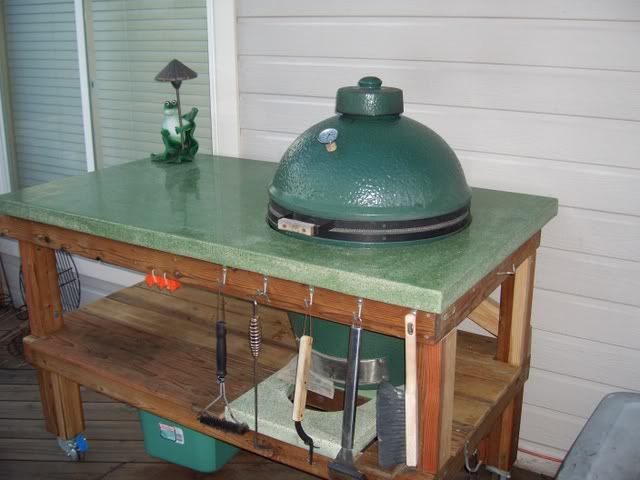
Final finish. As mentioned earlier I had microbubbles that I tried to fill with slurry, it came out just okay. You need to vibrate really really good to avoid these. My slurry wasn't that good. Next time I'll use unsanded grout, of same color, or accent with another color. I sealed with a high quality stone sealer and I went with carnuba wax for the polish, though not food grade safe I'm not dealing with direct food prep and wanted something that would withstand the elements and Colorado sun. Rub in then polish with your car buffer. I'll do this once a year to maintain.
I hope this helps those interested. Cheng's book and the Internet are great resources. Look up that Rock Solid show on the net and watch their episode on Concrete Counters. I referred to that one as well.
Enjoy,
CC
I call this the Egg Setter, designed to allow air flow under Egg and a hole to drop ash through. I used a piece of flexible molding I had for that curve:
Form for top and Egg Setter. Notice the slot for the Egg hinge, this is not needed if you like your egg sitting high, I like mine lower so the grill grate is flush with table surface. I don't have pics of when the reinforcement went in (remesh and rebar):
After pour, I let it set up for about 5 days. My concrete was Quikrete's Countertop Mix. Quikcrete told me no need for placticizer or fiberglass as it contained the former and was configured not to need the latter...we'll see:
It came out perfect out of form. You can sand with 120 then 220 grit paper at this point then buff in beeswax or carnuba wax. This gives you a solid color look. I chose to grind to reveal aggragate:
I let it set for about 2 weeks prior to grinding and polishing. Cheng says to grind at about 2 weeks or so, the concrete is still somewhat soft and it's less work this way. He suggested polishing at the 4 week point when concrete is fully cured, but winter was coming quick and I was impatient. I would suggest doing this project in late spring or early fall. You need the right temps and humidity levels to pull this off in a garage or outside.
All done, I didn't polish Egg Setter, I was too exhausted and it's covered with ash all the time anywhoo:
Final finish. As mentioned earlier I had microbubbles that I tried to fill with slurry, it came out just okay. You need to vibrate really really good to avoid these. My slurry wasn't that good. Next time I'll use unsanded grout, of same color, or accent with another color. I sealed with a high quality stone sealer and I went with carnuba wax for the polish, though not food grade safe I'm not dealing with direct food prep and wanted something that would withstand the elements and Colorado sun. Rub in then polish with your car buffer. I'll do this once a year to maintain.
I hope this helps those interested. Cheng's book and the Internet are great resources. Look up that Rock Solid show on the net and watch their episode on Concrete Counters. I referred to that one as well.
Enjoy,
CC
Comments
-
ColoradoCook,
What did you use for stone in the mix?
SteveSteve
Caledon, ON
-
Very cool! Just can't get enough of the Green...
")
-
The concrete counter mix had aggragate in it. Though you can add a plethora of other stuff if you want. One technique is to put crushed up glass on the bottom of mold, put concrete in by hand on top of glass, then pour more concrete on top of that. When you go to grind the glass is revealed.
-
Everyone is talking going green...we've know all along.
")
-
That looks great.
-
I hope you'll give us an update after several months or years of ownership, to let us know if there are any design changes you wish you'd made, and how the final product is holding up.
-
Will do. I need to get another cover made, Colorado sun dried up my custom table cover. I think that will go a long way to making the counter look good for years to come.
From a design perspective, I'm quite happy with it. At the last minute I added a metal electrical box before concrete pour. I now have a single outlet with a power switch that I use for the starter. You can do all sorts of cool stuff with concrete. Search around on the net and you'll get all sorts of ideas.
CC -
dang Rock Solid struck again I see . . . I watched too much of that program and went out last summer and redid 3 sidewalks with pavers :woohoo:aka marysvilleksegghead
Lrg 2008
mini 2009
XL 2021 (sold 8/24/23)
Henny Youngman:
I said to my wife, 'Where do you want to go for our anniversary?' She said, 'I want to go somewhere I've never been before.' I said, 'Try the kitchen.'
Bob Hope: When I wake up in the morning, I don’t feel anything until noon, and then it’s time for my nap -
Might be a stupid question. Green dye in concrete?? :ohmy:
-
Outstanding project.
In your earlier post you said you installed rebar/wire mesh before you poured. There's no bits of metal sticking out anywhere - how did you support the metal? Did you just pull it up into the mixture after the pour by hand and it basically was "floating" in the concrete?
Nice workmanship


Categories
- All Categories
- 182.7K EggHead Forum
- 15.7K Forum List
- 459 EGGtoberfest
- 1.9K Forum Feedback
- 10.3K Off Topic
- 2.2K EGG Table Forum
- 1 Rules & Disclaimer
- 9K Cookbook
- 12 Valentines Day
- 91 Holiday Recipes
- 223 Appetizers
- 516 Baking
- 2.4K Beef
- 88 Desserts
- 163 Lamb
- 2.4K Pork
- 1.5K Poultry
- 30 Salads and Dressings
- 320 Sauces, Rubs, Marinades
- 543 Seafood
- 175 Sides
- 121 Soups, Stews, Chilis
- 35 Vegetarian
- 100 Vegetables
- 312 Health
- 292 Weight Loss Forum