Welcome to the EGGhead Forum - a great place to visit and packed with tips and EGGspert advice! You can also join the conversation and get more information and amazing kamado recipes by following Big Green Egg to Experience our World of Flavor™ at:
Want to see how the EGG is made? Click to Watch
Facebook | Twitter | Instagram | Pinterest | Youtube | Vimeo
Share your photos by tagging us and using the hashtag #BigGreenEgg.
Share your photos by tagging us and using the hashtag #BigGreenEgg.
Want to see how the EGG is made? Click to Watch
No Knead Bread
Options

UGAVET
Posts: 577
Well, i have got to get my camera up and working again. I made my first no knead bread this weekend and it was outstanding. I can improve on the final product i think but i have never made such a crusty airhole filled piece of bread. I let it rise for a little over 24 hours which was not my original plan but i had to be out of the house longer than i expected yesterday so im not sure how that affected things. it didnt seem to rise on the cook as much as i expected. it was a little flatter that the pictures i have seen but it was really good. I want to try adding different things next like asagio cheese and garlic chunks maybe on the next one.
Comments
-
shame on you brad how many times do i have to get on to you to find that cord!!!!

this is as close to a loaf as i have gotten with it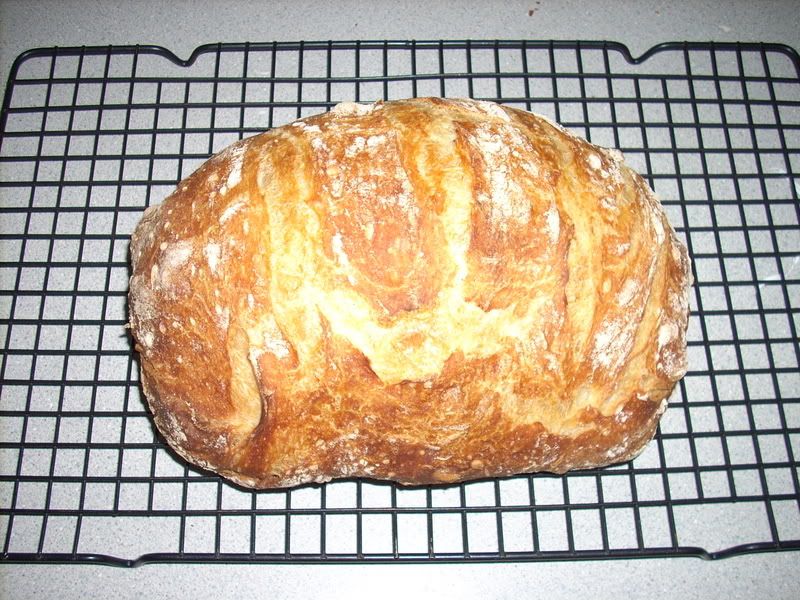
although i have had some "rounder"and "Flatter" loaves but i have not taken a picture (too embarressed )
) happy eggin
TB
Anderson S.C.
"Life is too short to be diplomatic. A man's friends shouldn't mind what he does or says- and those who are not his friends, well, the hell with them. They don't count."
Tyrus Raymond Cobb
-
still good stuff though. better than anything i have had out at a resturant.
-
i will second that if you get a chance try this one it is really good::
Bread, Herb Garlic Baguettes, Bente
Here you go i found it in my mixers instruction booklet.
INGREDIENTS:
1 Pkg Active dry yeast
1 tsp sugar
1/4 cup warm water (105-115 degrees)
3-1/4-3 1/2 cups all-purpose flour
1 Tbs chopped fresh basil or 1 tsp. dried basil
2 tsp chopped fresh oregano or 1/2 tsp dried oregano
2 Tsp Chopped fresh thyme or 1/2 tsp dries thyme
2 cloves of garlic minced
1 tsp salt
3/4 cup cold water
1 egg
1 Tsp Water
Procedure:
1 Dissolve yeast and sugar in warm water
2 Place 31/4 cup flour, basil, oregano, thyme, garlic, and salt in bowl. Attach bowl and power knead spiral dough hook to mixer turn speed to 2 and mix 30 seconds stop and scrape bowl
3 Continuing on speed 2 slowly add yeast mixture and cold water mixing about 30 seconds if dough is sticky add remaining ¼ cup flour. Knead on speed 2 about 3 minutes or until dough is smooth and elastic
4 Place dough in greased bowl turning over to grease top. Cover. Let rise in warm place, free of draft, 11/2 to 2 hours or until doubled in size.
5 On lightly floured surface. Punch dough down several times to remove all air bubbles. Divide dough in half. Shape each half into 12-inch long loaf. Place each loaf on greased baking sheet or in greased baguette pans. With sharp knife make 3 to 4 shallow diagonal slices in top of dough. Beat egg and 1 tbls of water together with a fork. Brush each baguette with egg mixture cover with greased plastic wrap. Let rise in warm place, free of draft, about 1 to 1 ½ hours or until doubled in bulk.
6 Brush top of each baguette again with egg mixture. Bake at 450 for 15-18 minuets or until deep golden brown. Remove from pans and cool on wire racks.
7 ***Note I baked mine on a large BGE directly on pizza stone on inverted plate setter (legs down) with the big green egg “feet” as a spacer for the pizza stone
Yield: 36 servings (18 slices per loaf)
Recipe Type
Bread
Recipe Source
Source: BGE Forum, Bente, 2008,02/16
Source; Kitchen Aid bowl lift stand mixer instructions and recopies pg 69
Posted to BGE forum 1-27-08 by BENTE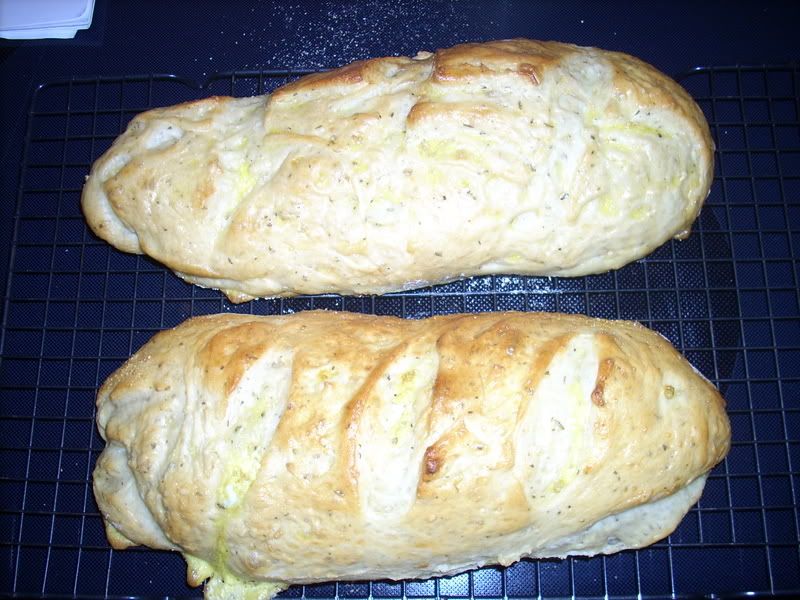
happy eggin
TB
Anderson S.C.
"Life is too short to be diplomatic. A man's friends shouldn't mind what he does or says- and those who are not his friends, well, the hell with them. They don't count."
Tyrus Raymond Cobb
-
thanks, that looks great!!
-
I made it also, it was awesome! Due to stuff going on, I let dough rise 29hrs. Turned out great.
Walt -
I cooked mine yesterday in a CI loaf pan. The bottom burned but it was apretty loaf. I only took pics after I sliced it. Next time I will not cook it as hot as the directions call for plus I think I let the CI loaf pan get tooooo hot before I put the dough in...
my wife said she liked the way it looked when it was cooked in the CI dutch oven.. :woohoo: -
Will post pictures as soon as wife brings cradle home from work.
Walt -
i cooked mine in my ci dutch oven which worked very well. I had egg at about 475 and the bottom of mine turned out great but i had let everything come to temp for about an hour before i was ready to add the dough. I look forward to doing this one again with some variation.
-
look forward to seeing it.
-
what recipe did you use for that wonderfull looking loaf of bread.
-
what recipe did you use for that wonderfull looking loaf of bread.
-
here you go::
Bread, No Knead Brock from just across.........
OK -- Here goes! This is a no-knead recipe. Very little "hands-on" time... maybe a total of ten minutes handling ingredients.
1 Simply dump into a bowl and quickly mix together
2 > 3 Cups all purpose flour
3 > 1/2 tsp yeast
4 > 1-1/2 tsp salt [I use sea salt]
5 Then just dump in 1-1/2 cups of good tasting water
6 > In about 20 - 30 seconds, just squish the water into the flour... don't worry about "under mixing." It will hydrate on its own.
7 Cover with plastic, and let sit on the counter 12+ hours.
8 < The longer it sits, the more taste it will develop
9 The next day ---
10 Flop the gooey mess onto a well floured countertop.
11 >It will be really sticky, and will seem like it is too wet. It isn't!
12 >Use flour liberally on your hands, and "powder" the dough as needed so you don't end up wearing it!
13 Tri-fold the mess as best you can just twice!
14 < Work the dough a bit with your fingers to de-gas the biggest bubbles. Unlike traditional bread making, don't overwork this section. You can do this in maybe 15 seconds at the most.
15 < Leave some gas bubbles in the dough.
16 As best you can with the gooey mess, keep your hands well floured, roll into a ball and place the dough into a lightly oiled [EVOO] bowl.
17 Cover with a towel, and walk away!
18 < To this point, your total contact time with ingredients is maybe a minute, include measuring the flour, yada-yada.
19 < Just walk away, Jose! -- For two hours.
20 Preheat your oven [Egg] to 450F, with the empty clay covered bread baker inside. I separate the body from the cover.
21 Turn the dough out on the counter again, gently de-gassing.
22 < Tri-fold twice!
23 < Then shape the dough into an appropriately long "log."
24 < Again, this is a fast-'n-furious step, taking less than a minute.
25 < When the "log" is formed, let it rest for about 10 minutes.
26 Quickly, toss the "log" into the clay baker, cover the baker with its clay top and put the baker into your Egg/oven for 30 min @ 450F
27 < The extremely wet dough [superhydrated] will steam -- but the steam can't escape the clay baker easily... this is what makes that crispy, yummy crust on the bread!
28 < BTW -- The bread will not stick to the baking pot. < Don't grease the baker, or anything. Just use it.
29 After 30 minutes, take the lid off the cooker, and continue to bake for 20 more minutes.
30 Viola! The deed is done!
31 < Remove the baker from the Egg/oven
32 < Turn your Italian loaf out on to a rack to cool at least 30 min. before slicing. The inside of a loaf of any bread needs this rest time before slicing, or the inside of the bread can turn out "gummy."
33 Enjoy the best Italian bread you've ever had.
34 DISCLAIMER: Do not subject the clay baker to direct heat, nor to temps above 450F. In the Egg, have a spacer between the plate setter and the baker. In a kitchen over, set the clay baker on the middle rack.
Recipe Type
Bread
Cooking Tips
i use a dutch oven in my egg instead of a clay baker
Recipe Source
Author: Broc just across………………………………………………………………………………………………………
Source: BGE Forum 2008-01-17happy eggin
TB
Anderson S.C.
"Life is too short to be diplomatic. A man's friends shouldn't mind what he does or says- and those who are not his friends, well, the hell with them. They don't count."
Tyrus Raymond Cobb


Categories
- All Categories
- 182.7K EggHead Forum
- 15.7K Forum List
- 459 EGGtoberfest
- 1.9K Forum Feedback
- 10.3K Off Topic
- 2.2K EGG Table Forum
- 1 Rules & Disclaimer
- 9K Cookbook
- 12 Valentines Day
- 91 Holiday Recipes
- 223 Appetizers
- 516 Baking
- 2.4K Beef
- 88 Desserts
- 163 Lamb
- 2.4K Pork
- 1.5K Poultry
- 30 Salads and Dressings
- 320 Sauces, Rubs, Marinades
- 543 Seafood
- 175 Sides
- 121 Soups, Stews, Chilis
- 35 Vegetarian
- 100 Vegetables
- 313 Health
- 293 Weight Loss Forum