Share your photos by tagging us and using the hashtag #BigGreenEgg.
Want to see how the EGG is made? Click to Watch
Building my table and need some hole cutting recommendations

Hi everyone, I am brand new to this site and this is my first post. The site looks very informative and I am looking forward to taking full advantage of your cooking knowledge. For now I am a member without an Egg. I am waiting until spring (early May) to make the purchase because I am also trying to afford some RV remodeling in the next few months too. As a motivator to commit to an egg purchase, I decided to build my table first and started on that in December. I am almost done with it, except for the tabletop. I need to do a lot of sanding on it, cut a hole and assemble it to my rolling base. Since I don't yet have an egg, that is where I am turning to all of you for some advice. I don't want to cut the hole too big, but since the top is going to be wood I don't want to be someone posting months down the road showing pictures of my burned table. So I do want a little clearance. Maybe between 1/4 and 3/8 all around? What gap do you recommend? Please soak in my info below and let me know if you have some advice to share.
Table is a rolling table. I have mounted a paver stone to set the egg on. The measured distance from the paver stone top surface to the underside of the table top is 15.5". The table top is 5/8" thick. I am going to be purchasing a Large Egg, and am planning to also buy the table nest to allow more airflow.
I assume I probably could have mounted the stone lower but it cuts into the size of a shelf I have build under the egg. Much lower and the shelf would have only been good for thin items like pizza stone, grills etc. I wanted it tall enough for a box to store coal in as well as the flat items.
Would I be better off to leave my table top unattached, finish it all except the hole and wait for the egg? How have you guys done it? Cut the hole to a recommended size, or put the egg in the table without the top and take real measurements?
Also, how have you cut your holes? Router? Jigsaw? Free hand or some kind of hole guide? I want it to look nice, but am by no means a master woodworker.
Thanks early, Jeff
Oh, one more thing about posting on here. I am sure I will find out soon enough, but do you get email notifications when someone replies to a post?
Comments
-
Suggest you look at the table plans on naked Whiz site. http://www.nakedwhiz.com/tableplans/tableplans.htmThey have plans for a large table with all the dimensions including diameter and location for the hole. You should be able to get what you need from their plans, even though yours is already under construction.I built a table for my XL, used a saber saw to cut the hole, then routed the edges. I also used a bunch of scrap pieces for the top, so did not have a solid top to cut the hole from. I made a cardboard template of the cutout, then traced it on the top.Good luck, and post pics when it is finished!XLBGE, Small BGE, Homebrew and GuitarsRochester, NY
-
Thanks. Those designs get me in the ballpark, but I think I really need to know the true diameter of a LG BGE with table nest measured from bottom of nest 15.5" and 16 1/8" up. Also the recommended gap.
I can post some in progress pics.
I started with a 24x36 Rockler table stand so I knew things would be solid and hold the weight. Then I assembled sides, drawer ends, shelves, etc and pieced it all together. It was my first time using the Kreig Pocket drill jig. That took some learning, but I figured it out and hiding the fasteners gives a nice clean look.
Sides and pieces unassembled seemed more flimsy than I had envisioned when designing, but once I assembled them to the Rockler stand it really got solid. Looks like I neglected to take pictures of the unassembled wood pieces though...oops.
I also modified the rockler stand and flipped the shelf pieces upside down and moved it towards the bottom of the stand so the stone could sit down into the shelf rather than standing above it an extra inch and a half.
I used redwood and covered with a basic deck sealant. I did use some 3/4" plywood for the shelf that the paver stone sites on and 1/4" plywood for the bottoms of the drawers though.
The top is 1x6 redwood pieces joined at the edges for approx. 27x70 table top. It was 28x75 until today. My grill cover arrived from amazon today and did not fit, yet it was the biggest they had, so I sized the top down a little. Still too tight but I think I will be fine once I round the table top corners.
Getting a cover was something I neglected to research before starting. Hindsight 20/20 I would have sized available covers first.
I might make a door for the bottom shelf eventually, but I want to test drive it and see what ends up going in there first.
Sorry if images size wrong...again this my first image attempt. Also some are from a camera and some from a phone...I expect the phone pictures to be sloppier.
Thanks, Jeff
-
I used a festool carved jigsaw with the circle cutter attachment. Check it out at about 1:02 of this video.
 http://youtu.be/AqfSgvlfZm0
 -
I based my table on a popular pattern that will allow the use of a standard cover. I pre drilled and assembled my top in order to get the hole correct. I then attached a swing arm to the jigsaw and cut the circle. After rounding the cuts over with a router - I then disassembled the top and put on 3 coats of finish. I think I had around 15" from the stone to the table top on my table.


-
One of the most accurate tools in your wood-shop is a router. You can also use a jigsaw but the cut will not be as accurate as a router because of the side to side flex in the jigsaw's blade. There is no flex in a router's cutting bit. It requires making a "inside" template out of tempered masonite. If you have a router and are interested in going this route I can explain it more in detail with photos, etc. It might require that you buy a few minor router accessories to complete the task. I have a LBGE and also all of the tools in my wood-shop. I is a little after 0430 here, dark and foggy outside...and I have not finished my morning coffee and newspaper read yet. Let me know and I will glad to help you.LARGE, MINI BGE SAN DIEGO, CA An alcoholic with a barbecuing problem.
-
FWIW--
I built my table using the inspiration of the naked whiz plans and the mother ship's plans. I didn't use a paver, just installed a table nest directly on the wood. Matching the 15" dimension between the top of the bottom shelf and the top of the table, the 21" hole matches my large egg perfectly, with about 1/2" gap all the way around.
I've got 2 recommendations:
1. Build a small base to put the stone on. Elevate the stone enough to get the distance between the top of the stone and the top of your table down to 15". Then cut a 21" hole in the top.
2. You can guesstimate how much larger to make the hole in the top. The egg sides are approaching vertical at the height of my top. Another inch and an eighth up from my table top's height relative to the egg, and I'd guess a 21.75" hole could work.
As for cutting the hole, I used a circle guide and 1/4" upcut spiral bit with my router.
-
Here is a video about using a router and template guides:LARGE, MINI BGE SAN DIEGO, CA An alcoholic with a barbecuing problem.
-
For some reason my machine is not able to post links
on this site. Go to Youtube and search the title below.How to use guide bushes & collars to make jigs with a router.
LARGE, MINI BGE SAN DIEGO, CA An alcoholic with a barbecuing problem. -
I really like the look of the table and the use if the rocker table.Jeff_R said:
Thanks. Those designs get me in the ballpark, but I think I really need to know the true diameter of a LG BGE with table nest measured from bottom of nest 15.5" and 16 1/8" up. Also the recommended gap.
I can post some in progress pics.
I started with a 24x36 Rockler table stand so I knew things would be solid and hold the weight. Then I assembled sides, drawer ends, shelves, etc and pieced it all together. It was my first time using the Kreig Pocket drill jig. That took some learning, but I figured it out and hiding the fasteners gives a nice clean look.
Sides and pieces unassembled seemed more flimsy than I had envisioned when designing, but once I assembled them to the Rockler stand it really got solid. Looks like I neglected to take pictures of the unassembled wood pieces though...oops.
I also modified the rockler stand and flipped the shelf pieces upside down and moved it towards the bottom of the stand so the stone could sit down into the shelf rather than standing above it an extra inch and a half.
I used redwood and covered with a basic deck sealant. I did use some 3/4" plywood for the shelf that the paver stone sites on and 1/4" plywood for the bottoms of the drawers though.
The top is 1x6 redwood pieces joined at the edges for approx. 27x70 table top. It was 28x75 until today. My grill cover arrived from amazon today and did not fit, yet it was the biggest they had, so I sized the top down a little. Still too tight but I think I will be fine once I round the table top corners.
Getting a cover was something I neglected to research before starting. Hindsight 20/20 I would have sized available covers first.
I might make a door for the bottom shelf eventually, but I want to test drive it and see what ends up going in there first.
Sorry if images size wrong...again this my first image attempt. Also some are from a camera and some from a phone...I expect the phone pictures to be sloppier.
Thanks, Jeff
-
Thanks everyone. I think I am going to borrow my friends router for cutting the hole. (actually I think I will have him do it for me.) He recieved a brand new circle jig for his router as a christmas present and this would be a good thing to test it out. I personally have never used a router, but he has alot of experience with his. Even so i think i want to see him work on a piece of scrap plywood first.
As far as hole size goes, I think I am going to try to find a local (Anaheim) BGE dealer that has a large with the table nest installed. Then get the actual measurements that I need. Measure twice, cut once. I want to be right on the first time. Lombard, any way I can get you to put 1 1/8" boards on your table top on each side of the egg and tell me what your diameter measurements are at that hieght which would be my 16 1/8 table top? Then again with just 1/2" boards to represent the diameter at the underside of my table? No rush, I want to sand the top before cutting, therefore I am at least 1-3 weeks from even being ready to cut a hole.
I definitely do not want to raise my stone any. I like how it sits right now, and prefer to keep the egg closer to the table. however....Lombard, how much clearance do you have on your setup between the rear hinge springs and the table top? Maybe I am already pressing my luck at 16 1/8" ??
Thanks, Jeff
-
Finished! CPA appointment the day after tomorrow. Wont be long now. As soon as my tax refund is back I make the plunge!
So I went with 21.375" for my hole diameter. And I borrowed my friends router to cut it. I found a little more info to go with the naked whiz design specs and I feel fairly confident my diameter is good. TNW called for 21" hole. It is based on 15" span from shelf to table top. My measurement was 16.125". Initially I was concerned that it was a significant height difference and was even concerned about hinge clearance, then I got more info. I am planning on getting a table nest which lifts my egg 2". TNW design is assuming the ceramic feet which lifts the egg 3/4". So I reverse calculated it. TNW measurement with feet from the bottom of the egg to the table top is an adjusted 14.25". (15"-3/4") While mine is an adjusted measurement of 14.125" (16.125"-2"). That is really almost identical. Mine will actually provide an extra 1/8" clearance to the hinge. So I am good to go! No real idea what my hole clearance will be, but I think ok.
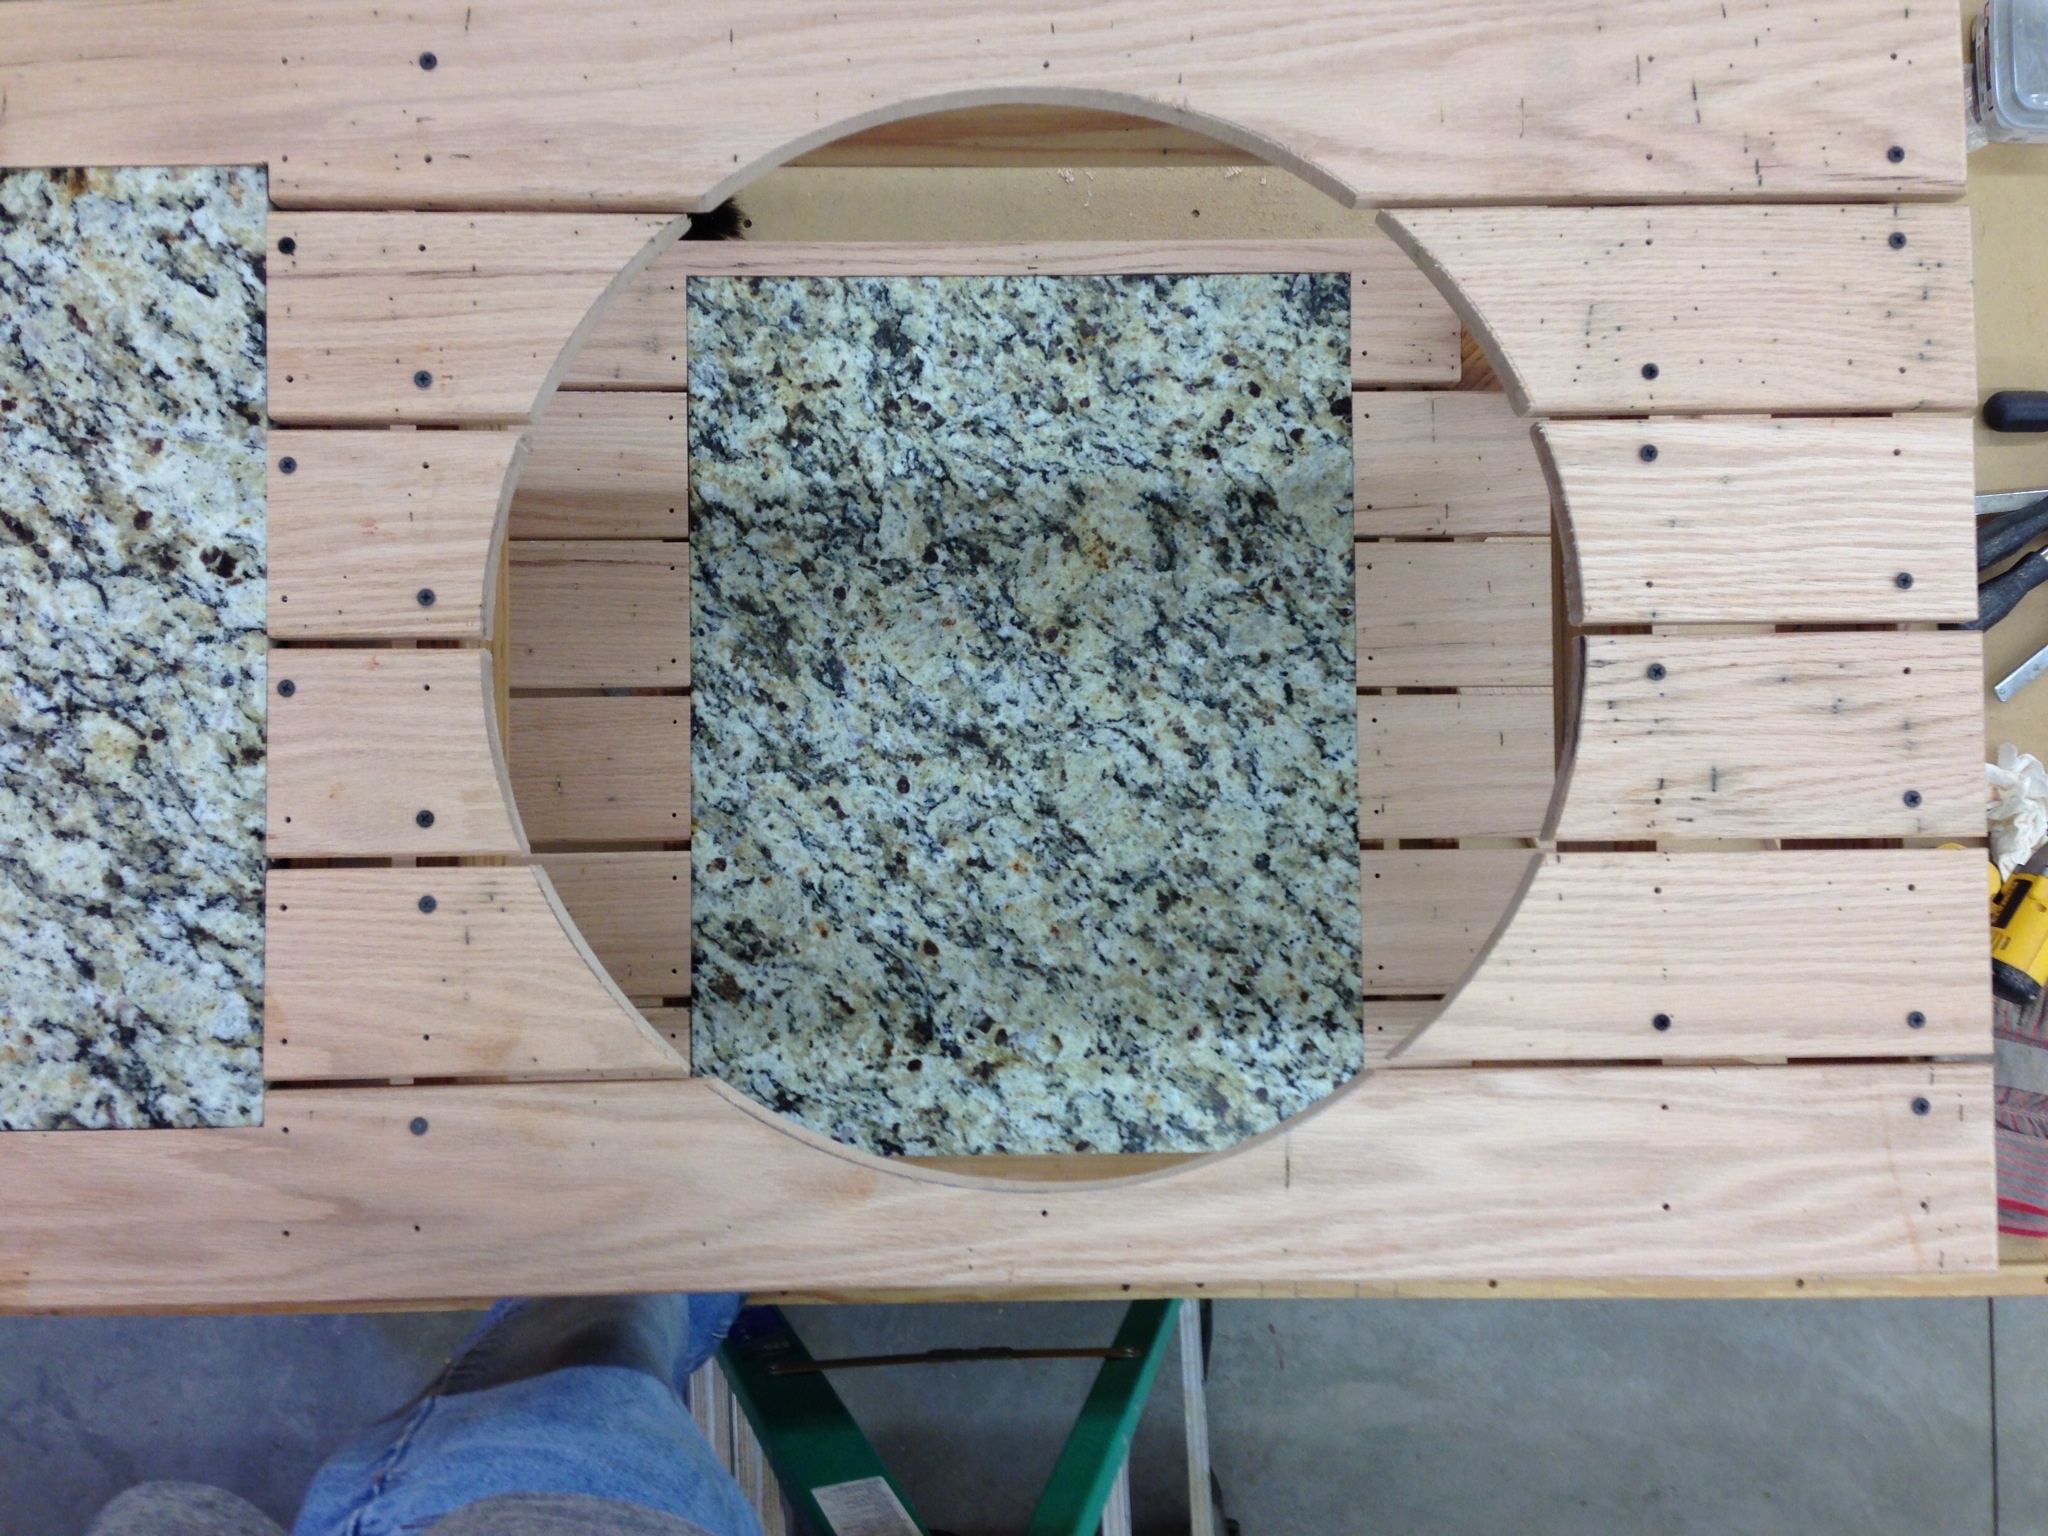
For a finish I was using Bear Transparent Deck Sealant. It has a good look and is easy to apply. But when I finished the table top, I noticed that it scuffed too easy. Easy enough to touch up, but I don't want be constantly doing touch up. I will ultimately get a cutting board and/or granite slab 20"x20" or so for each side so I don't actually rest stuff on the table top directly and I can bring those inside. However, I still thought it scuffed too easy. So for the top surface of the table top, I also gave it a couple coats of polyurethane. Note: If you do this, put the urethane on while the sealant is still tacky or you will get beading.
My cover also fits nicely. It was a simple $40 amazon.com cover. It is made for regular Gas Grill though. For now I just threw together a support frame to fill the space. Once an egg is in there, the frame will go away. Maybe I will put some boxes on each side to fill the gap? Or not. We will see. Might be a good disguise to make the expensive egg look like a cheap grill.
Anyway, here are some final pictures.
-
Beautiful table!
-
For not being a master wood worker that is one of the nicest tables I've ever seenLBGE& SBGE———————————————•———————– Pennsylvania / poconos
-
Oh. 1 more thing. Where's the bottle opener?LBGE& SBGE———————————————•———————– Pennsylvania / poconos
-
Thanks! I am definitely not a master woodworker. But I did borrow a nice chop saw and bought a kreg pocket jig. Once I learned how to use them it improved my quality alot. And the bottle opener will go in one of the drawers. I prefer using the handheld bar type bottle openers.
-
-
Very nice table. I over built mine using naked whiz plans and used smooth surface composit material. Easy to keep clean and maintenance free,
-
I love the look of the table but I am worried that gravity is going to be a problem in the future with the unsupported weight on both sides where the drawers are. I have built a number of projects over the years that I thought would withstand the effects of gravity, and I was wrong. Think about what modifications you can make to the drawer areas to support them. I hope that I am wrong though!
Northern Colorado Egghead since 2012.
XL BGE and a KBQ.
-
Thanks guys. I am not worried about gravity. Anything can happen but that table is extremely solid and well designed. It has a very rigid frame and wood supports that span the entire width of the table. Any weight is attached to those supports or the steel frame and is made even stronger by the table top itself and other reinforcement. I am an engineer and am very confident in my design. I am not 100% confident in my execution, but the design is sound. If key spots were to loosen because of my lack of wood skills, there are very easy steps I could take to make it even stronger. Overkill for now though. The table easily weighs over 150lb as it sits and my friend and I lifted the table off of the ground by the ends and no flex or creaks whatsoever. Time will tell for sure though. I am betting that if there are those kinds of problems, it will be many years before I see it. Thanks for the concern and advice though.


Categories
- All Categories
- 182.7K EggHead Forum
- 15.7K Forum List
- 459 EGGtoberfest
- 1.9K Forum Feedback
- 10.3K Off Topic
- 2.2K EGG Table Forum
- 1 Rules & Disclaimer
- 9K Cookbook
- 12 Valentines Day
- 91 Holiday Recipes
- 223 Appetizers
- 516 Baking
- 2.4K Beef
- 88 Desserts
- 163 Lamb
- 2.4K Pork
- 1.5K Poultry
- 30 Salads and Dressings
- 320 Sauces, Rubs, Marinades
- 543 Seafood
- 175 Sides
- 121 Soups, Stews, Chilis
- 35 Vegetarian
- 100 Vegetables
- 312 Health
- 292 Weight Loss Forum