Share your photos by tagging us and using the hashtag #BigGreenEgg.
Want to see how the EGG is made? Click to Watch
My XL Rutland Gasket Installation Photo Essay

I was going to add my Rutland installation experience onto @Black_Badger 's thread, but decided that due to the many pictures, folks (especially those looking at the site with their phones) should be warned so I made a new thread. Here's a link to Black_Badger's thread:
http://eggheadforum.com/discussion/1155144/installing-rutland-gasket-on-xlbge-thank-you-rrp
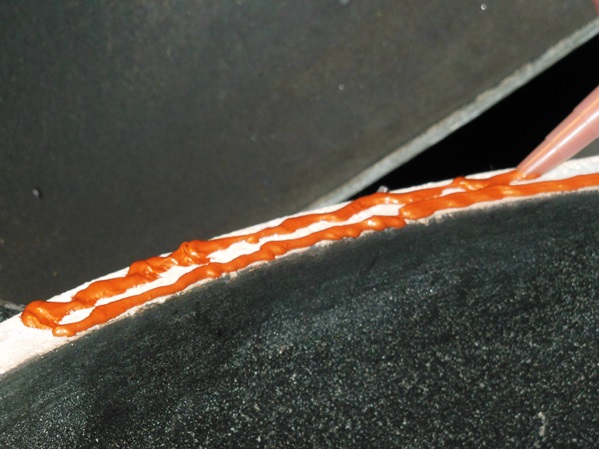
I expertly fused the gasket using BBQ sauce. Here's the damage:

Now for the fix. Big THANK YOU to @RRP for my new Rutland gasket! Here's the tools & materials: I never did use the trowel.

I thought I would heat the egg to get the rest of the gasket off, but I don't think it made a difference. I scraped off as much as I could from the base.

As for the dome, I removed it and scraped that too.

Here's the dome re-installed and the paint stripper wheel has done it's job.

Applying the sealant and spreading it with a putty knife:
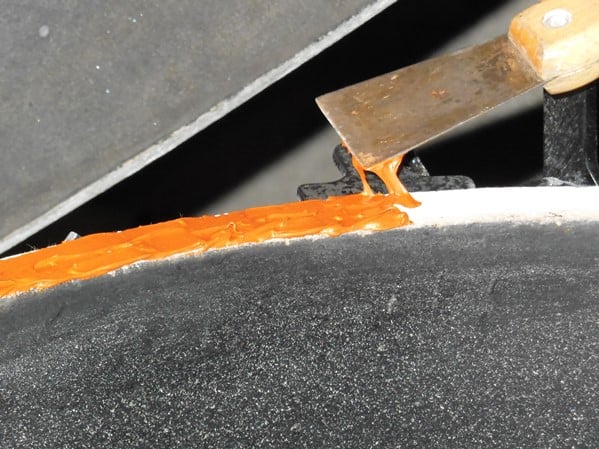
Applying the gasket and "bunching" it as I go.

It didn't take long, but I'm glad it's on!
Put some wax paper on it and close the dome to weight it down evenly.

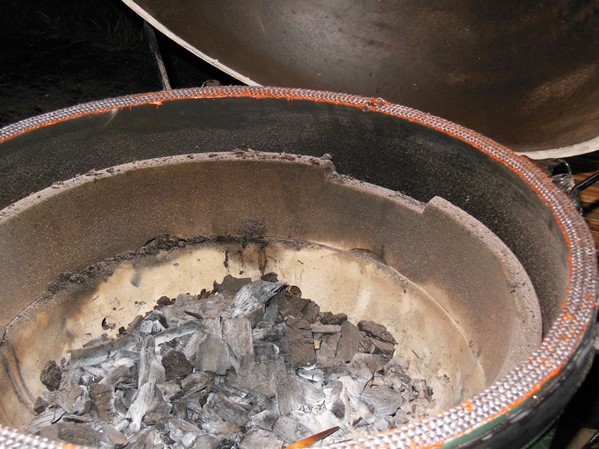
Done! Cured for 24 hours and the XL totally cleaned out. Now I'm ready to add the ceramics, some lump and fire it up!

EPILOGUE: According to RRP's instructions, I should have had about 2 inches of gasket leftover. I give myself a "C".

Thanks for looking!
Comments
-
I see the problem, that beer still has the top on it. That thing should have been opened before the first picture was taken.XLBGE, LBGE, MBGE, SMALL, MINI, 2 Kubs, Fire Magic Gasser
-
Yeah, I was going to take the photo myself with the bottle lying down. Wilma walked into the garage and she took the photo. Trust me, that beer was gone shortly afterwards!Flint, Michigan
-
Bookmarked....getting ready to do the small.Large, small and mini now Egging in Rowlett Tx
-
Actually I would give you a better grade...more like a B+ actually for your first time! Lately I have been adding more gasket than what I say in my XL instructions to give your guys more wiggle room! Not being critical though, but the Permatex on top of the gasket is your potential enemy and the less slop on top the better for years to come! The Rutland even as cheap as it is will last many years.Re-gasketing America one yard at a time.
-
Thanks Ron! That's high praise from a Rutland expert and I'll take it! Being more careful about slop on the gasket has become a priority for me.RRP said:Actually I would give you a better grade...more like a B+ actually for your first time! Lately I have been adding more gasket than what I say in my XL instructions to give your guys more wiggle room! Not being critical though, but the Permatex on top of the gasket is your potential enemy and the less slop on top the better for years to come! The Rutland even as cheap as it is will last many years.
Flint, Michigan -
Looks good @Fred19Flintstone, brings back memories of a couple weeks ago, haha. One other thing I realized later than I would have liked, removing the wedding ring is a good plan! No harm, no foul, but I did get a lot of permatex on my hands.CheersB_BFinally back in the Badger State!
Middleton, WI -
I am thinking about doing this after my 2nd Nomex (installed yesterday) fails.
Two questions- Is it necessary to have that much permetex on the cermamic? Would one bead in the center all the way around work so as not to splooge over the lip and get permatex on the gasket?
Nice essay Fred. Looks a lot better than what I would do.
Columbia, SC --- LBGE 2011 -- MINI BGE 2013 -
The better the bed the better the seal. The key is more in the uniform thickness and IMO while one bead could work it is not ideal at all. The slop on the ceramic edge is no big deal since once it cures in 24 hours the excess can be trimmed away easily, but the Permatex on top the gasket will be there "forever" though in time the color gets masked by lump dust and creosote.Chubbs said:Two questions- Is it necessary to have that much permetex on the cermamic? Would one bead in the center all the way around work so as not to splooge over the lip and get permatex on the gasket?
Re-gasketing America one yard at a time. -
Just installed a Rutland on my L yesterday too. Now I have the M and L ready to cook for years. I didn't put quite as much of the Permatex on as shown in the pictures. Maybe I should have done a bit more. I zig zagged a nice 1/4" bead around the top and it seemed to stick very well. It did push up through the gasket material a little but I think it will be OK. Smoked a beef roast yesterday after it was cured. Worked great.L x2, M, S, Mini and a Blackstone 36. She says I have enough now....eggAddict from MN!
-
@Chubbs - "splooge"? I'm offended! I kept my pants on the whole time!!Flint, Michigan
-
So only one gasket? The top stays naked? I have been running naked for about 9 months and haven't seen much difference in lump consumption. Temp control hasn't suffered either. Should I consider a new gasket?
-
When properly installed the Rutland is thicker and therefore it only needs to go on the base. If you OTOH are one of the lucky people who don't need a gasket then so be it, but many of us have small waves or imperfections and then a gasket smoothes out the edges and allows a tight seal.Re-gasketing America one yard at a time.
-
I've been going commando for years and seems to work fine for me...I've heard a lot about the rutland gasket method - I'm intrigued but concerned about the product exposure to food.I also looked at the permatex web site regarding the ultra-copper. There was a note about the temperature range -65°F to 700°F - What happens after 700 F? Does it start to melt? I rarely go above 600 F, but it does happen.Just curious.Michael
-
TNW put that issue to rest some time ago. I have had my large to 1050 degrees with no impact on the Permatex and my small hits 700 to 780 on a frequent basis with no impact for years. Only the inner most edge of the Permatex is being subjected to that intense heat not the whole layer, and I assure you it doesn't melt or burn up.Re-gasketing America one yard at a time.
-
Thanks RRP. Good info.
-
I used an old sawzall blade to spread my permatex. It makes a great notched trowel. Since they are fairly cheap, I tossed it and didn't worry about cleaning it up.Mark Annville, PA


Categories
- All Categories
- 182.7K EggHead Forum
- 15.7K Forum List
- 459 EGGtoberfest
- 1.9K Forum Feedback
- 10.3K Off Topic
- 2.2K EGG Table Forum
- 1 Rules & Disclaimer
- 9K Cookbook
- 12 Valentines Day
- 91 Holiday Recipes
- 223 Appetizers
- 516 Baking
- 2.4K Beef
- 88 Desserts
- 163 Lamb
- 2.4K Pork
- 1.5K Poultry
- 30 Salads and Dressings
- 320 Sauces, Rubs, Marinades
- 543 Seafood
- 175 Sides
- 121 Soups, Stews, Chilis
- 35 Vegetarian
- 100 Vegetables
- 312 Health
- 292 Weight Loss Forum