Welcome to the EGGhead Forum - a great place to visit and packed with tips and EGGspert advice! You can also join the conversation and get more information and amazing kamado recipes by following Big Green Egg to Experience our World of Flavor™ at:
Want to see how the EGG is made? Click to Watch
Facebook | Twitter | Instagram | Pinterest | Youtube | Vimeo
Share your photos by tagging us and using the hashtag #BigGreenEgg.
Share your photos by tagging us and using the hashtag #BigGreenEgg.
Want to see how the EGG is made? Click to Watch
Rutland Install
Options

fasteddiem
Posts: 212
So after a few months of Egging on my XL the POS felt gasket burned up! I realize it was a matter of time but 2 months seemed a little silly. So I read the various reviews on "The Whiz's" website and determined that a Rutland was the way to go for me. I contacted RRP from the Forum for a replacement and I was underway...I'd like to take a moment to give a Major Shout out to RRP (Ron), the service was amazing! We spoke on a Wednesday night, the gasket was in the mail on Thursday and in my hand on Saturday! Ron is the best!...I made sure to read the provided directions and reviewed the directions on TNW's website so I knew exactly what to do. I started off by cleaning out the firebox of all the remaining lump. In addition I used a small bucket top wet/dry vacuum to clean out the ash.

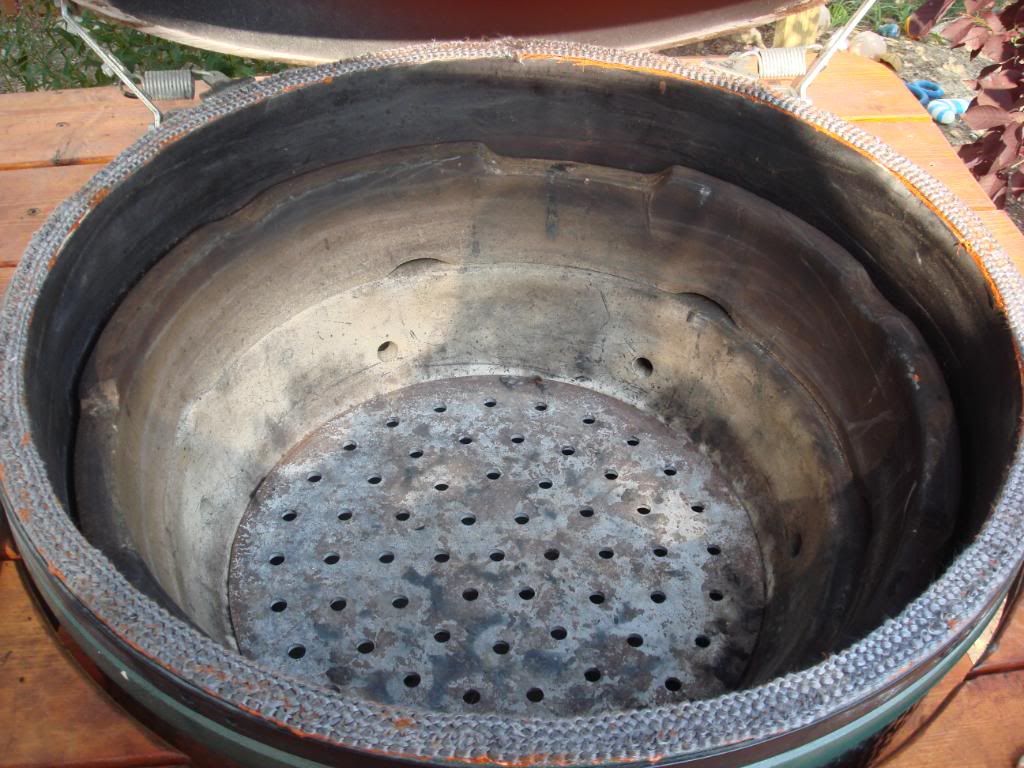
I began by placing a garbage bag over my stock grate and placed it inside the egg to reduce the falling debris. Then I used a razor knife to remove the remaining gasket off the top and bottom. Next I used a course rust and paint remover wheel to remove the remnants of the gasket from the top and bottom.
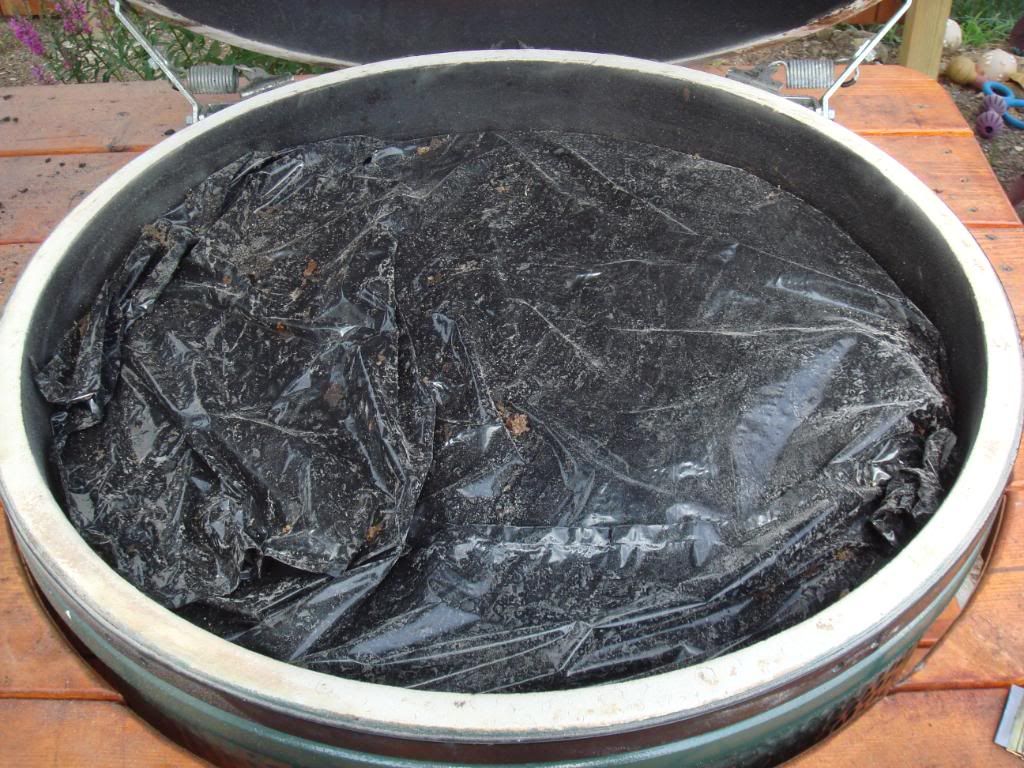
I was worried that I was taking off too much as there was what appeared to be a bunch of ceramic dust flying but it appears to be fine.
With the surface prepped for surgery I assembled the necessary equipment...the gasket marked in quarters, Permatex Ultra Copper, and a wall base spreader.
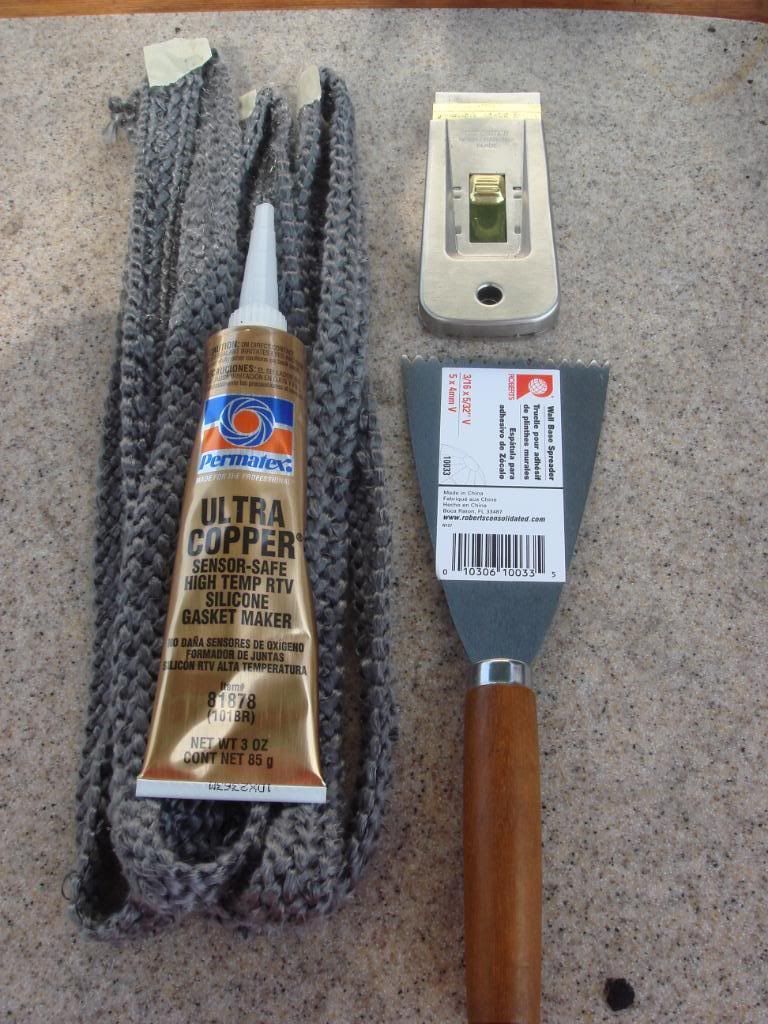
I worked by laying down a few inches of permatex, ran the spreader through it so the permatex was spread evenly over the surface then applied the gasket making sure to "bunch" as I went. I continued around the entire egg until installed...
Overall I am very pleased with the results. There were a few places where I was a little heavy handed with the permatex and it soaked though the gasket, but I dont think it will be a major issues...I also took this time to do some regular maintenance on my egg...I loosened the lid strap and realigned so that there was a good seat for the gasket...It appeared to be way off in the back. I also calibrated the thermometer.
I plan on doing a small 250 degree cook tomorrow to burn up any additional debris that didn't make it out as the egg was swept...I didn't do a burn to cure as TNW showed as it was not in Ron's directions...actually he specifically says not to cook for 24 hours...not sure what it right but I went with Ron on this one!
Overall the install was easier than I anticipated. I am one of the least handy people in the world (Much to my dad's dismay!) and I was able to do it without any issues...(at least that I've seen thus far!) Thanks for looking and another big thanks to RRP and The Naked Whiz! You guys are the best!
Eddie
I began by placing a garbage bag over my stock grate and placed it inside the egg to reduce the falling debris. Then I used a razor knife to remove the remaining gasket off the top and bottom. Next I used a course rust and paint remover wheel to remove the remnants of the gasket from the top and bottom.
I was worried that I was taking off too much as there was what appeared to be a bunch of ceramic dust flying but it appears to be fine.
With the surface prepped for surgery I assembled the necessary equipment...the gasket marked in quarters, Permatex Ultra Copper, and a wall base spreader.
I worked by laying down a few inches of permatex, ran the spreader through it so the permatex was spread evenly over the surface then applied the gasket making sure to "bunch" as I went. I continued around the entire egg until installed...
Overall I am very pleased with the results. There were a few places where I was a little heavy handed with the permatex and it soaked though the gasket, but I dont think it will be a major issues...I also took this time to do some regular maintenance on my egg...I loosened the lid strap and realigned so that there was a good seat for the gasket...It appeared to be way off in the back. I also calibrated the thermometer.
I plan on doing a small 250 degree cook tomorrow to burn up any additional debris that didn't make it out as the egg was swept...I didn't do a burn to cure as TNW showed as it was not in Ron's directions...actually he specifically says not to cook for 24 hours...not sure what it right but I went with Ron on this one!
Overall the install was easier than I anticipated. I am one of the least handy people in the world (Much to my dad's dismay!) and I was able to do it without any issues...(at least that I've seen thus far!) Thanks for looking and another big thanks to RRP and The Naked Whiz! You guys are the best!
Eddie
Comments
-
Eddie, nice job on the gasket, it looks great.
-
I did a Rutland from Ron back in early April of this year on my XL. Holding up well and extremely happy with it!
For me, the only thing I'd modify in the procedure (next time) is I would lay down the entire rim with permatex first, then lay down the entire gasket. I found it difficult and messy to keep starting and stopping with a little permatex and then a little gasket, little permatex, little gasket, and so on...Packerland, Wisconsin -
Thanks - I'm blushing! As for the difference in curing the old write up on TNW site was using the Rutland latex adhesive - not the Permatex.Re-gasketing America one yard at a time.
-
Did you take the lid off to do the install? I thought you have to take the lid off to do the install. Has anyone put a Rutland on without taking the lid off?
-
I took my lid off. It would have been impossible (in the back at least) to use a "paint and rust remover" to clean the rims without doing so:Packerland, Wisconsin
-
without taking the lid off? Sure!!!Re-gasketing America one yard at a time.
-
-
Choke on smoke,
Not sure what size egg you have but on my XL there is a bunch of room in the back. I was able to use the flat side of the remover (on the side where it fit into the chuck of the drill) on the back side while using my hand to hold the lid half open. There were only two spots where it wouldn't work; around the hinges. At those areas I cleaned them up with a pumice stone. Taking the lid off wasn't really possible. I didn't want to wrangle it alone...The wife isn't allowed to do any lifting! I worked out well thus far and it appears if have a clean edge.
Thanks, -
fasteddiem wrote:Choke on smoke,
Not sure what size egg you have but on my XL there is a bunch of room in the back. I was able to use the flat side of the remover (on the side where it fit into the chuck of the drill) on the back side while using my hand to hold the lid half open. There were only two spots where it wouldn't work; around the hinges. At those areas I cleaned them up with a pumice stone. Taking the lid off wasn't really possible. I didn't want to wrangle it alone...The wife isn't allowed to do any lifting! I worked out well thus far and it appears if have a clean edge.
Thanks,
fasteddiem,
Based on the pictures, what you were able to do (with the lid on) looks really good.
When I approached this project, I didn't think there was any way you could clean that stuff off (especially the lid), without removing it. Plus the added difficulty at getting at those angles on the lid sitting at a 45 degree angle.
I assembled my egg when it was new, so I felt comfortable taking the lid off. Just one bolt in the back, lift the band up and set the lid on the ground.
Glad it worked out for you, you're gonna love the Rutland!Packerland, Wisconsin


Categories
- All Categories
- 182.7K EggHead Forum
- 15.7K Forum List
- 459 EGGtoberfest
- 1.9K Forum Feedback
- 10.3K Off Topic
- 2.2K EGG Table Forum
- 1 Rules & Disclaimer
- 9K Cookbook
- 12 Valentines Day
- 91 Holiday Recipes
- 223 Appetizers
- 516 Baking
- 2.4K Beef
- 88 Desserts
- 163 Lamb
- 2.4K Pork
- 1.5K Poultry
- 30 Salads and Dressings
- 320 Sauces, Rubs, Marinades
- 543 Seafood
- 175 Sides
- 121 Soups, Stews, Chilis
- 35 Vegetarian
- 100 Vegetables
- 313 Health
- 293 Weight Loss Forum