Welcome to the EGGhead Forum - a great place to visit and packed with tips and EGGspert advice! You can also join the conversation and get more information and amazing kamado recipes by following Big Green Egg to Experience our World of Flavor™ at:
Want to see how the EGG is made? Click to Watch
Facebook | Twitter | Instagram | Pinterest | Youtube | Vimeo
Share your photos by tagging us and using the hashtag #BigGreenEgg.
Share your photos by tagging us and using the hashtag #BigGreenEgg.
Want to see how the EGG is made? Click to Watch
Need Maximum Buttage!!!
Options

Ozarkshooter
Posts: 65
Tried searching for my answer and can't quite find what I need. I know I've seen pictures in the past.
What I need are pictures of how to maximize the number of butts I put on my XL. I will be cooking seven 7 pounders - which I have got to think is possible.
I am cooking tomorrow night, so parts need to be found locally - I don't have time to order online.
Looked at getting a Weber 21.5" replacement grid and using 6" bolts to elevate it to make a second level. Four on bottom, plus three on top. But, with the height of the platesetter, plus two levels of butts, it doesn't look like I have room in the dome.
If I remove the fire ring to get lower in the dome, then I don't think my platesetter fits inside the egg - the base of the egg seems to taper down to a point that the platesetter won't fit.
HELP! I'm sure its been done.
Comments
-
I did (4) 7 - 8lb butts like this: Platesetter, regular grid and raised grid on top. (Thats a disposable foil pizza pan on the PS.
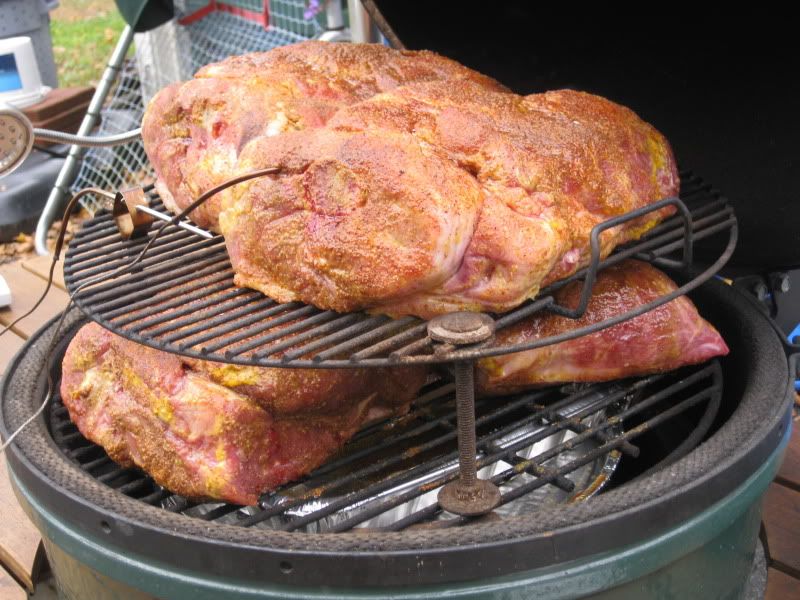
I had to be careful with the butts not hitting the thermometer or the sides.
(3) legs is what you need for the raised grid
I think mine was made with 4.5" carriage bolts. 6" will get you too high in the dome. I remember noticing that as you get higher in the dome, you need a smaller diameter grid. mine is a weber 18.5" replacement.
Another way you can cook 4 at a time (on a LBGE)is to stand them up on the grid. I was not confident enough to try that. -
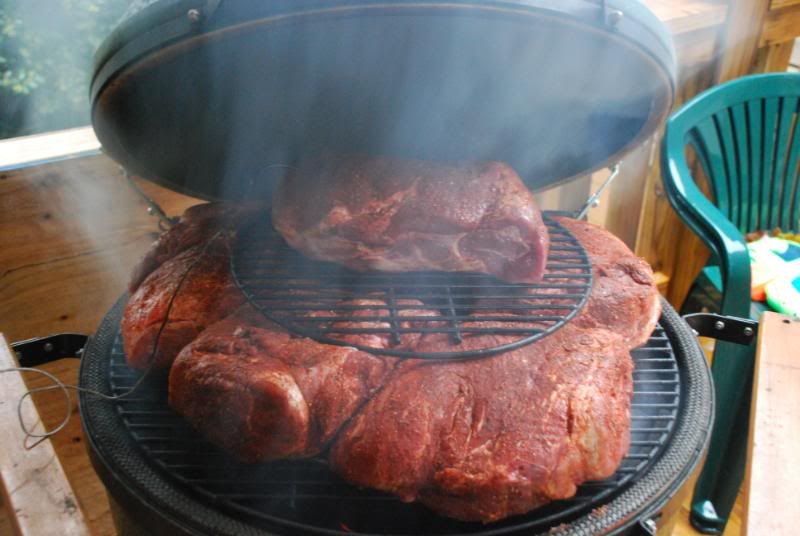
I have had my platesetter on the firebox a few times.
I would:
1) Load up the lump with smoking wood scattered throught the lump
2) Stabilize at 250 with platesetter in and wrapped in HDAF
3) Go with the legs down on the platesetter so you can use the extra space for additional lump beyond the top of the firebox
4) Use some foil wads or 3/4" copper elbows for spacers between a drip pan and the platesetter
5) Support the first grid by laying it on the drip pan
6) Support the second grid with nuts and bolts sized such that there will be enough space between the grids for the butts on the lower level
Pics of a similar (but different) set up for 12 racks
No fire ring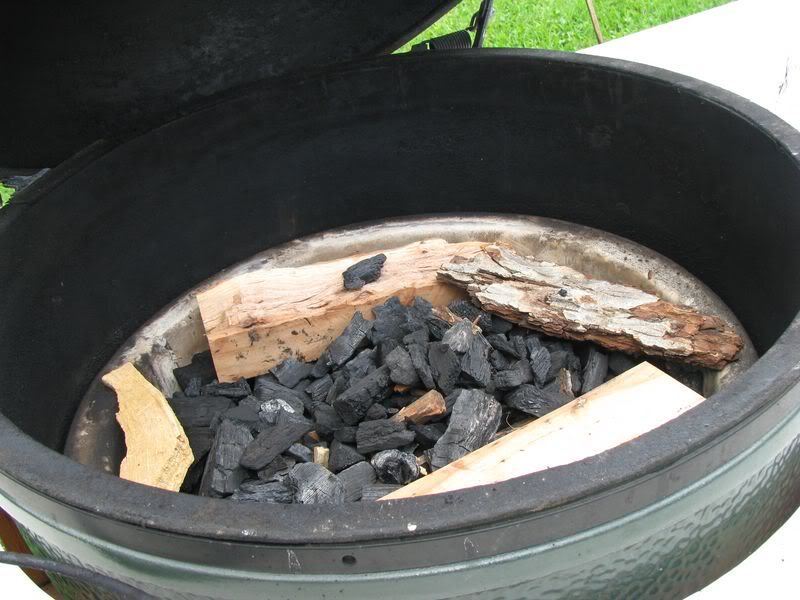
Platesetter legs down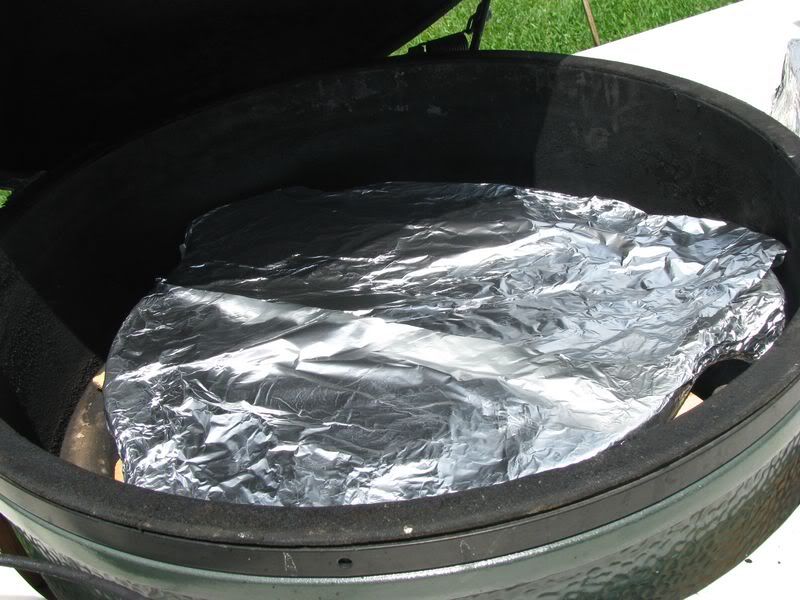
First grid supported on drip pan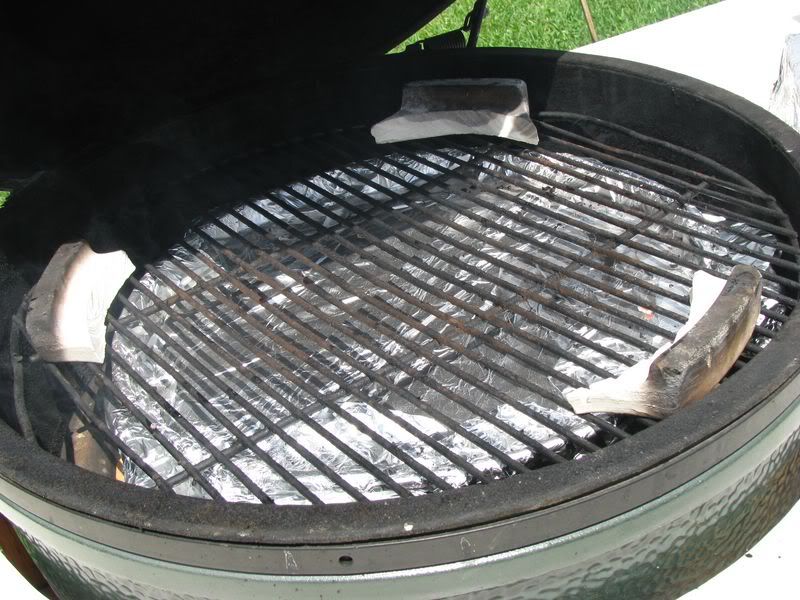
Ecetera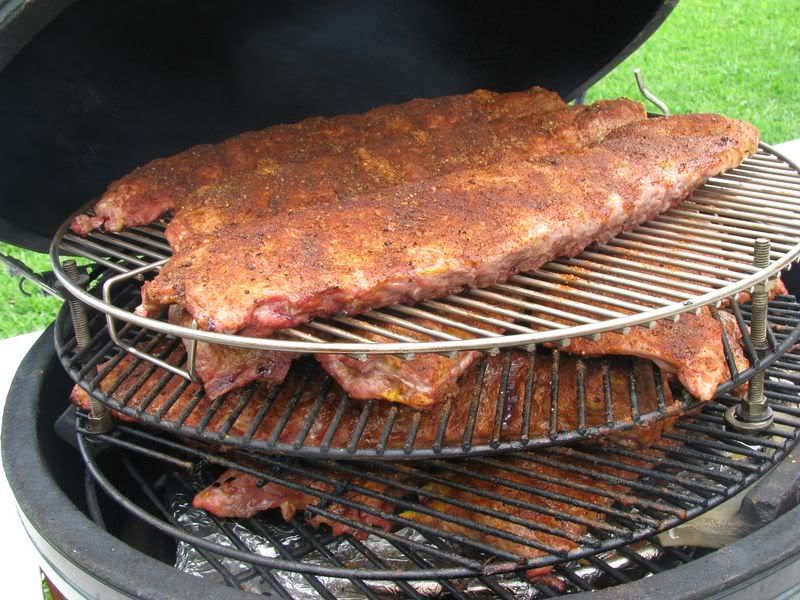
Good luck with it -
I've done 6 butts on my XL a few times with no special equiptment.I put 5 butts on the bottom then a small grid(no bolts),and put # 6 butt on top.You could easily fit another butt on top
") I use an 18" pizza pan for a drip tray
I use an 18" pizza pan for a drip tray ")
-
Thanks for the great pictures!!!
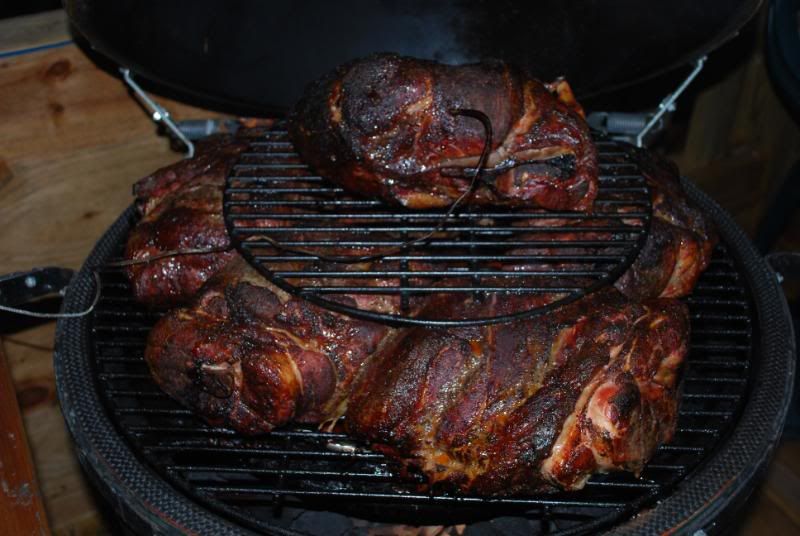
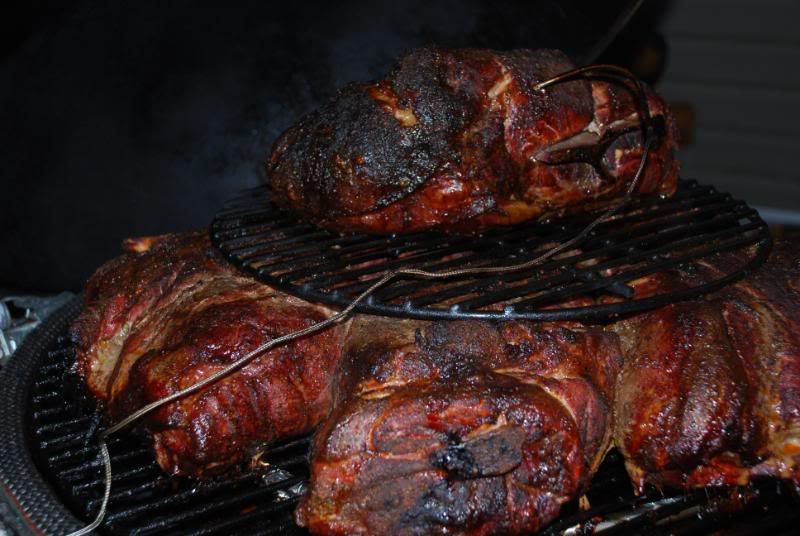
After seeing these, I got some bolts and a grid at Lowe's (similar to Flashback Bob's setup). I turned the platesetter to sit down in the notches in the fire ring to give me another inch or so. I did a dry run on setup last night (real cook happens tonight) - looks like it will work. Smaller butts will have to go on top. I will get four on the main lower grid and three on the top.
Only problem I had: I cannot remove the fire ring and set the platesetter directly on the fire box - similar to Frank's pictures. I've seen pictures where others have done it, but mine won't fit - must have used another size BGE that doesn't taper down like mine.
![[Deleted User]](https://secure.gravatar.com/avatar/72d0f3cf94935edd82517c944261e7bc/?default=https%3A%2F%2Fvanillicon.com%2Fec59a68092abc911e04ea514ec094e05_200.png&rating=g&size=200)


Categories
- All Categories
- 182.7K EggHead Forum
- 15.7K Forum List
- 459 EGGtoberfest
- 1.9K Forum Feedback
- 10.3K Off Topic
- 2.2K EGG Table Forum
- 1 Rules & Disclaimer
- 9K Cookbook
- 12 Valentines Day
- 91 Holiday Recipes
- 223 Appetizers
- 516 Baking
- 2.4K Beef
- 88 Desserts
- 163 Lamb
- 2.4K Pork
- 1.5K Poultry
- 30 Salads and Dressings
- 320 Sauces, Rubs, Marinades
- 543 Seafood
- 175 Sides
- 121 Soups, Stews, Chilis
- 35 Vegetarian
- 100 Vegetables
- 313 Health
- 293 Weight Loss Forum