Welcome to the EGGhead Forum - a great place to visit and packed with tips and EGGspert advice! You can also join the conversation and get more information and amazing kamado recipes by following Big Green Egg to Experience our World of Flavor™ at:
Want to see how the EGG is made? Click to Watch
Facebook | Twitter | Instagram | Pinterest | Youtube | Vimeo
Share your photos by tagging us and using the hashtag #BigGreenEgg.
Share your photos by tagging us and using the hashtag #BigGreenEgg.
Want to see how the EGG is made? Click to Watch
Putting Wheels on Egg Table
Options

darrott
Posts: 12
Hi everyone,
So I have built a table for my egg (using the basic plan from Green Egg with a few minor adjustments. but have decided that it should have wheels on it so that I can move it around a little easier. I have bought 2 7.5 inch wheels that I am hoping to attatch to the legs (2'4"'s) on side that the egg sits in. I am just wondering if anyone has any ideas of how to best install them? Also if the wheel is going to be lower that the actual table how should I level the legs on the other side?
Thanks for your help,
D.
Comments
-
I would think you would need to calculate how much the wheels would raise the height and shorten those legs accordingly.
-
Yup. Pretty much spot on.
I used 10" wheels on my table. I started by lopping off 1" off the legs where the wheels would be attached. I then measured up 3 5/8's inches on each leg. I drilled a 5/8th's hole. Ran some big ole 5/8ths bolts through the wheels and then through the 2" x 4". Bolted 'em all up.
So... what does all that mean? Half the diameter of the 10" wheel is 5". Minus the one inch I lopped off - that make 4". Then I measured up 3 5/8ths inches and attached the wheel. If I minus that 3 5/8ths from the reaming 4", that leaves only 3/8ths inches difference between the two sides. I then picked up some of those nice metal furniture/chair leg thingies (the look like GIANT thumbtacks that you put on the ends of furniture legs...) Lo and behold, they were 3/8ths of an inch thick. Bingo. Level table.
Here is a shot of the side of the table with the wheels: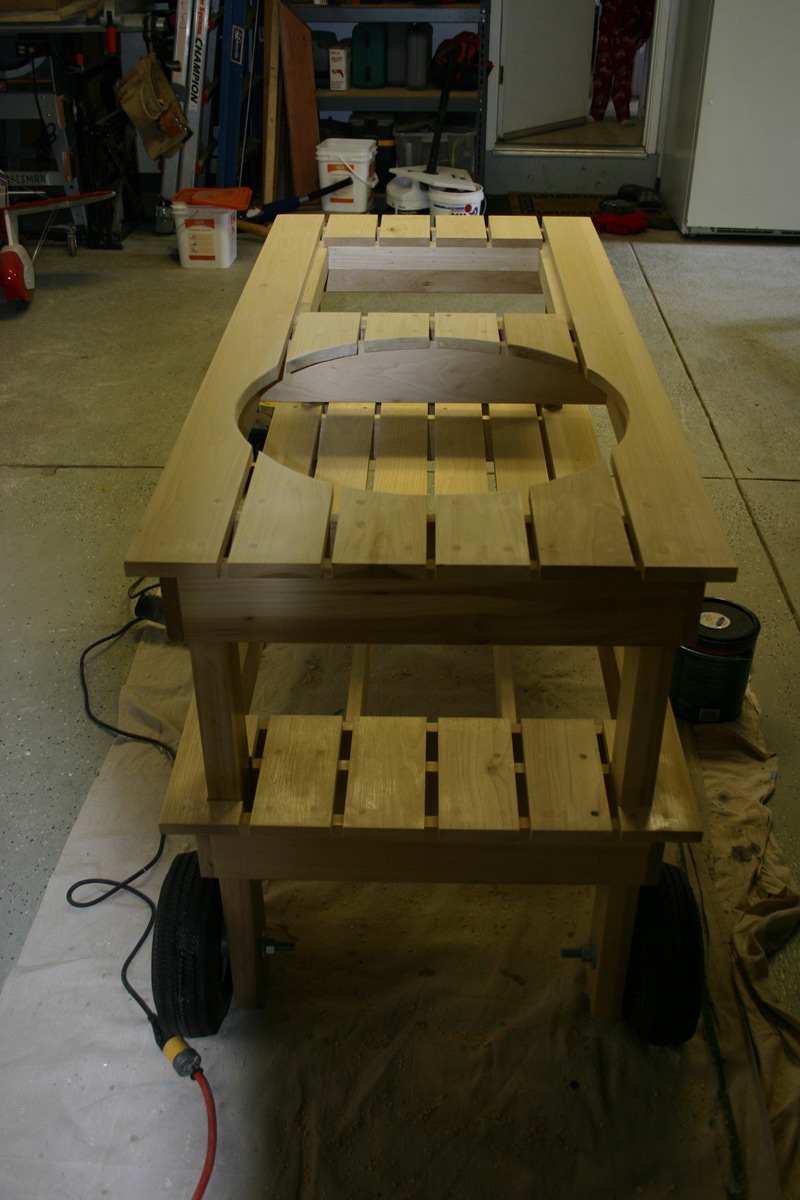
Here is a shot where you can barely make out the furniture leg end thingies (I forget the name of them, but I picked them up at Home Creepo: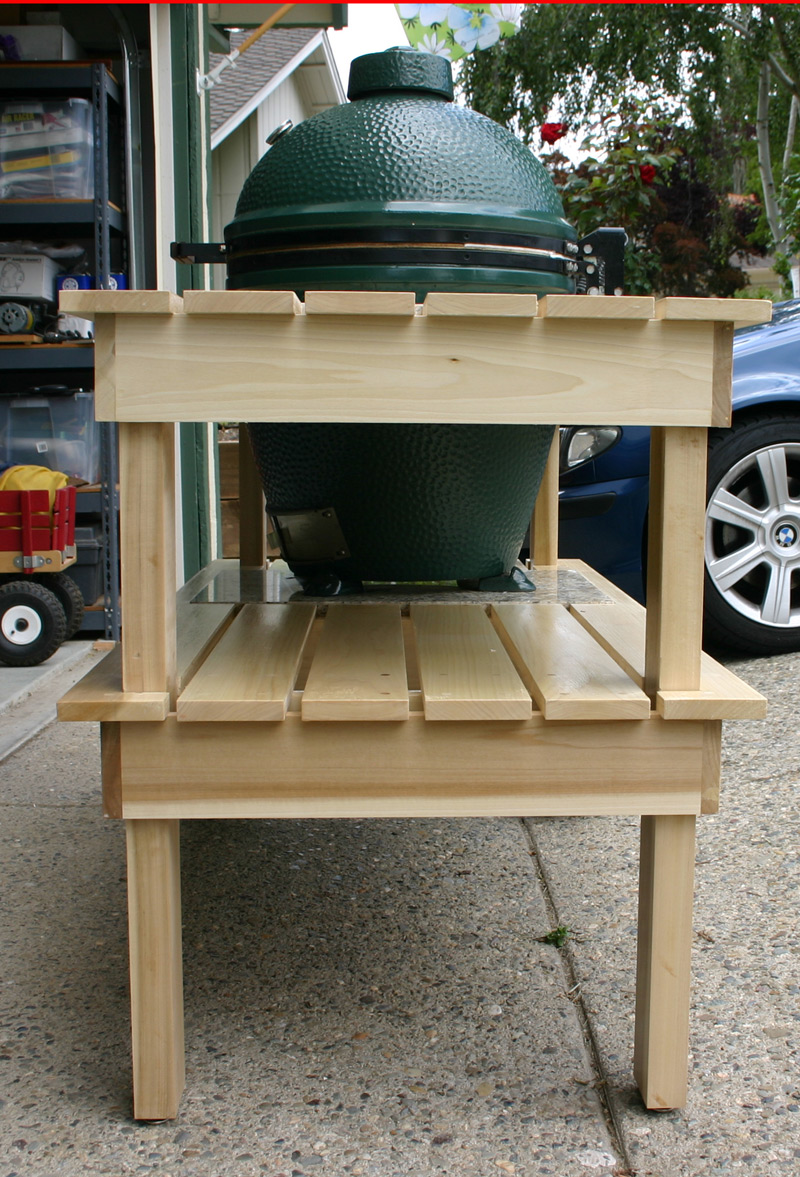
Ahh ha! I found an example on The Whiz's site:
You can find some great building info on his site. Specifically: http://www.nakedwhiz.com/cart.htm#eplg3. Jump down to the "Recall Repair Kit Installation Instructions." I think you may find your 7.5" wheels may suffer the same fate. Your mileage may vary.
Hope this helps,
Ted -
TRPIV wrote:Yup. Pretty much spot on.
I used 10" wheels on my table. I started by lopping off 1" off the legs where the wheels would be attached. I then measured up 3 5/8's inches on each leg. I drilled a 5/8th's hole. Ran some big ole 5/8ths bolts through the wheels and then through the 2" x 4". Bolted 'em all up.
So... what does all that mean? Half the diameter of the 10" wheel is 5". Minus the one inch I lopped off - that make 4". Then I measured up 3 5/8ths inches and attached the wheel. If I minus that 3 5/8ths from the reaming 4", that leaves only 3/8ths inches difference between the two sides. I then picked up some of those nice metal furniture/chair leg thingies (the look like GIANT thumbtacks that you put on the ends of furniture legs...) Lo and behold, they were 3/8ths of an inch thick. Bingo. Level table.
Here is a shot of the side of the table with the wheels:
Here is a shot where you can barely make out the furniture leg end thingies (I forget the name of them, but I picked them up at Home Creepo:
Hope this helps,
Ted
Where did you get a hole cutter that big? I swear that is perfect! -
Kailas wrote:
Where did you get a hole cutter that big? I swear that is perfect![/quote]
Thanks. I picked up a big hole saw at Harbor Freight in the clearance bin.")
I just took a 11.5" string and tacked it to the center of the table, right where i wanted the center of the circle be. I then took a pencil and attached it to the string at 10.5 inches from the center. I then used that string to keep my pencil exactly 10.5 inches from the center. I then simply drew a circle. I removed the pencil and attached the JigSaw to that same string so the blade was 10.5" from the center. Using the string and pencil marks as my guide, I slowly let the saw nibble away at the pencil mark, while keeping the string taught. At this point, the string was over kill. I could have simply one slow and had the same result.
Trust me, the camera seems to hide the imperfections.
Ted -
Hey TRPIV,
Thanks very much for your detailed response... I have decided to return the other wheels and go with the heavier duty 10' wheels. I figure if I follow your instructions I will be home free!!! Nearly time to get that Egg into its new home:) -
TRPIV,
Do you happen to remember the length of the bolts that you ran through your wheels.. Are the bolts threaded all the way through? did you use 3 washers for each wheel assembly?
Thanks again for your help,
D -
TRPIV wrote:
Thanks. I picked up a big hole saw at Harbor Freight in the clearance bin.Kailas wrote:
Where did you get a hole cutter that big? I swear that is perfect!
I just took a 11.5" string and tacked it to the center of the table, right where i wanted the center of the circle be. I then took a pencil and attached it to the string at 10.5 inches from the center. I then used that string to keep my pencil exactly 10.5 inches from the center. I then simply drew a circle. I removed the pencil and attached the JigSaw to that same string so the blade was 10.5" from the center. Using the string and pencil marks as my guide, I slowly let the saw nibble away at the pencil mark, while keeping the string taught. At this point, the string was over kill. I could have simply one slow and had the same result.
Trust me, the camera seems to hide the imperfections.
Ted[/quote]
I have done the tack and string for a compass before, but I'd still make it look like I used Fred Flinstone's wheel as pattern if I tried to use a jigsaw. But then I can't draw a straight like with a straight edge!
Dammit Jim! I'm a programmer, not a carpenter! -
darrott wrote:TRPIV,
Do you happen to remember the length of the bolts that you ran through your wheels.. Are the bolts threaded all the way through? did you use 3 washers for each wheel assembly?
Thanks again for your help,
D
I think I purchased a 6" bolt, a 5" bolt would have worked fine in my case. No the bolt is not threaded all the way through, there is a good 4" of non threaded surface (which is actually why you see multiple washers on the back side of each leg.) The non threaded portion of the bolt wouldn't allow me to tighten down the nut enough to snug up the wheel to the leg/washers. A shorter bolt would have solved this. The theory here is that you only need a long enough bolt to feed past the width of the wheel and wood, plus 3 washers and a nut.
Short version:
Bolt.Washer.Wheel.Washer.Wood.Washer.Nut.
Long version:
I took the bolt and slid a washer on it (this will protect the head of the nut from digging into the wheel), then fed that through the tire/rim, then another washer (this will protect the wheel from digging into the wood), then feed that through the wooden leg, then another washer or two... (again to keep the nut from digging into the wood) and finally the bolt.
Hope that makes sense. I'm better at doing than I am at 'splainin... -
makes perfect sense!
Thanks again,
d


Categories
- All Categories
- 182.7K EggHead Forum
- 15.7K Forum List
- 459 EGGtoberfest
- 1.9K Forum Feedback
- 10.3K Off Topic
- 2.2K EGG Table Forum
- 1 Rules & Disclaimer
- 9K Cookbook
- 12 Valentines Day
- 91 Holiday Recipes
- 223 Appetizers
- 516 Baking
- 2.4K Beef
- 88 Desserts
- 163 Lamb
- 2.4K Pork
- 1.5K Poultry
- 30 Salads and Dressings
- 320 Sauces, Rubs, Marinades
- 543 Seafood
- 175 Sides
- 121 Soups, Stews, Chilis
- 35 Vegetarian
- 100 Vegetables
- 313 Health
- 293 Weight Loss Forum